Biltong: the Butchers Classic Authentic Cure
- The Art of Air-Curing: Mastering a Traditional South African Delicacy
- Achieving the Signature Flavor and Tender Chew
- Essential Elements: Sourcing Your Meat and Spices
- Preparation and The Primary Curing Process
- Hanging and Air-Drying for Perfection
- Troubleshooting Your Batch: Common Pitfalls and Solutions
- Preserving the Yield: Long-Term Storage of Finished Cured Meat
- Perfect Pairings and Culinary Uses
- Recipe FAQs
- 📝 Recipe Card
The Art of Air-Curing: Mastering a Traditional South African Delicacy
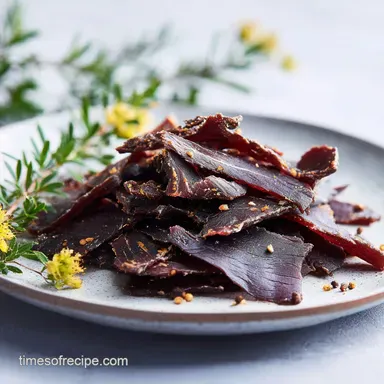
That deep, tangy, coriander spiced aroma? That’s the smell of properly cured meat, and trust me, it’s intoxicating. When you slice into a thick stick of homemade Biltong , you get that perfect mix of chew and tenderness that store-bought versions just can’t replicate.
It is absolute perfection, truly.
Look, life is expensive, and high protein snacks are often highway robbery. Making your own Biltong isn't just a hobby; it’s an investment in superior flavour and a massive cost saving. The active time is tiny, even if the waiting is torture.
It's the ultimate set-it and forget-it snack prep once you master the drying environment.
I’ve tripped up on airflow, ruined batches with too much heat, and generally made all the rookie errors so you don't have to. We are diving deep into the art of making flawless, authentic Biltong . Let’s crack on and get curing.
Achieving the Signature Flavor and Tender Chew
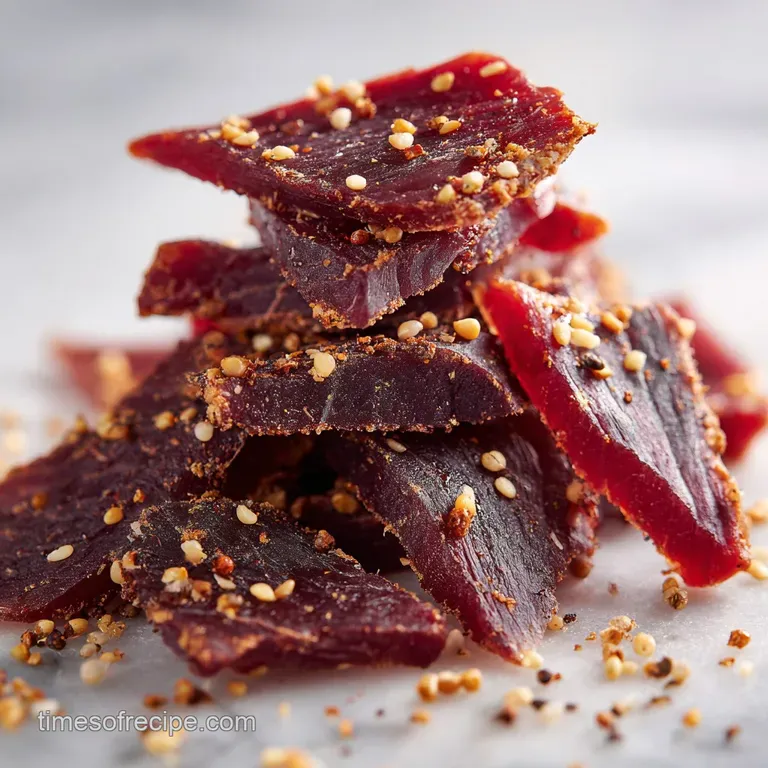
This isn't just dried meat; it’s a craft, and the flavour profile is entirely unique. We need that perfect balance the salty, the tangy, and the unique warmth of coriander that defines authentic South African Biltong .
Getting the chew right is all about patience and consistent drying conditions.
Defining the Difference: Biltong vs. Jerky
This is the number one question I get asked at dinner parties. Jerky is usually cooked or smoked, sliced thin before curing, and dried until rigid, often becoming quite leathery.
Biltong , conversely, is air-cured in thick strips, often with some fat remaining, using vinegar and salt as the primary preservation agents. The result is a richer flavour and a far more tender chew.
When you bite into well made Biltong , it should yield, not snap off your tooth.
The Science of Preservation: Salt, Acid, and Airflow
The triple threat is key here. Salt draws out moisture (desiccation) and inhibits bacterial growth, which is exactly what we want. The acetic acid in the vinegar lowers the surface pH, creating a hostile environment for spoilage, essentially pickling the exterior slightly.
Constant airflow removes the evaporating moisture quickly, which is critical for preventing case hardening and mold on your fresh Biltong . This process demands a delicate balance of the elements working together.
Choosing the Perfect Cut for Optimal Texture
Silverside, Topside, or Eye of Round are your heroes here; they are lean but not too lean, offering the ideal density for even drying. A little marbling is okay, but we absolutely want minimal external fat.
Fat can go rancid during the long, non-refrigerated drying process, ruining your precious Biltong and your entire kitchen smell.
The Crucial Role of Vinegar in Curing and pH Balance
Malt vinegar is the traditional choice, lending a specific earthy tang that complements the spices beautifully. The acid denatures the proteins (which means it tenderises the meat) and starts the curing process instantly when the raw strip hits the bath.
This quick surface acidification is why homemade Biltong is safer to dry than meat cured without acid. It’s absolutely non-negotiable for flavour and safety.
Why Freshly Toasted Coriander Seeds Matter
Don’t even think about using pre-ground coriander, please. This is my hill to die on. Toasting the whole seeds in a dry pan releases their volatile essential oils and deepens their nutty character, which is non-negotiable for real Biltong flavour.
Crushing them roughly afterwards ensures that the oil adheres perfectly to the surface, creating that iconic speckled, fragrant crust we all crave.
Controlling Moisture Loss for the Ideal 'Mois' (Wetness)
This factor is entirely down to personal preference, often called the "mois" factor in South Africa. Do you like wet (moist) Biltong or dry sticks? The difference lies simply in time the longer it hangs, the drier it gets.
If you prefer it medium rare on the inside, you pull it earlier, checking the internal moisture regularly with the pinch test we will discuss later.
Essential Elements: Sourcing Your Meat and Spices
We are building a flavour profile here, so quality matters, especially when dealing with such a minimal ingredient list. Every single component must pull its weight to create truly sublime Biltong .
Selecting the Ideal Thickness for Uniform Curing
I made the mistake once of cutting some strips too thin (like traditional jerky) and others way too thick. The result? Uneven drying. The thin pieces were leather after three days, and the thick pieces sadly molded in the centre.
Aim for a consistent thickness of about 1 to 1.25 inches (2.5 3 cm) across the board for optimal home cured Biltong . Consistency guarantees safety and quality.
The Spice Grind: Toasting and Crushing Techniques
Use low heat for toasting the coriander you want fragrance, not smoke. Use a mortar and pestle or the blunt side of a heavy pan to crack the seeds. We are not making powder here; the rough crush creates pockets of intense flavour that adhere better to the slightly sticky, vinegar washed meat.
This coarse grind is vital for the distinct texture of the finished Biltong .
Vinegar Options and Acidity Levels for the Cure
While malt vinegar is classic, I know some folks just can’t stand its intense, almost yeasty flavour. Red wine vinegar or high-quality apple cider vinegar work well, too, offering a slightly fruitier tang that some prefer.
Always avoid distilled white vinegar; it’s too harsh and can give your Biltong a strange, chemically taste that ruins the experience.
The Function of Brown Sugar and Bicarbonate of Soda
The small amount of sugar isn't really for sweetness; it helps balance the harshness of the salt and acid and aids in tenderising the meat subtly during the curing process. The bicarbonate of soda (baking soda) helps maintain the vibrant red colour of the meat and acts as a traditional, though minor, preservative aid.
It’s part of the authentic mix that results in such excellent, tender Biltong .
Preparation and The Primary Curing Process

This initial stage is where the magic begins; salt penetration is the number one goal here. Don't rush this process, as it is foundational to safe drying and deep flavour penetration.
Preparing the Meat: Cutting with or Against the Grain
For the classic soft, tender texture of sliced Biltong , you actually want to cure and dry the strips with the grain. This makes slicing the finished product against the grain far easier later, guaranteeing a tender bite every time you slice it.
Trimming all that tough, silvery connective tissue beforehand saves you endless frustration later when you try to slice the dried stick.
The Marinade Bath: Ensuring Uniform Coating and Saturation
The vinegar dip should be fast and decisive. You are coating, not soaking, the strips of meat. The goal is simply to get the entire surface slightly damp and acidic so that the dry spice cure adheres perfectly and begins its crucial work.
Do not let the meat soak for hours in the vinegar alone, or you'll end up with overly sour and potentially mushy Biltong .
Optimal Curing Duration and Temperature Inside the Container
The cold cure is absolutely essential for safety. Place the spiced meat in the fridge (4°C or lower) for 12 to 24 hours. This is the stage where the salt and acid penetrate the meat deeply, drawing out internal moisture and flavouring the entire strip.
Remember to flip the batch halfway through to ensure every piece is equally bathed in the salty liquid that pools at the bottom. Trust me, the waiting time here yields better, safer Biltong .
Hanging and Air-Drying for Perfection
This is the technical bit, where you must become a weather controller. Environment is everything when drying Biltong successfully.
Constructing or Utilizing a Dedicated Drying Box
While you can hang meat in a cool basement or laundry room, a dedicated Biltong box is a massive game changer for consistency and safety, especially if you live in a humid climate.
They control airflow precisely, often using a low-wattage lightbulb for minimal heat and an extractor fan. Consistency is the name of the game if you want perfect Biltong every single time.
Monitoring Ambient Temperature and Airflow
Aim for 18°C 25°C (65°F 77°F). Critically, you must ensure constant air movement. If the strips touch, moisture pools, and mold loves a moisture pool. Keep those strips separated!
Stagnant air is the primary culprit when a batch of homemade Biltong goes bad if you don't have a box, use a small, oscillating fan.
How to Identify and Prevent Case Hardening (Sealed Exterior)
Case hardening is when the outside layer of the strip dries out rapidly, forming a hard crust that seals the moisture inside a fast track to spoilage or rot. This happens when the temperature is too high or the humidity is too low without adequate airflow to pull the internal moisture away.
If you notice the outside feeling unpleasantly hard after only 24 hours, lower the temperature and ensure the airflow is gentle but constant across your Biltong strips.
Chef's Note: If you suspect case hardening, lightly spray the surface of the Biltong with a mixture of vinegar and water (50/50), then immediately re-hang. This softens the outer crust slightly, allowing the internal moisture to continue evaporating safely.
Troubleshooting Your Batch: Common Pitfalls and Solutions
We all make mistakes, but the key is knowing how to rescue the situation before you lose your entire precious batch of homemade Biltong . Knowledge is power!
Dealing with Unexpected Mold (And When to Discard)
Mold is usually fuzzy white or blue green. If you see a small amount of white, wispy mold early in the process (Day 1 or 2), you can sometimes quickly wipe it off with pure vinegar, pat it dry, and increase airflow immediately.
If the mold is black, green, or fuzzy blue, or if it has penetrated deep into the meat, you must discard the Biltong immediately. Safety first; your health is more important than a snack.
Adjusting the Cure: Too Salty or Not Tangy Enough?
If your finished Biltong is too salty next time, reduce the cure time in the fridge (aim for 12 hours instead of 24) or reduce the amount of salt slightly.
If it lacks that characteristic tangy bite, ensure you are dipping generously in the vinegar wash, or switch to a stronger acid like red wine vinegar for your next batch of homemade Biltong . Sometimes the simple solution is the best one.
The Importance of Testing Internal Moisture (Doneness)
The pinch test is the gold standard method. Squeeze the middle of the stick gently between your thumb and forefinger. For wet Biltong , you want some definite softness and give inside, much like a perfectly cooked medium rare steak.
If it feels solid all the way through, it’s firm, dry Biltong , perfect for long storage.
Preserving the Yield: Long Term Storage of Finished Cured Meat
You’ve waited a week, and the results are magnificent! Now, how do we keep this amazing snack fresh? Proper storage is key to maintaining that ideal texture of your expertly cured Biltong .
short term Storage in Paper Bags vs. Vacuum Sealing
Once dried, store your sticks whole in a breathable container, like a plain brown paper bag, in a cool, dark pantry. This crucial step allows the meat to "breathe" slightly and prevents condensation, maintaining that perfect texture for up to a week.
Do not store homemade Biltong in sealed plastic at room temperature, as this traps moisture and encourages quick spoilage. Vacuum sealing is excellent for freezing or fridge storage, but terrible for short term ambient storage.
Best Practices for Freezing Finished Slices
Biltong freezes beautifully, thankfully! Slice the finished sticks against the grain, portion them into small, snack sized batches, and vacuum seal them or use high-quality freezer bags, squeezing out all the air. It maintains quality for 6 9 months without noticeable flavour loss.
Thaw frozen Biltong slowly in the fridge overnight to minimize moisture loss and condensation, ensuring the texture remains perfect.
Maintaining Freshness Once the Slab is Cut
Once you slice a piece of Biltong , its shelf life immediately drops, as more surface area is exposed to air and potential contaminants. If you know you'll eat the slices within a day or two, keep them in the paper bag.
Otherwise, fridge storage in a lightly covered container is best for cut slices. This high protein, perfectly cured Biltong snack is worth protecting every step of the way!
Perfect Pairings and Culinary Uses
Biltong is fantastic straight out of the dryer, but don't limit yourself! The rich, umami flavour profile elevates simple meals dramatically and pairs beautifully with cold drinks.
Culinary Uses Beyond Snacking
Dice up the tougher, dryer ends of your sticks and sprinkle them over scrambled eggs or even mashed potatoes for a massive punch of savoury flavour and salt. You can also grind the fully dried Biltong into a coarse powder and use it as an intensely savoury seasoning rub for roasted vegetables or potatoes, replacing bacon bits entirely.
We love using our homemade Biltong on pizza, too!

Recipe FAQs
Why is there white fuzzy mold appearing on my Biltong?
A white powdery growth is often "salt mold," which is harmless and typically indicates insufficient air flow or high humidity during the early drying phase. If you see green or black fuzz, however, the meat must be discarded immediately for safety reasons.
To prevent salt mold, ensure your curing box or drying area has excellent ventilation and consider wiping the meat with extra vinegar before hanging.
How do I know when the Biltong is finished drying?
The drying time varies significantly based on climate, meat thickness, and your personal preference for "wet" (moist center) or "dry" Biltong. A good gauge is the weight; the meat should lose 40% to 50% of its original weight, usually taking between 4 and 7 days.
When squeezed, the center should feel firm but still yield slightly if you prefer a traditional wet Biltong.
Can I use a different type of meat besides beef?
Absolutely; traditional Biltong is often made with game meats like kudu, springbok, or venison, which lend a deeper flavour. When substituting, ensure the meat is extremely lean and cut into thick strips (at least 1 inch thick) to prevent it from drying out too quickly.
Always source meat from reputable suppliers and ensure it is fresh before beginning the curing process.
What is the role of the vinegar in the curing process?
The vinegar serves two crucial purposes: it tenderizes the meat by beginning to break down the muscle fibers, and it acts as an antimicrobial agent. The high acidity kills surface bacteria and mold spores before the drying process begins, which is essential for safely air-curing the meat at home.
Use traditional brown vinegar or cider vinegar for the best results.
My Biltong turned out too hard and dry. What went wrong?
Excessively hard Biltong usually results from using cuts that were too thin, or by drying the meat for too long in an environment with very high air circulation. Next time, cut the strips thicker (1.5 inches is ideal) and check the weight loss sooner, aiming for a shorter drying time.
You might also want to reduce the salt curing time slightly, as excessive salt can draw out too much moisture.
How should I store finished Biltong, and can I freeze it?
For short term storage (up to 10 days), keep the Biltong whole or sliced in a brown paper bag in a cool, dry place to allow it to "breathe" and prevent sweating. For long term preservation, Biltong freezes exceptionally well; slice it first, vacuum seal it, and it will last perfectly for 6 to 12 months.
Thaw frozen Biltong gradually in the refrigerator before serving.
Can I add chili or garlic to the traditional spice blend?
Yes, the spice blend is highly customizable, and many variations exist, including Peri Peri (chili), garlic, or even BBQ flavours. If adding wet ingredients like garlic paste, ensure the meat is dried quickly to avoid mold issues, perhaps by coating it thinly.
Always maintain the base ratio of salt, pepper, and coriander, as these are foundational to the Biltong flavour profile and curing effectiveness.
Authentic Home Cured Biltong Recipe
Ingredients:
Instructions:
Nutrition Facts:
| Calories | 419 kcal |
|---|---|
| Protein | 50.3 g |
| Fat | 17.6 g |
| Carbs | 13.8 g |
