Canned Green Beans with Bacon: the Sunday Dinner Star Side Dish Recipe
- The Sunday Dinner Star: Braised Canned Green Beans with Smoked Bacon and Tangy Glaze
- The Secret to Elevating Canned Green Beans: A Braised and Tangy Recipe
- Essential Pantry Staples: Ingredients for Gourmet Canned Green Beans
- Step-by-Step Method: Braising Your Way to Perfect Side Dishes
- Troubleshooting & Advanced Techniques: Expert Tips for Success
- Making Ahead & Storing Leftovers: Practical Kitchen Guide
- Recipe FAQs
- 📝 Recipe Card
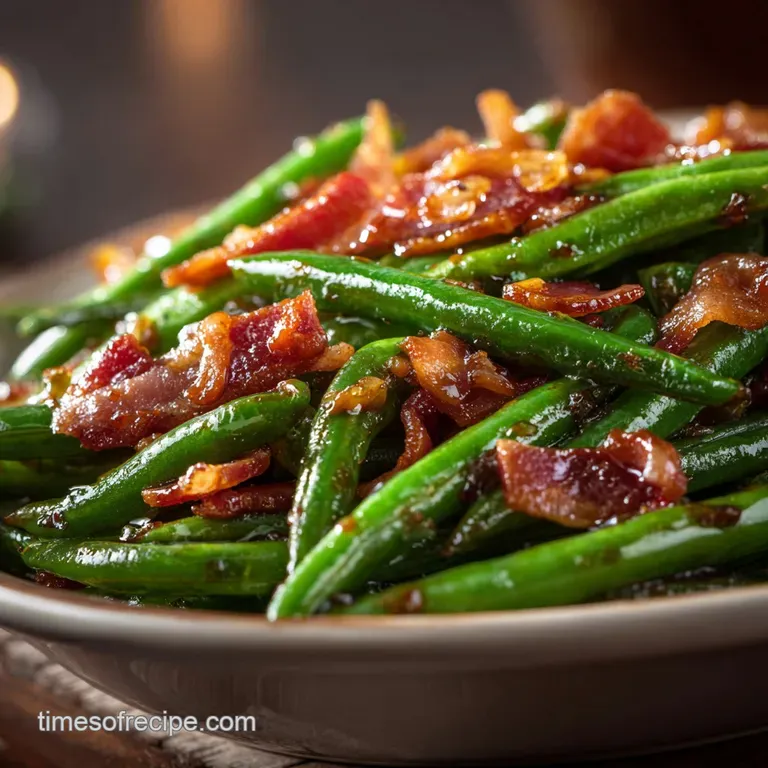
The Sunday Dinner Star: Braised Canned Green Beans with Smoked Bacon and Tangy Glaze
The smell alone will drag people into the kitchen, seriously. Smoky, sweet, and carrying a sharp, clean tang, this side dish is an absolute weapon that makes people ask for the recipe immediately. You get the deep comfort of the classic Southern style green beans but without that heavy, greasy feeling.
Canned green beans often get a bad rap, but they are the ultimate kitchen lifesaver when you need a fast, cheap side dish for a weeknight. We are not aiming for the texture of freshly steamed haricots verts; we are aiming for tender, flavour drenched comfort food that takes 35 minutes start to finish.
This is how you take a humble pantry staple and turn it into the star of your plate.
This isn't just about throwing bacon bits on top, either; it’s a specific technique. We are ditching the traditional long boil and instead braising the beans in a concentrated, tangy glaze. Trust me, these are the best canned green beans you will ever make.
Let’s crack on and elevate your side dish game.
The Secret to Elevating Canned Green Beans: A Braised and Tangy Recipe
Moving Beyond Sad, Soggy Sides
The reason most people hate canned green beans is simple: the metallic, watery liquid they swim in straight out of the can. If you don't address that brine, everything you add will taste muted and slightly tinny. We solve this by aggressively draining and rinsing the beans before they ever hit the pan.
What Makes This Recipe 'Gourmet Comfort Food'?
We are shifting from boiling to braising, which is the magic word here. Braising means cooking the beans in a small amount of flavourful liquid for an extended time, allowing that liquid to reduce and thicken into a glorious glaze.
This process allows the smoky, salty bacon flavour to deeply penetrate the canned green beans .
The Role of Sherry Vinegar in Balancing Richness
Every great Southern style dish has three components: fat, salt, and something sharp to cut the richness. The sherry vinegar is our secret weapon here. Added right at the end, it brings a bright acidity that lifts the entire dish, preventing the brown sugar and bacon from tasting too heavy or cloying.
Do not skip the vinegar!
Achieving Proper Texture: The Key to Draining and Braising
If your beans are too wet when they go into the glaze, they’ll turn mushy instantly and the glaze won’t set up properly. Make sure you drain and rinse them thoroughly to prevent this, ensuring the final product is clingy, tender, and definitely not waterlogged.
The Umami Bomb: Rendering Bacon Fat for Maximum Flavor
Flavor building starts with fat, plain and simple. We render the bacon slowly over medium heat to draw out all that beautiful, smoky grease. This rendered fat is the foundation of our entire sauce it's where the onions and garlic get sautéed, creating an immediate depth of flavour that oil just can't match.
The Maillard Reaction on Onion and Sugar
By sautéing the onions gently in the bacon fat and then adding the brown sugar early, we encourage a low-level caramelization. This reaction creates deep, savory sweet notes that make the final glaze taste complex, rather than just sweet. That deep savory base is why this feels like an old family recipe.
Essential Pantry Staples: Ingredients for Gourmet Canned Green Beans
I love this canned green beans recipe because almost everything required is probably already sitting in your pantry. We need simple ingredients, but we need to treat them right.
Selecting the Right Cut of Smoked Bacon
You want thick cut bacon, the good stuff that yields solid lardons and plenty of rendering fat. Thin bacon burns too fast, meaning you miss out on that foundational smoky flavour we are chasing. Four thick slices is exactly the right amount for this recipe.
Ingredient Deep Dive: Draining and Rinsing the Beans
Seriously, drain and rinse twice. The canning process uses a brine that preserves the beans but gives them an off-putting, slightly metallic aftertaste. Cold water rinsing removes the excess sodium and that tinny taste, ensuring the final dish tastes fresh, bright, and clean.
Optimizing Onion Type for Sweetness
Yellow or brown onions are the perfect choice here. They break down beautifully and offer a gentle, natural sweetness that complements the brown sugar and contrasts the salty bacon. White onions can be too sharp for this gentle braise.
Substitutions for Sherry Vinegar (Acidity Alternatives)
| If you don't have... | Use this instead... | Why it works |
|---|---|---|
| Sherry Vinegar | Red Wine Vinegar | Offers a similar fruity depth and clean finish. |
| Chicken Stock | Vegetable Stock or water + 1/2 tsp bouillon paste | Provides the necessary moisture without overwhelming the bacon flavour. |
| Thick Cut Bacon | Prosciutto ends or 1 Tbsp Smoked Paprika + Olive Oil (for vegetarian) | Still delivers that crucial smoky/salty element. |
step-by-step Method: Braising Your Way to Perfect Side Dishes
This method ensures you get a flavourful, easy green bean side dish every time. Pay attention to the stages; timing is everything.
Stage 1: Building the Flavor Foundation (Rendering the Bacon)
- Prep: Drain the two cans of green beans in a colander, then rinse them under cold running water for a full minute. Set them aside to drip dry while you start the bacon.
- Render Slow: Place your diced bacon into a heavy bottomed skillet or Dutch oven over medium heat. Cook the bacon slowly, stirring often, until it is beautifully crispy and all the fat has melted out (8– 10 minutes).
- Reserve: Remove the crispy bacon bits using a slotted spoon and set them aside on a paper towel. Crucially, leave about 1 tablespoon of that glorious bacon fat in the pan.
Stage 2: Sautéing Aromatics and Developing the Glaze
- Aromatics: Add the diced yellow onion to the hot fat. Reduce the heat slightly to medium low and sauté until the onion is soft and translucent, about 5 minutes.
- Garlic Power: Stir in the minced garlic and red pepper flakes. Cook for just 30 seconds until you smell that wonderful nutty aroma don't let the garlic burn, or it will turn bitter instantly!
Stage 3: Gentle Braising and Reduction
- Deglaze: Pour in the 1/2 cup of chicken stock. Use your spatula to scrape up every bit of browned deliciousness (the fond ) stuck to the bottom of the pan. Bring this mixture to a gentle simmer.
- The Sweetener: Stir in the brown sugar and black pepper.
- The Beans Go In: Add the drained and rinsed green beans to the skillet. Toss them gently but thoroughly to coat them in the simmering glaze mixture.
- Simmer and Reduce: Allow the mixture to simmer, uncovered, for 15– 20 minutes. We want the liquid to reduce by about half, transforming into a thick, sticky glaze that visibly clings to the canned green beans .
Chef's Note: We simmer uncovered to allow maximum evaporation. This is how the liquid turns into a thick, concentrated syrup, making this a truly quick way to cook canned green beans without sacrificing depth.
Stage 4: The Final Tangy Finish and Serving
- The Finish Line: Remove the skillet from the heat immediately when the glaze is sticky and thick. Stir in the reserved crispy bacon and the 1 teaspoon of sherry vinegar.
- Adjust: Taste the beans. Because canned goods and bacon are salty, you probably won't need added salt. If it tastes slightly flat, a final pinch of pepper or maybe a tiny squeeze of lemon juice (if you don't have more vinegar) will brighten it up perfectly. Serve hot!
Troubleshooting & Advanced Techniques: Expert Tips for Success
Preventing Mushy Beans: Controlling the Braise Time
Mushy beans happen when they simmer too long after the liquid has fully evaporated. Keep a close eye on the reduction stage. Once the liquid has reduced and looks sticky, pull them off the heat.
Since canned beans are already cooked, we are just warming them and coating them, not trying to tenderize them.
The Fix for Too Salty or Too Sweet Glazes
Did you use salty stock or overdo the sugar? It happens!
- Too Salty: Add another splash of the sherry vinegar, or a small squeeze of fresh lemon juice. Acid balances salt wonderfully.
- Too Sweet: Again, the answer is acid! Or, if the sweetness is extreme, add a pinch of unsmoked salt and another 1/4 teaspoon of red pepper flakes for warmth.
Quick Tip: Using the Reserved Bean Liquid
If you are using low-sodium canned beans and low-sodium stock, you can actually save about 1/4 cup of the reserved, drained bean liquid. Use this instead of part of the chicken stock. It contains starches and minerals that can help the glaze thicken slightly better, giving the sauce an extra depth.
Making Ahead & Storing Leftovers: Practical Kitchen Guide
Shelf Life of Refrigerated Canned Green Beans
These braised beans keep beautifully. Store them in an airtight container in the refrigerator for up to 4 days. The flavour actually improves overnight as the beans continue to soak up that smoky glaze they are brilliant as a leftover side.
Freezer Suitability and Best Practices
But does it freeze well? You bet, though they will lose a tiny bit of their firm texture upon thawing. Allow the cooked beans to cool completely before transferring them to a freezer safe zip-top bag, pressing out as much air as possible. Freeze flat for up to 3 months.
Reheating Without Losing Texture
The key to reheating is to do it gently.
- Stovetop (Best Method): Thaw overnight in the fridge. Heat them slowly in a skillet over low heat, adding one tablespoon of water or stock to prevent the glaze from burning or sticking. Stir gently until warmed through.
- Microwave (Fast Method): Heat in 60 second bursts, stirring in between. Avoid high power, which can make the bacon chewy and the beans rubbery.

Recipe FAQs
Why did my green beans turn out mushy or overly soft?
Canned green beans are already fully cooked and require very little heat, so they easily become mushy if braised too long or boiled vigorously. Ensure you drain them extremely well before adding them to the skillet and only simmer gently until the glaze has reduced.
Overmixing them during the cooking process can also damage the texture.
Can I make this recipe vegetarian or vegan?
Yes, to make it vegan, omit the bacon and replace it with a teaspoon of liquid smoke added to the cooking oil for depth. You can also sauté mushrooms or use smoked paprika for a similar savory flavor foundation. Ensure you use a plant based substitute for brown sugar if necessary.
What is the best way to store and reheat leftovers?
Store any leftover beans in an airtight container in the refrigerator for up to four days. To reheat, gently warm them in a skillet over low heat until heated through, stirring minimally to preserve the coating. If they appear dry, add a small splash of water or vegetable stock during reheating.
I don't have sherry vinegar. What is a good substitute for the tangy glaze?
A high-quality red wine vinegar is the best replacement as it offers similar complexity and acidity without overwhelming the dish. Alternatively, apple cider vinegar works well if you are looking for a slightly fruitier note. Avoid using plain white vinegar, as its sharp flavor will be too harsh for the delicate glaze.
Can I use fresh or frozen green beans instead of canned ones?
Yes, but you must precook them first until they are tender crisp, as this recipe’s cook time is designed for already soft canned beans. Fresh beans require blanching, while frozen beans should be thawed, drained, and patted very dry before they are added to the skillet for glazing.
Adjust the simmering time based on how firm they are.
How do I fix the dish if it tastes too salty or too sweet?
If the dish is too salty, add a little water and a small squeeze of lemon juice to help dilute the seasoning and brighten the flavor. If it is overly sweet due to the brown sugar, the solution is to increase the acidity by adding an extra teaspoon of sherry vinegar to balance the profile.
Can I prepare the bacon and onion mixture ahead of time?
Absolutely, preparing the bacon and onion base (which is the main flavor driver) ahead of time is a great time saver. Cook the mixture fully, and store it covered in the refrigerator for up to 2 days. When ready to serve, reheat the mixture in the skillet, add the drained beans, and proceed with the glaze reduction.
Bacon Braised Canned Green Beans Recipe
Ingredients:
Instructions:
Nutrition Facts:
| Calories | 165 calories |
|---|---|
| Fat | 9 g |
| Fiber | 4 g |
