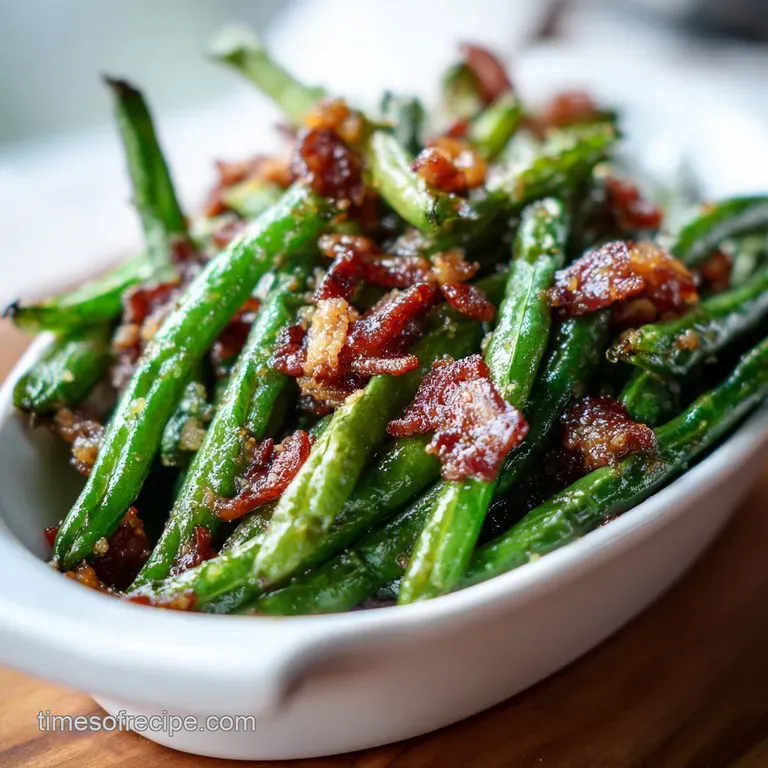
Crack Green Beans Recipe Easy Side with Bacon
- Time: Active 15 minutes, Passive 35 minutes, Total 50 minutes
- Flavor/Texture Hook: Smoky, snappy, and glazed
- Perfect for: Holiday dinners, potlucks, and Sunday roasts
- Mastering Crack Green Beans Recipe Easy Side
- Why This Bold Glaze Works
- Component Analysis of Bold Flavors
- Essential Shopping List Elements
- Vital Tools For Better Glazing
- Executing The Savory Glaze Process
- Solving Texture And Salt Balance
- Adjusting For Larger Family Crowds
- Flavor Variations For Any Table
- Debunking Common Kitchen Misconceptions
- Keeping Leftovers Fresh And Snappy
- Plating For A Hearty Feast
- Recipe FAQs
- 📝 Recipe Card
Mastering Crack Green Beans Recipe Easy Side
The first time I pulled a tray of these out of the oven, the aroma alone stopped my husband in his tracks. Imagine the scent of thick cut bacon rendering its fat into a pool of dark, bubbling brown sugar and savory soy sauce.
It is a scent that fills the whole house, smelling less like a vegetable side dish and more like a high end steakhouse appetizer. We had a small gathering that night, and I kid you not, people were picking the glazed bacon bits off the pan with their fingers before I could even get them into a serving bowl.
What makes this specific version stand out is the contrast between the bright, earthy snap of the fresh beans and that velvety, umami heavy glaze. I used to make a similar version with canned beans, but they always ended up a bit too soft for my liking. Moving to fresh produce changed everything.
The beans hold their integrity, providing a satisfying bite that cuts through the richness of the melted butter. It is comfort food at its most bold and satisfying, and honestly, you might find yourself making these more often than the main course itself.
We are going for a dish that balances the salt from the soy sauce with the deep caramel notes of the light brown sugar. When that mixture hits the heat, it transforms into a sticky coating that makes the beans almost addictive.
If you've been looking for a way to get the kids (or the picky adults) to actually enjoy their greens, this is the secret weapon you've been waiting for. Let's get into how we make this happen without any soggy results.
Why This Bold Glaze Works
The magic of this dish isn't just in the ingredients, but in how they interact under heat. We aren't just tossing things together; we are creating a stable emulsion that coats the vegetables instead of pooling at the bottom of the dish.
- Fat Encapsulation: The melted butter and rendered bacon fat coat the exterior of the green beans, creating a barrier that prevents the sugar from drawing out too much internal moisture.
- Sugar Caramelization: As the light brown sugar heats to 350°F (180°C), it undergoes the Maillard reaction, developing complex, nutty flavors that pair naturally with the smoky bacon.
- Osmotic Balance: The soy sauce provides salt that penetrates the beans, seasoning them from the inside out while the sugar stays on the surface to create that signature "crack" glaze.
- Acid Brightness: While not a primary ingredient, the trace acidity in Worcestershire sauce helps break down the heavy fats, keeping the flavor profile from feeling too greasy on the tongue.
This recipe relies on the interaction between high heat and high sugar content. If you love a good smoky bean dish, you’ve got to check out my Canned Green Beans recipe for those nights when fresh produce isn't an option. The science remains similar, but the texture is a whole different ball game.
| Method | Total Time | Texture | Best For |
|---|---|---|---|
| Oven Classic | 50 minutes | Snappy & Glazed | Holiday Feasts |
| Stovetop Fast | 20 minutes | Tender & Sizzled | Weeknight Dinners |
| Slow Cooker | 4 hours | Soft & Infused | Potluck Transport |
Picking the right method depends on how much time you have. For the most satisfying results, the oven method provides the best glaze reduction and bacon crispness. It's the classic way to achieve that "shatter" crunch from the bacon while keeping the beans bright.
Component Analysis of Bold Flavors
Before we start cooking, let's look at why we chose these specific items. Every ingredient plays a role in the final texture and taste.
| Ingredient | Science Role | Pro Secret |
|---|---|---|
| Fresh Green Beans | Structural Base | Use beans of uniform thickness for even cooking. |
| Thick Cut Bacon | Flavor & Texture | Chill for 10 minutes before dicing to get clean edges. |
| Light Brown Sugar | Glaze Foundation | Pack it tight to ensure you get the full moisture content. |
| Soy Sauce | Umami Source | Use a naturally brewed version for a deeper fermented flavor. |
The choice of thick cut bacon is non negotiable here. Thin bacon tends to disappear into the glaze, whereas the thick cut variety maintains its chew and provides a hearty contrast to the vegetables.
Essential Shopping List Elements
Gathering your supplies is the first step toward a successful dinner. For this recipe, we are looking for maximum flavor impact with minimal fuss.
- 2 lbs fresh green beans, trimmed and washed: Why this? Fresh beans provide a superior snap compared to frozen or canned varieties.
- 3 cloves garlic, thinly sliced: Why this? Sliced garlic browns slowly, providing sweet toasted notes rather than sharp bitterness.
- 10 strips thick cut bacon, diced into 1/2 inch pieces: Why this? The fat from these strips acts as the primary cooking medium.
- 1/2 cup light brown sugar, packed: Why this? It provides the sticky sweetness that defines the "crack" glaze.
- 1/4 cup unsalted butter, melted: Why this? Adds a velvety mouthfeel and helps the sauce emulsify.
- 2 tbsp soy sauce: Why this? Provides the salt and umami needed to balance the sugar.
- 1 tsp Worcestershire sauce: Why this? Adds a complex, vinegary depth that cuts through the fat.
- 1/2 tsp garlic powder: Why this? Ensures an even distribution of garlic flavor across every single bean.
- 1/2 tsp cracked black pepper: Why this? Freshly cracked pepper provides a subtle heat that wakes up the palate.
- 1/4 tsp red pepper flakes: Why this? Just enough to provide a back of-the throat warmth without being spicy.
If you're looking to substitute, tamari works perfectly as a gluten-free alternative to soy sauce. Just keep in mind that tamari is often a bit richer and darker, which will result in an even more intense glaze.
Vital Tools For Better Glazing
You don't need a professional kitchen, but a few specific tools will make your life much easier and the results much better.
- Large Rimmed Baking Sheet: Essential for spreading the beans in a single layer. If they are crowded, they will steam instead of roasting, and you'll lose that snappy texture.
- Cast Iron Skillet (optional): If you want to start the bacon on the stove, a 12 inch Lodge skillet is excellent for rendering fat efficiently.
- Small Heavy Bottomed Saucepan: For melting the butter and whisking the glaze. A heavy bottom prevents the sugar from scorching.
- Chef's Knife: A sharp knife makes quick work of dicing the 10 strips of bacon and slicing the garlic cloves.
- Kitchen Tongs: Necessary for tossing the beans mid way through the cooking process to ensure even glazing.
For the ultimate holiday spread, these beans sit beautifully next to a Southern New Year recipe. Having the right tools means you can manage multiple dishes without breaking a sweat.
Executing The Savory Glaze Process
Now, let's get to the actual cooking. Follow these steps closely to ensure your glaze is thick and your beans are perfectly cooked.
- Preheat and Prep: Set your oven to 350°F (180°C). Wash your 2 lbs of fresh green beans and trim the stem ends. Pat them completely dry with a kitchen towel. Note: Excess water will thin out your glaze and make the beans soggy.
- Render the Bacon: In a cold skillet, add your diced bacon. Turn the heat to medium and cook for about 5 minutes until the fat has rendered and the edges are just starting to crisp. Do not cook them until they are completely hard yet.
- Whisk the Glaze: In a small bowl, combine the 1/2 cup light brown sugar, 1/4 cup melted butter, 2 tbsp soy sauce, 1 tsp Worcestershire sauce, 1/2 tsp garlic powder, 1/2 tsp pepper, and 1/4 tsp red pepper flakes.
- Arrange the Beans: Place the trimmed beans in a large 9x13 inch baking dish or on a rimmed baking sheet. Scatter the 3 sliced garlic cloves over the top.
- Pour and Toss: Drizzle the sugar and soy mixture over the beans. Use your tongs to toss them until every bean is glistening and coated.
- Add the Bacon: Sprinkle the par cooked bacon bits and about 1 tablespoon of the rendered bacon fat over the beans.
- First Bake: Place in the oven and bake for 20 minutes.
- The Toss: Remove the pan and toss the beans again. This redistributes the glaze that has settled at the bottom.
- Final Blast: Bake for another 15 minutes until the sauce is bubbling and the bacon is deeply browned.
- Rest: Let the dish sit for 5 minutes before serving. This allows the glaze to thicken as it cools slightly, clinging to the beans.
When I'm not in the mood for a full roast, I sometimes pair these with a Black Bean Quesadillas recipe. It might sound like an odd pairing, but the smoky beans actually complement the earthy black beans in the quesadillas beautifully.
Solving Texture And Salt Balance
Sometimes things don't go exactly as planned. Cooking is a science, but your kitchen environment can change the outcome.
Why Your Beans Are Soggy
If your beans turned out limp instead of snappy, the culprit is usually moisture. This can happen if the beans weren't dried properly after washing, or if you used a baking dish that was too small, causing the beans to overlap and steam in their own juices.
Why the Sauce is Too Salty
Soy sauce brands vary wildly in sodium content. If you used a very high sodium brand, the reduction in the oven can concentrate that saltiness. Next time, try a low sodium soy sauce or add a splash of apple cider vinegar at the end to cut through the salt.
| Problem | Root Cause | Solution |
|---|---|---|
| Thin/Runny Glaze | Under baked sugar | Bake for 5 extra minutes or simmer sauce before pouring. |
| Burnt Bacon | Diced too small | Use 1/2 inch pieces and ensure they are mixed into the glaze. |
| Tough Beans | Old produce | Blanch beans in boiling water for 3 minutes before roasting. |
Common Mistakes Checklist
- ✓ Pat the beans bone dry before adding the glaze to prevent steaming.
- ✓ Don't skip the Worcestershire sauce; that acidity is vital for balance.
- ✓ Avoid over crowding the pan; use two sheets if necessary.
- ✓ Check the oven temperature with a thermometer to ensure it's a true 350°F (180°C).
- ✓ Let the dish rest for 5 minutes after baking so the glaze can set.
Adjusting For Larger Family Crowds
When you are cooking for a big family gathering, you'll likely need to double this recipe. However, you can't just double everything and hope for the best.
- Scaling Up (2x): When using 4 lbs of beans, increase the salt, pepper, and red pepper flakes to only 1.5x the original amount. Spices tend to amplify more aggressively than the base ingredients. Use two separate baking sheets to ensure the beans have enough room to roast.
- Scaling Down (1/2x): For a smaller meal using 1 lb of beans, you can reduce the cook time by about 20%. Keep a close eye on the sugar glaze, as a smaller volume will caramelize and potentially burn much faster.
- Baking Adjustments: If you are doubling the recipe in one large deep pan, increase the oven temperature to 375°F (190°C) to help the heat penetrate the larger mass, but toss the beans every 10 minutes to prevent the edges from scorching.
Chef's Note: If you are scaling up, render your bacon in batches. Overcrowding the skillet will result in boiled bacon rather than the crispy, rendered bits we need for that perfect texture.
Flavor Variations For Any Table
Once you've mastered the classic version, you can start playing with the profile to suit your specific tastes.
- The Spicy Kick: Double the red pepper flakes and add a teaspoon of Sriracha or gochujang to the glaze. The fermented heat of gochujang pairs exceptionally well with the soy sauce.
- The Nutty Crunch: Add 1/2 cup of slivered almonds or chopped pecans during the last 10 minutes of baking. The nuts will toast in the bacon fat and sugar, adding another layer of texture.
- The Vegan Twist: Replace the bacon with smoked mushrooms (like shiitake) and use a vegan butter substitute. For the umami, double the Worcestershire sauce (ensure it's a vegan brand) or add a teaspoon of liquid smoke.
- The Citrus Brightener: Grate the zest of one orange over the beans immediately after they come out of the oven. The citrus oils provide a bright, fragrant contrast to the heavy, smoky glaze.
Debunking Common Kitchen Misconceptions
There are a lot of "rules" in the kitchen that don't actually hold up when you look at the chemistry of the food. Let's clear a few up.
Myth: You must blanch fresh beans before roasting. Truth: While blanching can help preserve a bright green color, it's not strictly necessary for this recipe. The 35 minutes of roasting time is more than enough to cook the beans through.
In fact, roasting from raw allows the beans to absorb more of the glaze as they soften.
Myth: Brown sugar and soy sauce is just "teriyaki." Truth: While the ingredients are similar, the ratios here are much different. Teriyaki usually involves ginger, garlic, and a higher ratio of liquid.
This "crack" glaze is designed to be a thick, fat based coating that relies on bacon rendering for its primary flavor profile.
Myth: Thick cut bacon takes too long to crisp in the oven. Truth: By dicing the bacon and par cooking it slightly on the stove, we ensure it reaches a perfect "shatter" stage at the same time the beans are finished. The oven heat is actually more even than the stovetop for crisping diced pieces.
Keeping Leftovers Fresh And Snappy
If you happen to have any beans left over which is rare in my house you need to store them properly to maintain that texture.
Storage: Keep the beans in an airtight container in the fridge for up to 4 days. The glaze will solidify into a gel like consistency because of the butter and bacon fat, but don't worry, it will melt right back down when heated.
Freezing: I don't generally recommend freezing these. Green beans have a high water content, and the freezing/thawing process will break down the cell walls, resulting in a mushy mess. The glaze also tends to separate when frozen.
Reheating: Avoid the microwave if you can. It makes the bacon chewy and the beans limp. Instead, toss the leftovers back into a skillet over medium low heat. Stir constantly for 3-5 minutes until the glaze is bubbling and the beans are warmed through.
Zero Waste Tip: If you have a small amount of leftover beans and glaze, chop them up and fold them into a morning omelet or stir them into a bowl of fried rice. The savory sweet bacon bits and glazed beans are an incredible flavor booster for simple grains.
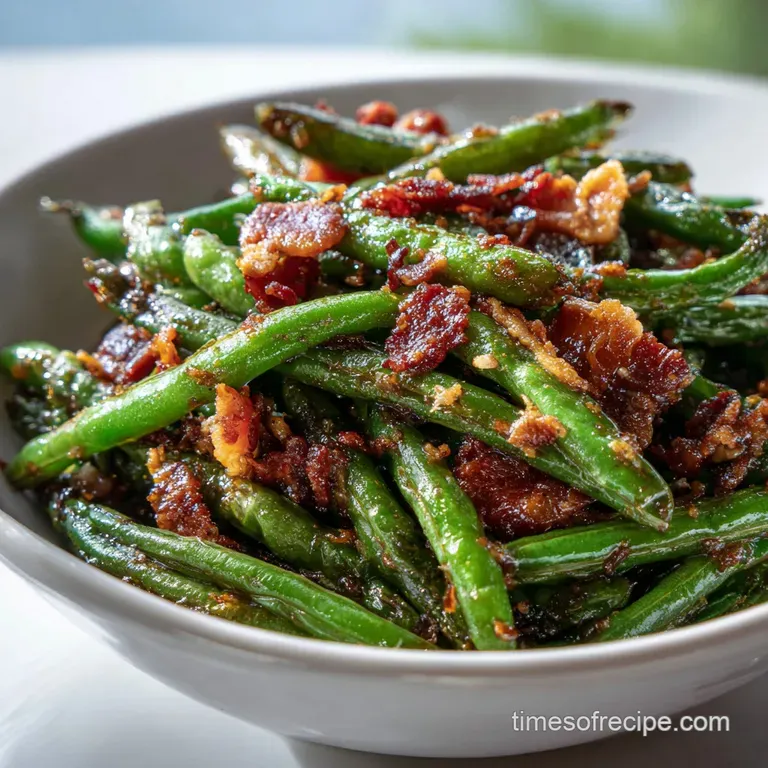
Plating For A Hearty Feast
When it comes to serving, these beans deserve a bit of spotlight. Because the glaze is dark and sticky, they look best when served in a light colored ceramic dish that makes the green pop.
Don't just pour them into a bowl. Use your tongs to stack them neatly, ensuring the bacon bits are distributed across the top rather than buried at the bottom. If you have some fresh parsley or chives, a quick sprinkle of green herbs right before serving adds a touch of freshness that looks great in photos.
I often serve these alongside a heavy protein like a smoked brisket or a roasted chicken. The sweetness of the beans acts as a natural "sauce" for the meat. If you're feeling adventurous, a final drizzle of high-quality balsamic glaze right at the table can provide a sharp, tangy finish that guests won't expect but will absolutely love.
Trust me, once you bring these to a dinner party, you'll be the one everyone asks for the recipe. It is the ultimate easy side that tastes like you spent hours at the stove.

Recipe FAQs
Can I use frozen green beans instead of fresh for this recipe?
No, stick with fresh. Frozen beans release too much moisture during roasting, leading to a thin, watery glaze instead of the signature "crack" coating.
How long should I roast the beans at 350°F (180°C)?
Bake for 35 total minutes, tossing halfway through. The initial 20 minutes allows the glaze to penetrate, and the final 15 minutes creates the dark, sticky caramelization on the bacon and sugar.
How do I ensure the bacon bits become crispy and not soggy in the glaze?
Render the bacon fat on the stovetop first until it is nearly crisp. Only add the par-cooked bacon back to the beans for the final 15 minutes of oven time to prevent it from stewing in the sauce.
What is the purpose of resting the beans for 5 minutes after baking?
Resting allows the rendered fat and sugar glaze to cool and thicken slightly. This sets the coating, ensuring it clings tightly to the beans instead of running off when plated.
Is it true that I must use two baking sheets when doubling the recipe?
Yes, use two sheets when doubling for best texture. Overcrowding forces the beans to steam rather than roast, which ruins the snap and prevents the glaze from properly reducing.
How can I cut the saltiness if I accidentally used regular soy sauce instead of low sodium?
Add a small amount of acid, like apple cider vinegar, to the glaze. This technique balances high sodium flavors by introducing a counterpoint, similar to how acid brightens a heavy sauce like in our Chicken Bryan recipe.
How do I reheat leftovers to keep the beans snappy?
Reheat them in a skillet over medium low heat, stirring constantly. Avoid the microwave, as the rapid heating will soften the beans and make the bacon chewy rather than crisp.
Easy Crack Green Beans Side
Ingredients:
Instructions:
Nutrition Facts:
| Calories | 238 kcal |
|---|---|
| Protein | 8.5 g |
| Fat | 13.2 g |
| Carbs | 21.8 g |
| Fiber | 3.1 g |
| Sugar | 16.2 g |
| Sodium | 425 mg |
