Filipino Recipe Pandesal
- Time: Active 35 mins, Passive 2 hours, Total 2 hours 35 mins
- Flavor/Texture Hook: Toasted breadcrumb crunch with a pillowy, yeasty heart
- Perfect for: Traditional family brunches or comforting meal prep snacks
- Authentic Filipino Recipe Pandesal
- The Science of the Rise
- Essential Recipe Benchmarks
- Flour and Fat Component Analysis
- Necessary Kitchen Tools
- Step By Step Method
- Fixing Your Dough Issues
- Flavorful Pandesal Variations
- Keeping Your Rolls Fresh
- Serving and Pairing Ideas
- Filipino Recipe Pandesal FAQs
- 📝 Recipe Card
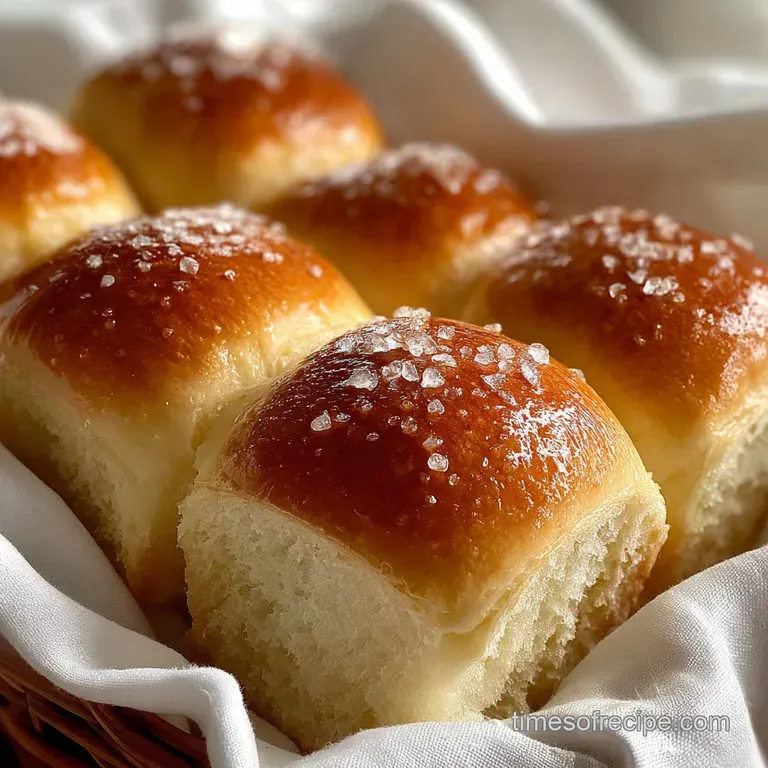
Authentic Filipino Recipe Pandesal
There is nothing quite like the aroma of fresh dough meeting a hot oven at the crack of dawn. For me, that yeasty scent is a trip straight back to my grandmother’s kitchen, where a brown paper bag of warm rolls was the centerpiece of every morning.
Making this Filipino recipe pandesal at home isn't just about baking bread, it is about capturing that specific contrast between the gritty, toasted breadcrumb exterior and the almost impossibly soft interior.
I’ve spent months testing hydration levels because my early batches always turned out like dry dinner rolls. The secret, I found, is the marriage of melted butter for flavor and a splash of neutral oil for lasting moisture. If you’ve ever felt intimidated by yeast, don’t be.
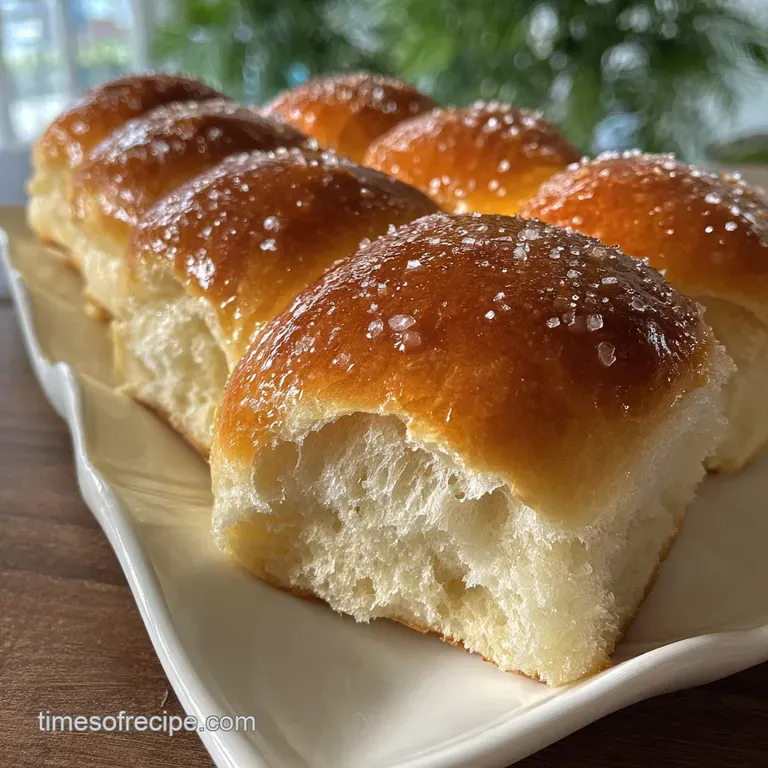
We are going to walk through the "windowpane" test and the "baston" rolling technique so you can pull a tray of golden, crackling rolls out of your own oven.
The beauty of this bread lies in its versatility. It is just sweet enough to eat plain, yet sturdy enough to hold a thick slice of salty cheese or even a hearty portion of meat. We are aiming for a roll that feels light in the hand but carries a bold, yeasty punch that satisfies the soul.
Let's get into the mechanics of why this specific method works so well.
The Science of the Rise
Understanding the "why" behind your dough helps you adjust on the fly when your kitchen is too cold or your flour is too thirsty. Baking is a series of chemical reactions that we happen to get to eat.
- Protein Denaturation: Using 500g of high protein bread flour allows for a strong gluten network that traps carbon dioxide bubbles, creating that signature airy lift.
- Starch Gelatinization: The warm 250ml of milk hydrates the starch granules, ensuring the crumb remains velvety rather than crumbly or dry.
- The Maillard Reaction: The 100g of granulated sugar reacts with the heat and the milk proteins to create a deep, golden brown crust and a complex, toasted aroma.
- Lipid Interference: Combining 50g of melted butter with 30ml of oil coats the gluten strands, which prevents them from becoming too tough, resulting in a tender "short" crumb.
| Method | Time | Texture | Best For |
|---|---|---|---|
| Traditional Oven | 15 minutes | Even golden crust, maximum height | Large batches and uniform browning |
| Stovetop (Cast Iron) | 20 minutes | Dense, rustic, charred bottom | Small batches or "no oven" setups |
| Air Fryer | 10 minutes | Extra crispy breadcrumb shell | Quick reheating or 2-3 individual rolls |
Using a cast iron skillet on the stovetop creates a very different experience, much like the toasted edges you'd find in a Yorkshire Pudding recipe, though for the classic airy puff, the oven remains king. The stovetop method requires a very low flame and a tight lid to mimic the ambient heat of an oven.
Essential Recipe Benchmarks
To get consistent results every time, I rely on a few specific numeric checkpoints. These aren't just suggestions, they are the guardrails that keep your bread from failing.
| Servings | Ingredient Adjustments | Pan Size | Cook Time |
|---|---|---|---|
| 10 Rolls | Halve all ingredients; use 1/2 whisked egg | 9x9 inch square | 12-14 minutes |
| 20 Rolls | Standard recipe (500g flour) | 13x18 inch sheet | 15 minutes |
| 40 Rolls | Double recipe; 1.5x salt/spices only | Two sheet pans | 18-20 minutes |
When you are scaling up, remember that dough behaves differently in large masses. If you double the recipe, you might need a slightly longer bulk fermentation because the larger volume of dough takes longer to warm up to room temperature.
Always go by the visual cue of the dough doubling in size rather than just the clock.
Flour and Fat Component Analysis
Every ingredient in this Filipino recipe pandesal serves a structural or sensory purpose. When you understand these roles, you can make smart swaps without ruining the batch.
| Ingredient | Science Role | Pro Secret |
|---|---|---|
| Bread Flour | Provides 12-14% protein for structure | Sift it twice to incorporate air for a lighter, fluffier roll |
| Active Dry Yeast | Leavening agent through fermentation | Bloom it in 110°F milk; any hotter will kill the yeast |
| Unsalted Butter | Softens the crumb and adds richness | Use European style butter for a higher fat content and bolder flavor |
| Fine Breadcrumbs | Creates a protective, textured barrier | Use "fine" crumbs; panko is too chunky and won't stick well |
1. The Oil and Butter Synergy
I used to use only butter, but the rolls would get hard as a rock by the next morning. By adding 30ml of neutral vegetable oil, we lower the melting point of the fats in the bread. This means even when the roll is cool, it stays pliable and soft to the touch.
2. The Power of the Egg
The single large egg acts as an emulsifier. It helps bind the fats from the butter and oil with the water in the milk. This results in a dough that is much easier to handle and a finished product with a rich, brioche like golden interior.
3. The Salt Balance
Don't skip the 6g of fine sea salt. While pandesal is known for being sweet, the salt is what makes the yeast flavor "pop" and controls the fermentation rate so the dough doesn't over proof and collapse.
Necessary Kitchen Tools
You don't need a high end bakery setup to make this Filipino recipe pandesal, but a few specific tools make the process much more enjoyable. I personally love using a stand mixer because kneading 500g of flour by hand for 10 minutes is a serious workout.
- Digital Scale: Essential for the 500g flour measurement. Cups are too inconsistent for bread.
- Bench Scraper: Perfect for dividing the dough into 20 even pieces without tearing the gluten.
- Large Mixing Bowl: Needs to be at least double the size of your initial dough mass.
- Sheet Pan: A standard 13x18 inch rimmed baking sheet works best for a full batch.
- Parchment Paper: Prevents the sugar in the dough from sticking to the pan.
Chef's Note: If you don't have a bench scraper, a sharp chef's knife dusted in flour will work, but avoid using your hands to "pull" the dough apart, as this damages the air pockets you've worked so hard to create.
step-by-step Method
Ready to bake? Let's get our hands in some dough. Follow these steps closely, especially the "windowpane" check in step three.
- Bloom the yeast. Combine 250ml warm milk (110°F), 10g active dry yeast, and a pinch of the sugar. Wait 5-10 minutes until the mixture is foamy and smells like beer.
- Mix the wet ingredients. Whisk in the remaining 100g sugar, 50g melted butter, 30ml vegetable oil, and 1 large egg until the sugar is mostly dissolved.
- Incorporate the flour. Add 500g bread flour and 6g salt. Knead for 8-10 minutes until the dough is smooth, elastic, and passes the windowpane test. Note: The windowpane test means you can stretch a small piece of dough thin enough to see light through it without it tearing.
- First proof. Place the dough in a greased bowl, cover with a damp cloth, and let sit for 1 hour 30 mins until it has clearly doubled in size.
- The Baston technique. Punch the dough down and divide into two logs. Roll each log into a long cylinder (the "baston") about 15 inches long.
- Shape the rolls. Use a bench scraper to cut the log into 20 equal pieces (about 45-50g each). Do not reshape them into balls; the cut side should face up to create the traditional look.
- Coat in crumbs. Roll each piece thoroughly in the 1 cup of fine breadcrumbs until every nook is covered in grit.
- Final proof. Arrange the rolls on a parchment lined pan. Let them rest for 45 minutes until they look puffy and feel like soft marshmallows.
- Bake. Slide the pan into a preheated 375°F oven. Bake for 15 minutes until the tops are golden brown and the crumbs are toasted.
- Cool. Let them sit on the pan for 5 minutes before moving to a wire rack. This allows the steam to redistribute so the bottoms don't get soggy.
This dough is incredibly forgiving, much like the one I use for my Cevapi recipe flatbreads, though the high sugar content here means you must watch the oven closely during those last few minutes to prevent burning.
Fixing Your Dough Issues
Bread making is a skill that comes with its fair share of "oops" moments. If your rolls didn't come out like the photos, it’s usually a simple fix in the timing or temperature.
1. My Pandesal is Dense and Heavy
This is the most common heartbreak. If your rolls feel like stones, you either didn't knead long enough to develop gluten, or your yeast was "lazy" (old or killed by hot milk). Next time, make sure your dough is truly elastic before the first rise.
2. The Breadcrumbs are Burning
Since there is a high sugar content in this Filipino recipe pandesal, the exterior browns fast. if you notice the crumbs getting too dark before the 12 minute mark, tent the pan loosely with aluminum foil for the remainder of the bake.
3. The Rolls Are Dry the Next Day
This happens if you overbake them by even two minutes. Pandesal should be pulled out just as they turn golden. If they are already dry, a 10 second zap in the microwave with a damp paper towel will bring back that velvety softness.
| Problem | Root Cause | Solution |
|---|---|---|
| No Rise | Dead yeast or cold room | Check yeast expiration; proof dough inside an oven with the light on |
| Soggy Bottoms | Left on the hot pan too long | Move to a wire cooling rack immediately after the 5 minute rest |
| Crumbs won't stick | Dough surface is too dry | Lightly mist the dough balls with water before rolling in crumbs |
Common Mistakes Checklist
- ✓ Never use milk hotter than 115°F (it will scald the yeast).
- ✓ Don't skip the second proof; this is where the airy texture happens.
- ✓ Measure flour by weight, not volume, to avoid a dry, floury dough.
- ✓ Preheat your oven for at least 20 minutes before baking for even heat.
- ✓ Use "Bread Flour" specifically; All Purpose won't provide the same chew.
Flavorful Pandesal Variations
Once you’ve mastered the classic, you can start playing with the "Filipino fusion" flavors that are taking bakeries by storm. The base dough is sturdy enough to handle all sorts of creative additions.
1. The Modern Classic: Ube Cheese
This is a crowd favorite. Mix 1 teaspoon of ube (purple yam) extract into your liquid ingredients. When shaping, flatten each piece of dough and wrap it around a small cube of quick melt cheese before rolling in breadcrumbs. The result is a vibrant purple roll with a molten, salty center.
2. The Savory Garlic Herb
Instead of plain melted butter, infuse your 50g of butter with two cloves of minced garlic and a teaspoon of dried parsley. Use this in the dough as usual. The aroma while baking is absolutely bold and satisfying, making it the perfect side for a Daniel Fast meal recipe or a hearty stew.
| Original Ingredient | Substitute | Why It Works |
|---|---|---|
| Whole Milk | Coconut Milk (Full fat) | Adds a rich, tropical nuttiness. Note: Dough may rise slightly slower. |
| Granulated Sugar | Brown Sugar | Adds a deep molasses note and extra moisture. |
| Bread Flour | All Purpose Flour | Makes a softer, less chewy roll. Note: Won't hold its shape as well. |
If you are looking for a completely different profile, try swapping the fine breadcrumbs for crushed toasted pinipig (pounded rice) for an extra bold crunch that feels very traditional.
Keeping Your Rolls Fresh
Because this Filipino recipe pandesal contains both butter and oil, it stays fresh longer than store-bought versions, but you still need to store it correctly to maintain that pillowy texture.
Storage: Keep cooled rolls in an airtight container or a heavy duty zip top bag at room temperature for up to 3 days. Do not refrigerate them, as the cold air will pull moisture out of the starch and make them go stale faster.
Freezing: These freeze beautifully. Once completely cool, wrap individual rolls in plastic wrap and place them in a freezer bag. They will stay fresh for up to 2 months.
To reheat, let them thaw at room temperature for 30 minutes, then pop them in a 350°F oven for 5 minutes to crisp up the crumbs.
Zero Waste Tip: If you have rolls that have gone truly stale, don't toss them! Cut them into cubes, toss with a little melted butter and cinnamon sugar, and bake until crispy. You’ve just made Pandesal croutons, which are incredible over vanilla ice cream or a bowl of warm oatmeal.
You can also blitz stale rolls in a food processor to make your own "Pandesal breadcrumbs" for your next batch.
Serving and Pairing Ideas
Pandesal is the ultimate culinary chameleon. In the Philippines, the most classic way to eat it is "palaman," which means filling. A thick slab of Dari Creme (a local margarine) or a piece of salty Queso de Bola is the traditional choice.
The contrast of the sweet dough and the sharp cheese is a flavor map you won't forget.
If you want something heartier, try stuffing these rolls with leftover Crawfish Recipes or a savory corned beef hash. The rolls act as a soft vessel that soaks up the juices without falling apart. For a simpler vibe, just dip a warm roll directly into a cup of hot chocolate or strong black coffee. The breadcrumbs soak up the liquid, creating a rich, malty bite that is pure comfort.
Making your own bread at home might seem like a journey, but once you pull that first tray of crackling, yeasty rolls out of the oven, you'll never go back to the grocery store version. It’s a labor of love that fills your house with a scent that says "family" more than any other.
Trust me, your kitchen is about to become everyone's favorite place to be. Happy baking!

Filipino Recipe Pandesal FAQs
What are the ingredients in Filipino style pandesal?
Bread flour, yeast, sugar, milk, butter, oil, salt, and fine breadcrumbs. Bread flour provides the necessary gluten structure for a chewy yet soft roll. Yeast is the leavening agent, while sugar and milk contribute to sweetness and a tender crumb.
Butter and oil ensure lasting softness, and salt balances the flavor and controls yeast activity.
What is the secret to fluffy pandesal?
Proper gluten development and sufficient proofing time. Ensure your dough passes the windowpane test, indicating a strong gluten network that can trap air. Allowing the dough to double in size during both proofing stages is crucial for achieving that signature airy texture.
What flour is best for pandesal?
Bread flour is best for pandesal. It has a higher protein content (12-14%) compared to all-purpose flour, which is essential for developing the strong gluten structure needed for a chewy and fluffy bread roll. This structure effectively traps the gases produced by the yeast during fermentation.
What does pandesal mean in Filipino?
"Pandesal" literally means "salt bread" in Spanish. However, in Filipino context, it refers to the sweet, soft bread rolls coated in breadcrumbs that are a staple breakfast item. The name likely evolved from the Spanish influence and the bread's original form.
How do I keep my pandesal soft and fresh?
Store cooled pandesal in an airtight container at room temperature for up to 3 days. The combination of butter and oil in the recipe helps maintain moisture. Avoid refrigerating, as this can make the rolls stale faster.
Can I make pandesal ahead of time?
Yes, you can shape the rolls and refrigerate them overnight for a cold proof. This slow fermentation develops deeper flavor. Bake them directly from the refrigerator; they might require a few extra minutes in the oven.
Why are my pandesal crumbs burning?
This is common due to the sugar content in the dough caramelizing quickly. If the crumbs are browning too fast before the bread is cooked through, loosely tent the baking sheet with aluminum foil for the remainder of the baking time to prevent burning.
Filipino Pandesal Recipe

Ingredients:
Instructions:
Nutrition Facts:
| Calories | 173 kcal |
|---|---|
| Protein | 4.2 g |
| Fat | 4.4 g |
| Carbs | 28.5 g |
| Fiber | 1.1 g |
| Sugar | 5.6 g |
| Sodium | 157 mg |
