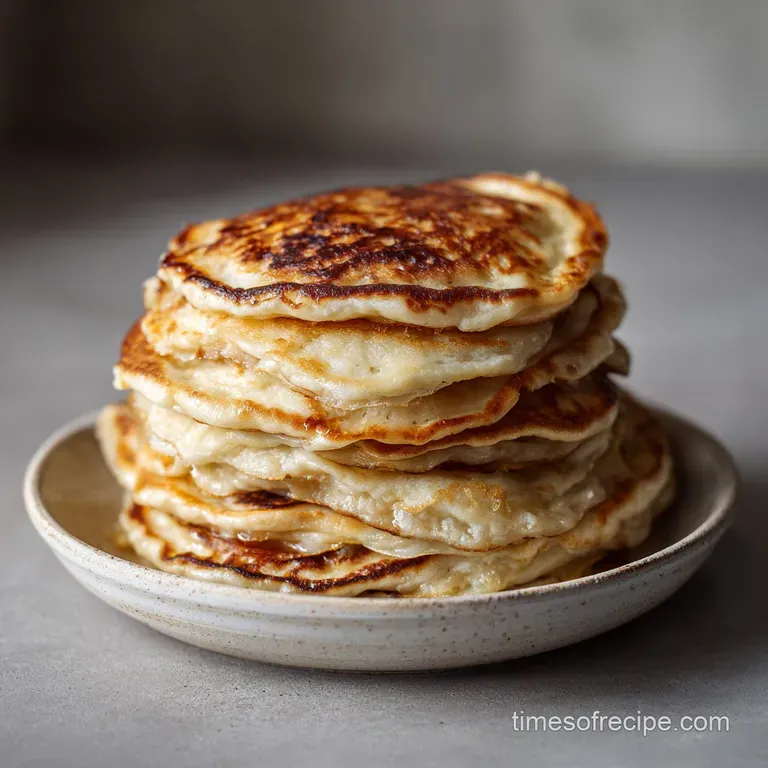
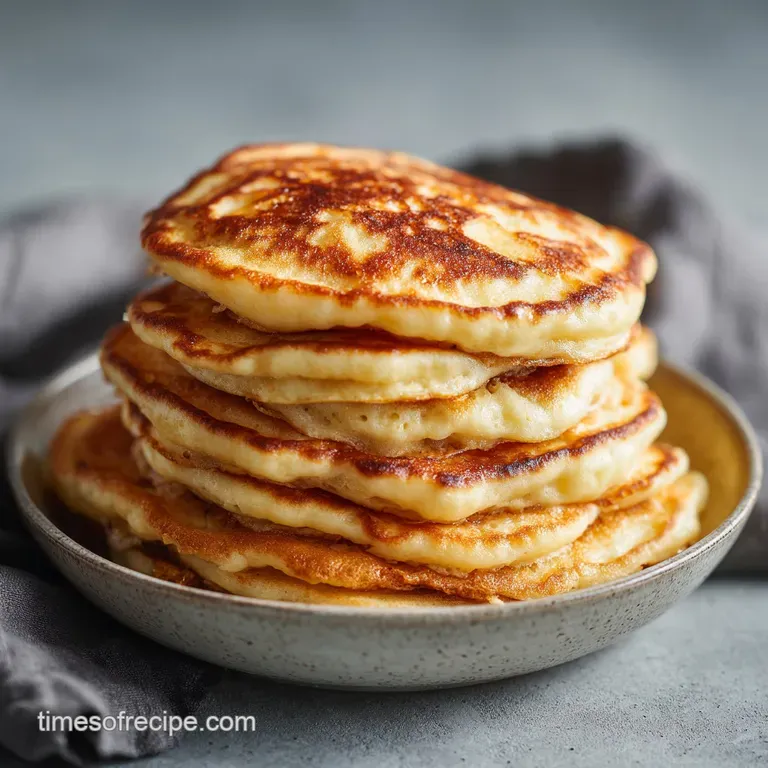
Sourdough Discard Pancakes: Fluffy and Airy
- Time: Active 5 minutes, Passive 10 minutes, Total 15 minutes
- Flavor/Texture Hook: Tangy, lacy edged, and incredibly airy
- Perfect for: Busy weekday mornings and sustainable meal prepping
- Fluffy Golden Ritual: How to Make Sourdough Discard Pancakes
- Morning Magic: Key Techniques for a Fluffy Sourdough Batter
- Fast and Tangy: Essential Recipe Specs for Morning Success
- Beyond the Starter: A Deep Dive into Flour and Fat
- The Skillet Setup: Essential Equipment for a Perfect Sear
- From Prep to Plate: Step-by-Step Guidance for Your Pancakes
- Troubleshooting the Bubbles: Pro Tips and Common Batter Pitfalls
- Creative Twists and Swaps for Your Sourdough Discard Batter
- How to Store and Keep Fresh
- Plating Perfection: Side Dishes and Complements for Breakfast
- Myths Regarding Discard Batter
- Recipe FAQs
- 📝 Recipe Card
Fluffy Golden Ritual: How to Make Sourdough Discard Pancakes
The first time I heard the hiss of batter hitting a hot, buttered cast iron skillet, I knew I was hooked on this morning ritual. There’s something specifically hypnotic about watching those tiny bubbles surface and pop, signaling that it’s finally time to flip.
You know that jar of sourdough discard sitting in the back of your fridge, looking a bit sad and neglected? We’ve all been there, feeling that pang of guilt every time we feed the starter and toss the excess.
This recipe isn't just a way to use that up, it’s honestly the reason I keep a starter in the first place now.
We are going for a texture that is light as a cloud but with those signature "sourdough" lacy, crispy edges that shatter when your fork hits them. If you’ve ever had a pancake that felt like a lead weight in your stomach, you’ll appreciate how the fermented notes of the discard break down the heaviness of the flour.
We're talking about a 15 minutes transformation from a cold from the fridge jar of goop to a towering stack of mahogany brown goodness. It’s quick, it’s rewarding, and it smells like a high end bakery right in your own kitchen.
I promise you, once you see how these rise, you’ll never go back to the boxed mix. We're using simple pantry staples to support the star of the show, and I’ll show you exactly how to handle the batter so you don't lose all that precious air. It’s all about the gentle fold and the patient wait.
Right then, let’s get your coffee brewing and your skillet heating up, because we are about to make the best use of that discard you've ever experienced.
Morning Magic: Key Techniques for a Fluffy Sourdough Batter
The Carbon Dioxide Boost: When the lactic acid in your sourdough discard meets the baking soda, it creates an immediate surge of bubbles that lifts the heavy batter.
Gluten Relaxation: A short 5 minutes rest allows the flour to fully hydrate, ensuring the pancakes are tender rather than chewy or rubbery.
The Moisture Balance: Using whole milk provides enough fat to create a silky crumb while keeping the batter thin enough to spread slightly on the griddle.
Thermal Shock: Dropping cold ish batter onto a over medium heat surface creates steam, which works alongside the leavening agents to push the pancakes upward.
| Method | Time | Texture | Best For |
|---|---|---|---|
| Stovetop Skillet | 10 minutes | Crispy edges, moist center | Classic breakfast texture |
| Sheet Pan Oven | 15 minutes | Uniform, cake like, soft | Serving a large crowd at once |
| Electric Griddle | 10 minutes | Even browning, very soft | High volume batch cooking |
The choice between stovetop and oven really comes down to your morning vibe. I personally live for the stovetop method because I love that specific sizzle and the way the butter browns the edges into a crispy crown.
However, if you're hosting a brunch and don't want to stand over the stove while everyone else is talking, the oven method is a total lifesaver. Just remember that the oven won't give you those varied textures, it’s more of a consistent, fluffy cake experience.
Fast and Tangy: Essential Recipe Specs for Morning Success
When we talk about making Sourdough Discard Pancakes, we have to look at how the ingredients interact to create that specific tang. The sourdough discard isn't just there for flavor, it acts as the primary acidic component.
Unlike regular pancakes that might rely solely on baking powder, this recipe uses the discard to trigger the baking soda. It's a chemical dance that happens the second you stir the wet and dry ingredients together.
| Component | Science Role | Pro Secret |
|---|---|---|
| Sourdough Discard | Acidic leavener | Use it straight from the fridge for better lift |
| Baking Soda | Gas producer | Sift it with the flour to avoid bitter clumps |
| Melted Butter | Fat barrier | Let it cool slightly so it doesn't scramble the egg |
If you’re interested in trying other tangy breakfast options, you might want to compare this to a lemon ricotta pancakes recipe which uses citrus acid instead of fermentation for a similar lift. Both recipes rely on that acidic kick to get the height we all crave in a stack.
Beyond the Starter: A Deep Dive into Flour and Fat
To get this recipe exactly right, you need to be specific with your measurements. We are using 240g of sourdough discard, which is roughly one cup, but weighing it is always safer since the density of your starter can change. You’ll also need 240ml of whole milk, one large egg, and 30g of melted butter.
For the dry side, we’re looking at 125g of all purpose flour, 25g of granulated sugar, and our leavening duo: 1 tsp of baking powder and 1/2 tsp of baking soda. Don't forget that 1/2 tsp of fine sea salt and 1 tsp of vanilla extract to round everything out.
| Original Ingredient | Substitute | Why It Works |
|---|---|---|
| Whole Milk (240ml) | Buttermilk (240ml) | Increases the tang. Note: May require 1/4 tsp extra baking soda |
| All Purpose Flour | White Whole Wheat | Adds nuttiness. Note: Resulting pancake will be slightly denser |
| Granulated Sugar | Maple Syrup | Natural sweetness. Note: Add to wet ingredients instead of dry |
| Melted Butter | Coconut Oil | dairy-free fat. Note: Adds a very subtle tropical aroma |
I’ve found that using whole milk really makes a difference in the richness of the crumb. If you try to use skim milk, you lose that velvety mouthfeel that makes these feel like a treat.
If you're out of butter, avocado oil works in a pinch, but you’ll miss that nutty, toasted flavor that only butter provides when it hits the hot pan.
The Skillet Setup: Essential Equipment for a Perfect Sear
You don't need a professional kitchen to pull this off, but the right pan is your best friend here. I swear by a well seasoned cast iron skillet (like a Lodge). Cast iron holds heat like nothing else, which means when you drop that cold batter on, the pan temperature doesn't plummet.
This is the secret to getting those dark, mahogany brown circles that look like they belong in a magazine. If you don't have cast iron, a heavy bottomed non stick skillet is your next best bet.
You’ll also want two bowls: a large one for your dry foundation and a medium one for the "tangy emulsion" of wet ingredients. A whisk is essential for the wet ingredients to get the egg and discard fully integrated, but when it comes time to combine everything, put the whisk away and grab a silicone spatula.
Over mixing is the enemy of fluffiness. If you beat the batter until it's perfectly smooth, you've likely developed too much gluten, and you'll end up with something closer to a tortilla than a pancake.
Chef's Tip: Before you even start mixing, put your skillet on the stove over medium low heat. Let it warm up for a full 5 minutes. A truly preheated pan is the difference between the first pancake being a "throwaway" and it being the best one of the batch.
From Prep to Plate: step-by-step Guidance for Your Pancakes
- Whisk together the 125g flour, 25g sugar, 1 tsp baking powder, 1/2 tsp baking soda, and 1/2 tsp salt in your large bowl. Note: This ensures the leavening agents are perfectly distributed so you don't get a "soapy" bite of soda.
- In your medium bowl, vigorously whisk the 240g sourdough discard, 240ml milk, 1 egg, 30g melted butter, and 1 tsp vanilla. Vigorously whisk until the discard is no longer lumpy.
- Pour the wet mixture into the dry foundation.
- Gently fold the mixtures together using a spatula. Stop when you still see a few small streaks of flour.
- Let the batter rest for exactly 5 minutes. You will see small bubbles starting to form on the surface as the soda activates.
- Heat your skillet over medium heat and lightly grease with a tiny bit of butter or oil.
- Pour 1/4 cup (about 60ml) of batter per pancake into the hot pan. Listen for a gentle sizzle.
- Cook for about 2-3 minutes until bubbles form on the surface and the edges look matte and set.
- Flip the pancakes carefully.
- Cook the second side for 1-2 minutes until the bottom is mahogany brown and the center feels springy.
Troubleshooting the Bubbles: Pro Tips and Common Batter Pitfalls
Why Did My Pancakes Turn Out Gummy?
This usually happens for two reasons: undercooking or over mixing. If the heat is too high, the outside browns before the inside can set, leaving you with a raw, gummy center. If you over mix the batter, you create a dense gluten network that traps moisture in a way that feels heavy and wet on the tongue.
Why Are They Not Bubbling on the Skillet?
If you don't see those iconic bubbles forming on the top of the batter while it's in the pan, your leavening agents might be expired, or your discard wasn't acidic enough. Sourdough discard that has been in the fridge for a few days is actually better for this than fresh discard because it has more built up acid to react with the baking soda.
| Problem | Root Cause | Solution |
|---|---|---|
| Burnt outside, raw inside | Pan is too hot | Lower heat to medium low and use a heavier pan |
| Flat, thin pancakes | Batter was over mixed | Fold gently and leave lumps in the batter |
| Bitter aftertaste | Too much baking soda | Measure soda carefully and sift with flour |
Common Mistakes Checklist:
- ✓ Don't skip the 5 minutes rest; it's vital for flour hydration.
- ✓ Use a measuring cup for consistent pancake sizes so they cook at the same rate.
- ✓ Wipe the skillet between batches to prevent burnt butter bits from sticking to the next round.
- ✓ Flip only once; flipping multiple times toughens the texture.
- ✓ Avoid pressing down on the pancake with your spatula you're just squishing out the air!
If you're looking for another great make-ahead morning option that uses similar ingredients, check out this breakfast casserole which is perfect for feeding a group.
Creative Twists and Swaps for Your Sourdough Discard Batter
If you want to shake things up, there are so many ways to adapt this base. For "overnight sourdough discard pancakes," you can actually mix the flour, milk, and discard the night before and leave them in the fridge. In the morning, just whisk in the egg, butter, and leavening agents right before cooking.
This gives the sourdough more time to ferment the flour, making them even easier to digest.
For those looking for "sourdough discard protein pancakes," you can swap out 30g of the flour for your favorite vanilla protein powder. You might need a splash more milk since protein powder is very thirsty, but it’s a great way to make a more filling meal.
If you need a "sourdough discard pancakes vegan" version, use a flax egg (1 tbsp ground flax + 3 tbsp water), swap the milk for soy or oat milk, and use melted coconut oil instead of butter. The discard itself is vegan, so it still provides that great rise and flavor.
How to Store and Keep Fresh
If you have leftovers, you are in luck. These actually store surprisingly well. You can keep them in the fridge for up to 4 days in an airtight container. To reheat, don't use the microwave unless you want them to turn soft and soggy. Instead, pop them in the toaster on a medium setting.
This brings back those crispy edges and keeps the center light.
For long term storage, these are freezer superstars. Freeze them in a single layer on a baking sheet for an hour, then toss them into a freezer bag. They’ll stay fresh for up to 2 months. You can toast them straight from frozen!
Regarding zero waste: if you have extra batter that you can't cook right away, don't throw it out. It can sit in the fridge for about 24 hours, though you might need to add a tiny pinch of extra baking powder the next day to regain the lift.
Plating Perfection: Side Dishes and Complements for Breakfast
| Plating Level | Topping Strategy | Texture Contrast | Visual Appeal |
|---|---|---|---|
| Simple | Salted butter & maple syrup | Soft on soft | Classic home style |
| Polished | Fresh berries & whipped cream | Juicy berries vs fluffy cake | Bright pops of color |
| Restaurant | Lemon zest, honey, & toasted walnuts | Crunchy nuts vs airy batter | High end cafe vibes |
For the "Simple" level, just let the butter melt into the nooks and crannies. If you want to go "Polished," a quick blueberry compote (simmer berries with a splash of water and sugar for 5 minutes) makes these look incredible.
For the "Restaurant" feel, I love adding a dollop of Greek yogurt or ricotta on top, a heavy dusting of lemon zest, and a drizzle of high-quality honey. The creaminess of the yogurt pairs perfectly with the sourdough tang.
Myths Regarding Discard Batter
One big misconception is that the discard has to be "fed" or active to work. That’s actually the opposite of what we want here! We want the "discard" specifically because it is acidic.
An active starter is great for bread because we need the yeast to be alive and hungry, but for Sourdough Discard Pancakes, we are relying on the acid in the "old" starter to react with the baking soda.
Another myth is that you can't make these without eggs. While the egg helps with structure, the sourdough discard itself provides a lot of binding power. You can absolutely make a "no egg" version by just increasing the milk by about 2 tablespoons, though the result will be slightly less rich.
Finally,, don't believe that you have to use the batter immediately. While the baking soda reaction starts fast, the 5 minutes rest is actually what makes the texture superior, not a hindrance to the rise.

Recipe FAQs
Is it true I must use active, bubbly starter instead of discard?
No, this is a common misconception. You can use cold, unfed discard directly from the refrigerator because the baking powder and baking soda provide the necessary lift.
How to ensure the pancakes reach a fluffy texture?
Whisk the dry ingredients thoroughly to eliminate soda clumps before mixing. After combining with wet ingredients, let the batter rest for five minutes to allow the flour to fully hydrate and the gluten to relax for a tender crumb.
Why did my pancakes turn out tough and rubbery?
You likely over mixed the batter. Fold the wet and dry components together only until just combined, as excessive agitation develops too much gluten, resulting in a dense, chewy pancake.
How to know exactly when to flip the pancakes?
Wait until bubbles appear on the surface and the outer edges look set. Once you flip, cook until the bottom is a deep mahogany brown to ensure the interior is fully set.
Is it possible to store leftovers for later in the week?
Yes, store them in an airtight container in the refrigerator for up to three days. Reheat them in a toaster or oven to restore their texture, or use them as a base for our protein rich breakfast sandwiches for a quick morning meal.
How to manage the heat level on the griddle?
Keep your non-stick griddle or cast iron skillet set to medium heat throughout the cooking process. This heat setting ensures the pancakes cook through to the center without burning the exterior before the batter sets.
What if my batter is too thick after resting?
Add a tiny splash of milk to reach your desired consistency. Because flour absorption varies, thinning the batter slightly ensures it spreads properly when poured onto the hot griddle.
Fluffy Sourdough Discard Pancakes

Ingredients:
Instructions:
Nutrition Facts:
| Calories | 355 kcal |
|---|---|
| Protein | 9.8 g |
| Fat | 9.8 g |
| Carbs | 55.6 g |
| Fiber | 2.1 g |
| Sugar | 8.8 g |
| Sodium | 488 mg |
