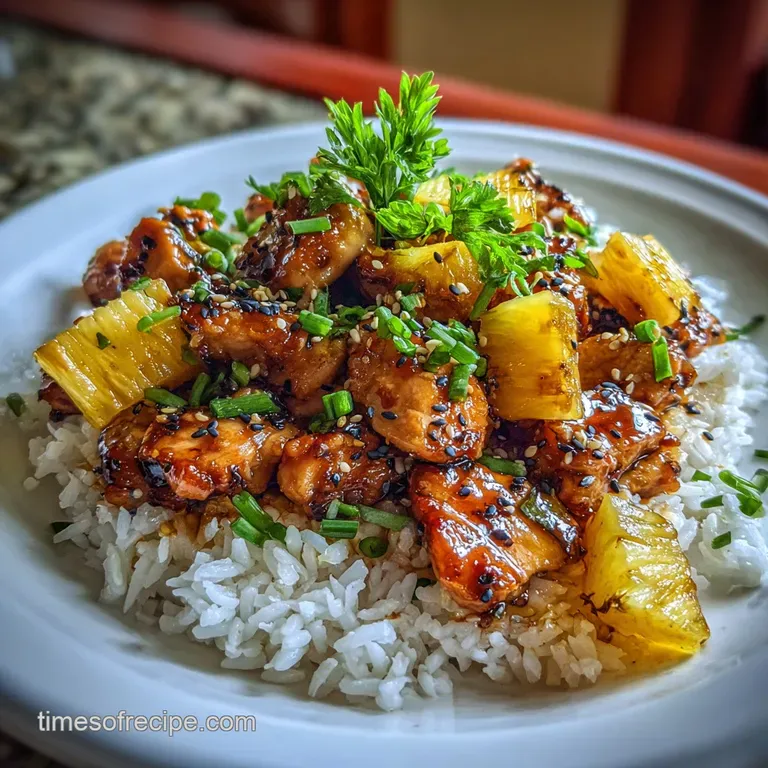
Pineapple Teriyaki Chicken
- Time: Active 10 minutes, Passive 15 minutes, Total 25 minutes
- Flavor/Texture Hook: Sticky, charred sweetness with a satisfying sizzle
- Perfect for: A hearty family weeknight dinner or meal prep
- Searing the Hearty Pineapple Teriyaki Chicken Everyone Craves
- The Chemistry of Bromelain and Sticky Glazes
- Essential Specs for Satisfying Results
- Ingredient Analysis for Bold Flavor Layers
- Essential Tools for a Proper Sizzle
- Layering Flavors Step by Step
- Fixing Common Texture and Balance Issues
- Adapting the Dish for Every Table
- Smart Storage and Reducing Food Waste
- Finishing the Bowl for Family Comfort
- Final Thoughts on Flavor Layers
- Very High in Sodium
- Recipe FAQs
- 📝 Recipe Card
Searing the Hearty Pineapple Teriyaki Chicken Everyone Craves
There is a specific sound that happens when cold, marinated chicken hits a heavy, preheated pan that aggressive, angry sizzle that promises a deep crust. I remember the first time I tried making this for a big family Sunday lunch; I was so impatient that I crowded the pan with 680 grams of meat all at once.
Instead of that beautiful golden brown, I ended up with a grey, steaming pile of sadness. It was a total mess, but it taught me everything about why heat management is the soul of a great stir fry.
Now, when I catch the aroma of fresh ginger and toasted sesame oil hitting the air, it feels like home. This isn't that cloyingly sweet, neon yellow stuff you get in a plastic container at the mall.
We are talking about a deep, mahogany glaze that clings to every crevice of the chicken, balanced by the sharp tang of rice vinegar and the hit of fresh garlic. It’s the kind of meal that makes everyone at the table go quiet for a second because they’re too busy enjoying that first, perfect bite of charred fruit and savory poultry.
We are going to walk through how to layer these flavors so they don't just sit on top of each other, but actually meld into something satisfying. You’ll learn how to treat the pineapple juice not just as a sweetener, but as a tool to tenderize the meat.
Trust me, once you see how that sauce transforms from a thin liquid into a velvety, glossy coat, you’ll never want to go back to the bottled stuff again. Let’s get that pan screaming hot and get started.
The Chemistry of Bromelain and Sticky Glazes
Understanding why this recipe works comes down to the interaction between the fruit enzymes and the heat of your stove. We aren't just tossing things in a pan; we are managing a series of chemical reactions that result in that specific, tacky texture we love in a good Pineapple Teriyaki Chicken with Rice.
- Enzymatic Tenderization: Fresh pineapple contains bromelain, an enzyme that breaks down protein fibers, making the chicken incredibly soft if timed correctly.
- Maillard Magic: High heat transforms the amino acids in the soy sauce and the sugars in the juice into hundreds of new flavor compounds, creating that savory crust.
- Starch Gelatinization: The cornstarch molecules swell and burst when they hit 62°C, turning the thin marinade into a thick, clinging glaze that won't run off the meat.
- Sugar Caramalization: As the water evaporates from the sauce, the brown sugar undergoes thermal decomposition, adding a complex, slightly bitter edge to the sweetness.
Achieving the Maillard Reaction
To get that deep brown color, you must ensure the chicken is dry before it hits the oil. If there is too much surface moisture, the energy from the pan goes into evaporating water rather than browning the meat, leaving you with a rubbery texture instead of a satisfying sear.
Managing Bromelain Enzymes
While bromelain is great for tenderizing, leaving the chicken in fresh pineapple juice for too long will turn the meat to mush. We keep the marinade time short or add the juice during the cooking phase to stop the enzyme action once the heat hits the pan.
Mastering the Reduction
The "gloss" of a professional sauce comes from reducing the liquid until the bubbles become large and slow. This concentration of solutes sugar and salt creates a heavy syrup that reflects light, giving the dish its signature "lacquered" look.
Essential Specs for Satisfying Results
Before you start chopping, it helps to know exactly what the goal is for each stage of the cook. This Pineapple Teriyaki Chicken moves fast once the heat is on, so having these visual and temperature cues ready will keep you from overcooking the breast meat.
| Thickness of Meat | Internal Temp | Rest Time | Visual Cue |
|---|---|---|---|
| 2.5 cm cubes | 74°C | 3 minutes | No longer translucent; golden edges |
| 1.5 cm strips | 74°C | 2 minutes | Opaque center; sauce bubbles thickly |
| Whole thighs | 75°C | 5 minutes | Juices run clear when pierced |
Getting the rice right is just as important as the protein itself. Since we are serving this as a Pineapple Teriyaki Chicken with Rice dish, the grains need to be distinct and fluffy, not a gummy block that absorbs the sauce too quickly.
I always rinse my Jasmine rice under cold water until the cloudy starch disappears; it's a small step that makes a massive difference in the final mouthfeel.
Ingredient Analysis for Bold Flavor Layers
Building a bold flavor profile requires choosing ingredients that can stand up to high heat without losing their identity. We are looking for a balance between the salty punch of the soy and the bright, acidic lift of the ginger and vinegar.
- Chicken Thighs (680g): I prefer thighs over breasts because the higher fat content keeps them juicy during the over high heat sear. Why this? Fat carries the aromatics of the ginger and garlic better than lean meat.
- Fresh Pineapple Juice (120ml): This provides the base acidity and sweetness for the glaze. Why this? It contains natural sugars that caramelize much better than plain white sugar.
- Soy Sauce (120ml): The primary source of salt and deep umami. Why this? It provides the dark color and savory backbone that balances the fruit juice.
- Fresh Ginger (1 tbsp): Adds a sharp, peppery heat that cuts through the sugar. Why this? Fresh ginger has volatile oils that dried powder simply cannot replicate.
| Ingredient | Science Role | Pro Secret |
|---|---|---|
| Cornstarch | Thickening agent | Mix with cold water first to prevent lumps |
| Rice Vinegar | Acid balancer | Adds a "bright" finish that wakes up the salt |
| Brown Sugar | Caramelization | Use dark brown sugar for deeper molasses notes |
When you are picking out your produce, look for a red bell pepper that feels heavy for its size. That weight means it’s full of water, which will give you a satisfying crunch even after it has been tossed in the hot sauce. It's these small details that turn a simple Chicken with Rice meal into something special.
Essential Tools for a Proper Sizzle
You don't need a professional kitchen, but a few specific items will make this recipe much easier to execute. A heavy bottomed pan is non negotiable because it holds heat better when you add the cold ingredients.
- Cast Iron Skillet or Wok: This is the best way to get that restaurant style sear. The high thermal mass prevents the temperature from dropping too low.
- Microplane Grater: Perfect for turning that ginger and garlic into a paste so they melt into the sauce without leaving woody chunks.
- Small Whisk: Essential for ensuring the cornstarch slurry is completely smooth before it hits the pan.
- Instant Read Thermometer: The only way to guarantee your chicken is cooked to 74°C without cutting it open and losing the juices.
Chef's Tip: If you don't have a wok, use the largest skillet you own. Overcrowding is the enemy of texture; the more surface area you have, the better the evaporation and browning will be.
Layering Flavors step-by-step
Let's get into the actual cooking. Remember to have everything prepped and ready (your "mise en place") because once the oil starts shimmering, the process happens in about 15 minutes.
Preparing the Foundation
- Cube the chicken. Cut your 680g of chicken into uniform 2.5 cm pieces. Note: Uniformity ensures every piece finishes cooking at the exact same time.
- Whisk the sauce. In a bowl, combine the 120ml soy sauce, 120ml pineapple juice, 50g brown sugar, 15ml rice vinegar, and 5ml sesame oil.
- Prep the aromatics. Mince the 3 cloves of garlic and grate the 15g of ginger. Set them aside together.
Searing for Texture
- Heat the oil. Place 30ml of neutral oil in your skillet over medium high heat until you see wisps of smoke.
- Sear the protein. Add the chicken in a single layer. Let it sit undisturbed for 3 minutes until a deep golden crust forms.
- Add aromatics. Toss in the garlic and ginger, stirring constantly for 30 seconds until the fragrance fills the kitchen.
Integrating the Peppers and Fruit
- Sauté the vegetables. Add the diced red bell pepper and 150g of pineapple chunks. Cook for 2 minutes until the peppers are bright but still crisp.
- Pour the liquid. Add the soy sauce mixture to the pan, scraping the bottom to release all those browned bits of chicken (the fond).
Thickening the Glaze
- Add the slurry. Mix 10g cornstarch with 15ml water and pour it into the bubbling sauce.
- Final reduction. Simmer for 2 minutes until the sauce coats the back of a spoon with a velvety sheen.
- Garnish and serve. Remove from heat and toss with sliced green onions and sesame seeds over your 3 cups of cooked rice.
Fixing Common Texture and Balance Issues
Even with the best intentions, things can go sideways in the kitchen. Maybe your sauce is looking a bit like water, or perhaps it’s so salty it makes your eyes water. Don't panic; most of these issues are easily fixed with a little kitchen logic.
Why Your Sauce is Runny
If your glaze isn't clinging to the chicken, it usually means the cornstarch wasn't activated by enough heat, or the ratio of liquid to starch was off. Ensure the sauce reaches a full boil for at least 30 seconds.
Why Your Chicken is Dry
Overcooking is the usual suspect, but sometimes it's because the chicken sat in the acidic juice for too long before hitting the pan. Acid "cooks" the protein, and then the heat finishes it off, leaving it tough.
| Problem | Root Cause | Solution |
|---|---|---|
| Sauce is too salty | Too much reduction or heavy soy | Add a splash of water and a teaspoon of honey |
| Chicken is grey/steamed | Pan was too cold or overcrowded | Cook in two batches next time; pat meat dry |
| Glaze is lumpy | Slurry added too fast or not mixed | Strain the sauce or whisk vigorously over low heat |
Common Mistakes Checklist
- ✓ Never skip rinsing the rice; it prevents the Teriyaki Chicken with Rice from becoming a sticky glob.
- ✓ Ensure the pan is hot enough that the oil "shimmers" before adding meat.
- ✓ Use fresh ginger rather than the jarred stuff for a more vibrant flavor profile.
- ✓ Don't stir the chicken immediately; let the crust develop for at least two minutes.
- ✓ Keep the red peppers for the very end to maintain their snap and color.
Adapting the Dish for Every Table
Whether you are cooking for two or a crowd of ten, the physics of the pan stays the same. If you are scaling this recipe up, remember that you cannot just double everything and put it in the same pan. You'll end up steaming the meat instead of searing it.
- To Double (8 servings)
- Use two separate pans or cook the chicken in four batches. Increase the sauce to 1.75x rather than a full 2x to avoid it being too liquid.
- To Halve (2 servings)
- Use a smaller 20 cm skillet. Use one small egg yolk if you are using an egg wash variation, or just half the slurry.
- Baking Option
- If you're doing a large batch for a party, sear the chicken first, then toss with the sauce and bake at 200°C for 10 minutes to set the glaze.
For those who want a lighter side, this Lemon Chicken Cauliflower recipe is a fantastic way to swap out the grains while keeping the bright, citrusy notes.
| Feature | Fresh Pineapple | Canned Pineapple |
|---|---|---|
| Texture | Firm and fibrous | Soft and consistent |
| Flavor | Tart and complex | Very sweet (syrup) |
| Enzyme | High Bromelain | Low (inactivated) |
Smart Storage and Reducing Food Waste
Pineapple Teriyaki Chicken is one of those rare dishes that actually tastes better the next day because the flavors have time to penetrate deep into the chicken fibers. However, there are a few tricks to keeping it from becoming a soggy mess in the fridge.
- Fridge Storage: Keep the chicken and rice in separate airtight containers. It will stay fresh for up to 4 days. When reheating, add a tablespoon of water to the chicken to loosen the glaze back up.
- Freezing: This dish freezes beautifully. Place the cooled chicken and sauce in a freezer bag, removing as much air as possible. It will last for 3 months. Thaw in the fridge overnight before reheating.
- Zero Waste - Fruit Scraps: Don't throw away the pineapple core or skin! You can simmer them in water with a bit of sugar and ginger to make a refreshing tropical tea or a base for a cocktail.
- Leftover Veggies: If you have half a bell pepper left, slice it thin and quick pickle it in a bit of the rice vinegar and sugar for a crunchy topping the next day.
If you find yourself with extra shredded meat, you can easily repurpose it. I often use leftovers to mimic the texture found in my Shredded Chicken in recipe for a quick taco night later in the week.
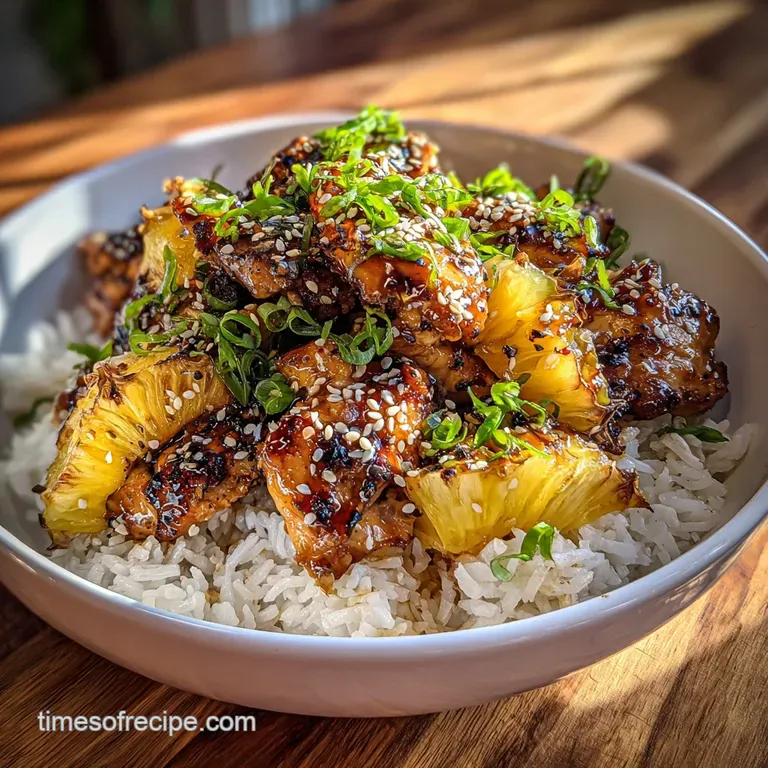
Finishing the Bowl for Family Comfort
Presentation isn't just about looking pretty; it's about the contrast of temperatures and textures. I like to serve this in wide, shallow bowls rather than flat plates. This keeps the sauce pooled around the rice so every grain gets seasoned.
Start with a generous bed of the fluffy Jasmine rice. Pile the glistening chicken and peppers right in the center, making sure to spoon over extra glaze from the pan. The green onions should be sliced on a sharp bias (diagonal) to give them more surface area and a professional look.
For a final touch, a tiny pinch of red pepper flakes can add a heat that balances the cool, sweet pineapple.
- If you want it Extra Sticky
- Double the brown sugar and reduce the sauce for an extra 3 minutes until it looks like molasses.
- If you want it Healthier
- Swap the white rice for quinoa and double the red bell peppers to bulk up the fiber.
- If you want it Spicier
- Whisk in 1 tablespoon of Sriracha or sambal oelek into the sauce before cooking.
Pairing Suggestions
This hearty meal goes perfectly with a side of charred bok choy or a simple smashed cucumber salad with rice vinegar and chili oil. The coolness of the cucumbers provides a brilliant contrast to the warm, sticky Chicken with Rice. If you're looking for another one pot wonder to add to your rotation, you might love the flavor profile of this Honey Garlic Pineapple recipe, which uses a similar fruit based sweetness but with a heavier garlic punch.
Final Thoughts on Flavor Layers
Making a satisfying stir fry is about respecting the heat of the pan and the balance of the sauce. By searing the meat first and layering in the aromatics, you create a depth of flavor that feels like a warm hug in a bowl.
It’s a versatile, bold dish that has become a staple in my kitchen, and I hope it becomes one in yours too. Keep your pans hot and your ginger fresh!

Very High in Sodium
1645 mg mg of sodium per serving (72% % of daily value)
The American Heart Association recommends limiting sodium intake to no more than 2,300mg per day for most adults. Ideally, aim for 1,500mg per day for even greater heart health benefits.
Tips to Reduce Sodium
-
Reduce Soy Sauce-30%
Soy sauce is a major source of sodium. Reduce the amount to 60ml and consider using a low-sodium soy sauce or tamari instead. This single change can significantly lower the sodium content.
-
Fresh Pineapple Over Juice-20%
Use 120ml of fresh pineapple puree instead of juice. Fresh pineapple contains naturally occurring sugars and flavor compounds, reducing the need for additional sodium to enhance the dish.
-
Lower the Sugar-10%
Reduce the brown sugar by half to 25g. As soy sauce is lowered, cutting the sugar ensures that your dish is not overtly sweet. The dish should rely more on the natural pineapple sweetness. You could also experiment with using a no-calorie sweetener to greatly reduce sugar.
-
Unsalted Rice-5%
Ensure the Jasmine rice is cooked without added salt. Even a small amount of salt added during cooking can significantly contribute to the overall sodium content of the meal.
-
Spice It Up!
Experiment with sodium free herbs and spices like black pepper, garlic powder, onion powder, smoked paprika, or red pepper flakes to enhance the flavor of the dish without adding sodium. These can help compensate for the reduction in sodium from other sources.
Recipe FAQs
Should I use chicken breasts or thighs for the best flavor and texture?
Thighs are recommended for better results. The higher fat content in chicken thighs keeps them much juicier during the necessary high heat sear required for a good crust.
How do I ensure the pineapple juice doesn't make the chicken mushy before cooking?
Marinate for less than 30 minutes, or add the juice during cooking. Fresh pineapple contains bromelain enzymes that tenderize protein; high heat rapidly deactivates these enzymes, stopping the mushy breakdown.
How to achieve the signature sticky glaze coating on the chicken?
Combine cornstarch with cold water first, then simmer the sauce vigorously. The heat activates the cornstarch, turning the thin liquid into a thick, glossy sauce that clings perfectly to the seared protein.
Is it necessary to use a cast iron skillet or wok for searing?
Yes, a heavy bottomed pan is essential for searing. A cast iron skillet has high thermal mass, meaning it holds its high temperature even when cold chicken is added, promoting browning over steaming.
What internal temperature should the chicken reach before glazing?
Cook the chicken to an internal temperature of 74°C before adding the final glaze. Using an instant read thermometer guarantees the meat is safe and prevents overcooking during the final simmer.
How can I balance the intense sweetness from the pineapple and brown sugar?
Add an acid like rice vinegar or lime juice near the end. The acid brightens the overall flavor profile, cutting through the richness and balancing the heavy sweetness, much like balancing the tang in our Chicken Apple Sandwich Recipe.
Can I substitute soy sauce with a low-sodium version?
Yes, but adjust the quantity carefully. If using low-sodium soy sauce, you may need to increase the amount slightly or add a touch more brown sugar to compensate for the reduced salt and deep umami notes.
Pineapple Teriyaki Chicken
Ingredients:
Instructions:
Nutrition Facts:
| Calories | 542 kcal |
|---|---|
| Protein | 36 g |
| Fat | 14.2 g |
| Carbs | 68 g |
| Fiber | 2.4 g |
| Sugar | 21 g |
| Sodium | 1645 mg |
