Flavorful Pickled Red Onion Recipe in Just 10 Minutes
- Time:8 minutes prep + 2 minutes resting = 10 minutes total
- Flavor/Texture Hook: Tangy, crunch heavy, and vibrant
- Perfect for: Tacos, burgers, and meal prep bowls
- Flavorful Pickled Red Onion Recipe in Just 10 Minutes
- Common Pickling Failures and Fixes
- The Logic of Brining
- Ingredient Component Analysis
- Essential Component Selections
- Necessary Kitchen Equipment
- Complete Step-By-Step Method
- Resolving Flavor Inconsistencies
- Adjusting for Crowd Size
- Personalized Seasoning Variations
- Storing for Lasting Freshness
- Optimal Meal Pairings
- Debunking Pickling Myths
- Recipe FAQs
- 📝 Recipe Card
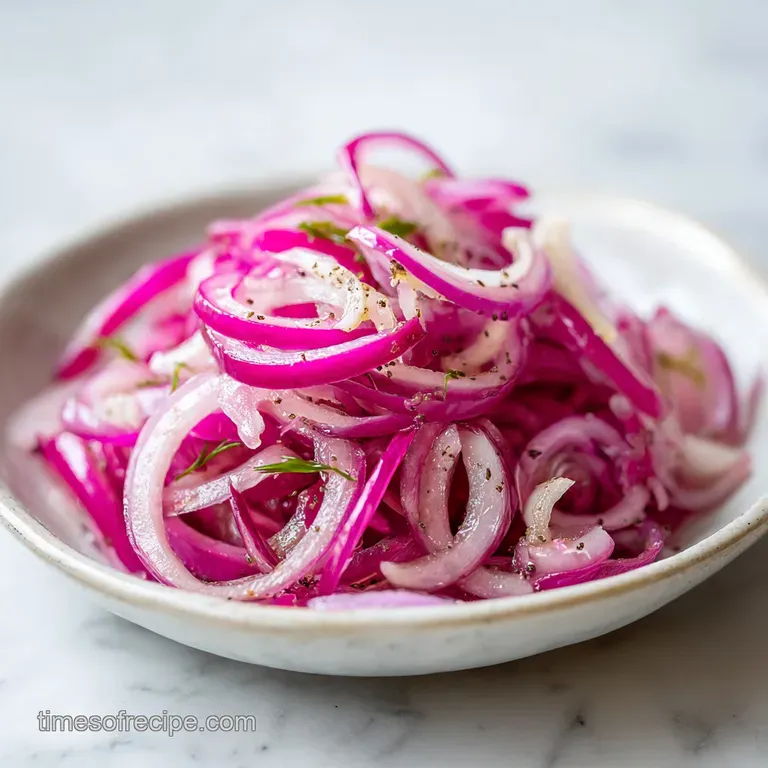
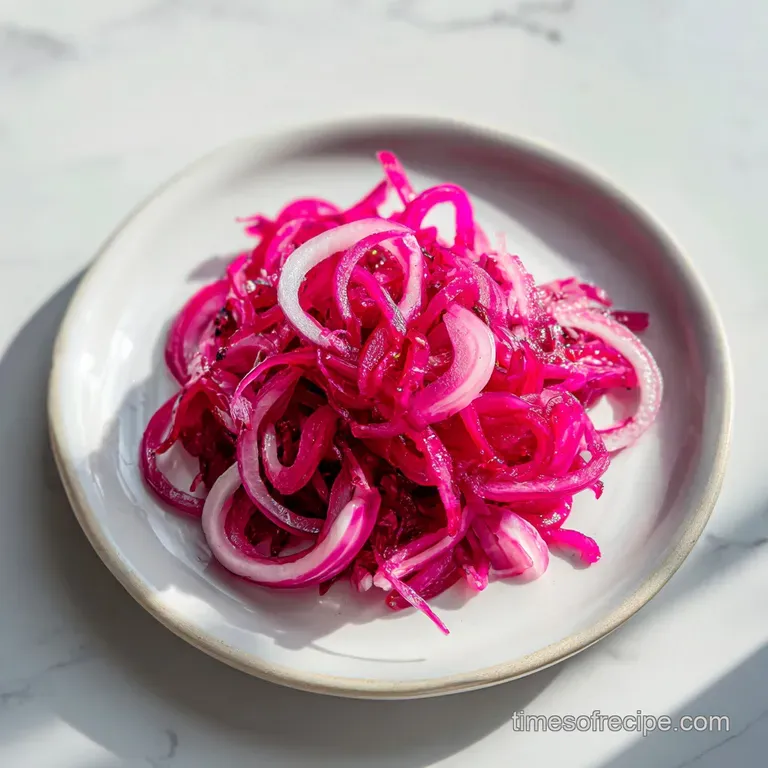
Flavorful Pickled Red Onion Recipe in Just 10 Minutes
Have you ever noticed how a single ingredient can make a dish look like it came out of a professional kitchen? That is exactly what happens when you drop a handful of neon pink onions onto a plate.
I used to think pickling was this massive weekend project involving boiling huge pots of vinegar and sanitizing dozens of jars, but honestly, who has time for that on a Tuesday night?
Discover our standout Flavorful Pickled Red Onion Recipe, ready in just 10 minutes. This is the version I make when I’m halfway through grilling burgers and realize the fridge is looking a bit boring. It is fast, it is sharp, and it completely changes the profile of whatever you’re eating.
You don’t need to be an expert to get that perfect "shatter" crunch that makes these so addictive.
The magic here isn't in some secret ingredient; it's in the way we handle the onion’s natural structure. By the time you finish reading this, you'll see why we use warm water instead of cold and why maple syrup is actually the secret to a better brine.
We're skipping the long wait and going straight to the vibrant, tangy results that will make your tacos the talk of the neighborhood.
Common Pickling Failures and Fixes
Most people struggle with quick pickles because they end up with one of two extremes: either the onions are still raw and "burny" in the middle, or they’re soggy and limp. The mistake usually lies in the temperature of the brine. If the water is boiling, it cooks the onion, killing that beautiful snap.
If it’s stone cold, the vinegar can’t penetrate the layers fast enough to do its job within the 10 minute window.
We also need to talk about the "sulfur stink." You know that smell when you open a jar of old onions? That happens because the brine wasn't balanced or the onions weren't submerged properly.
By using a precise ratio of acid to water and ensuring every sliver of onion is tucked under the liquid line, we lock in the freshness and keep that sharp, clean aroma that makes these so appetizing.
The Logic of Brining
Understanding why this recipe moves so fast helps you become a more intuitive cook. It isn't just about mixing things in a jar; it's about a specific sequence of events that happens the moment the vinegar hits the vegetable. Here is why this specific method works every single time without fail.
- Cellular Permeability: Warm water at 110°F softens the rigid cell walls of the onion just enough for the vinegar to seep in quickly without turning the vegetable into mush.
- Acid Base Reaction: The acetic acid in the vinegar reacts with the anthocyanins (the natural pigments) in the red onion, triggering a vivid color shift from dull purple to bright neon pink.
- Osmotic Balance: The sea salt draws out just enough internal moisture from the onion to allow the seasoned brine to take its place, flavoring the onion from the inside out.
- Natural Sweetening: Maple syrup dissolves instantly in warm water, providing a mellow sweetness that tames the vinegar's bite more effectively than granulated sugar.
| Method | Time | Texture | Best For |
|---|---|---|---|
| Warm Soak (This Recipe) | 10 minutes | Crisp tender and snappy | Immediate use on tacos or burgers |
| Stovetop Boil | 20 minutes | Soft and slightly jammy | Sandwiches where you want a melt in-mouth feel |
| Cold Fridge Steep | 24 hours | Very crunchy and raw | long term storage and fermented style flavor |
This comparison shows that you don't actually gain much by boiling your brine unless you specifically want a soft, cooked texture. For most of us, that signature "crunch" is the whole point of a pickled topping.
Ingredient Component Analysis
Choosing the right components is the difference between a jar that sits in the fridge for a month and one that disappears in two days. We are looking for balance across all five taste profiles, and each item in this list plays a functional role in that equilibrium.
| Ingredient | Science Role | Pro Secret |
|---|---|---|
| Apple Cider Vinegar | Primary Acidifier | Use "with the mother" for a more complex, fruity undertone. |
| Maple Syrup | Sweetness Buffer | Prevents the "grainy" texture often found with undissolved white sugar. |
| Fine Sea Salt | Moisture Extractor | Smaller grains dissolve faster in 110°F water than chunky kosher salt. |
| Black Peppercorns | Aromatic Depth | Leave them whole to provide a slow release heat that doesn't overwhelm. |
If you are looking for other ways to use up your vegetable haul, these onions are a fantastic garnish for a Roasted Vegetable Medley. The acidity of the onions cuts through the caramelized sweetness of roasted carrots and parsnips perfectly.
Essential Component Selections
I’ve made this with everything from white distilled vinegar to fancy balsamic, and I keep coming back to this specific list. The goal is a brine that is punchy but not harsh. Here is exactly what you need to gather before you start your 10 minute timer.
- 1 large red onion (approx. 300g): Look for one that feels heavy for its size.
- Substitute: Shallots work beautifully but will be much milder.
- Why this? Red onions have the specific pigments needed for that iconic pink color.
- 0.5 cup apple cider vinegar: This is softer than white vinegar.
- Substitute: White wine vinegar or rice vinegar.
- Why this? ACV adds a subtle fruitiness that complements the onion's natural sugars.
- 0.5 cup warm filtered water (approx. 110°F): Not boiling, just very warm tap water.
- Substitute: Distilled water if your tap water has a heavy chlorine taste.
- Why this? The heat facilitates the quick pickle reaction without "cooking" the onion.
- 1.5 tablespoons maple syrup: This is my favorite liquid sweetener.
- Substitute: Honey or agave nectar (Note: Honey may take longer to dissolve).
- Why this? It adds a rich, earthy sweetness that balances the sharp acidity.
- 1.5 teaspoons fine sea salt: Crucial for texture.
- Substitute: 2 teaspoons of Diamond Crystal kosher salt.
- Why this? Fine grains ensure the brine is perfectly smooth and seasoned in seconds.
- 1 clove garlic, smashed: For that savory background note.
- Substitute: A pinch of garlic powder if you're in a massive rush.
- 0.5 teaspoon whole black peppercorns: Essential for a little kick.
- Substitute: Crushed red pepper flakes for more heat.
- 1 pinch red pepper flakes: Just a touch of warmth.
Chef's Tip: If you don't have a thermometer, 110°F feels like a very warm bath. It should be hot to the touch but not so hot that you have to pull your finger away.
Necessary Kitchen Equipment
You don't need a lot of gear for this, but the tools you choose will dictate how fast you actually finish. Speed is the name of the game here.
- Mandoline Slicer: This is the real secret to "Just 10 Minutes." It ensures every slice is exactly 1/8th of an inch. If you use a knife, try to get them as thin as possible, almost translucent.
- 16oz (500ml) Glass Mason Jar: Glass is non reactive, which is vital when working with high acid brines. Metal or certain plastics can leach flavors into your onions.
- Small Pitcher or Whisking Bowl: You need something with a spout to make pouring the brine easy and mess free.
If you have leftover scraps like the onion ends or the garlic skins, don't throw them out. Toss the onion ends into a homemade vegetable broth for extra flavor and color.
Complete step-by-step Method
- Slice the onion. Use a mandoline set to 1/8th inch to create uniform half moons from your red onion. Note: Uniformity ensures even pickling across the entire jar.
- Pack the jar. Stuff the sliced onions tightly into your clean 16oz glass mason jar. until it is nearly full.
- Mix the base. Combine the warm water, apple cider vinegar, maple syrup, and sea salt in a small pitcher.
- Dissolve the solids. Whisk the liquid vigorously until the salt is completely dissolved and the liquid is clear.
- Add the aromatics. Drop the smashed garlic, peppercorns, and red pepper flakes directly into the jar with the onions.
- Pour the brine. Carefully pour the vinegar mixture over the onions until they are completely submerged.
- Remove air pockets. Use the back of a spoon to press the onions down firmly. until no air bubbles remain trapped.
- Rest and react. Let the jar sit on your counter for 2 minutes. until the liquid turns a vibrant neon pink.
- Check the submerged level. Ensure the onions haven't popped up above the liquid line; add a splash more vinegar if needed.
- Serve or chill. Use them immediately for peak crunch or lid the jar and move it to the fridge.
Resolving Flavor Inconsistencies
Sometimes the onions don't turn out quite right, usually due to the age of the onion or the mineral content of your water. If your onions taste "soapy," it's often because they were too old and had started to develop high levels of sulfur.
A quick rinse under cold water before pickling can help wash away some of those compounds.
Fixing a Bitter Brine
If the brine tastes bitter, it's usually because the red pepper flakes or peppercorns were too aggressive or the maple syrup wasn't strong enough to balance the specific vinegar you used. You can easily fix this by adding an extra teaspoon of syrup directly to the jar and giving it a gentle shake.
Correcting the Texture
If the onions feel too tough after the 2 minute rest, you can give the jar a gentle "massage" by pressing down on the onions with a clean spoon again. This physical agitation helps break down the fibers further.
| Problem | Root Cause | Solution |
|---|---|---|
| Dull Color | Water was too cold | Microwave the jar (without lid) for 15 seconds to jumpstart the reaction. |
| Overly Sharp Taste | Too much vinegar | Replace 2 tablespoons of brine with 2 tablespoons of warm water. |
| Onions are Limp | Water was boiling | Use 110°F water next time; chill these immediately to save the crunch. |
Common Mistakes Checklist
- ✓ Use a mandoline for 1/8th inch slices (prevents uneven pickling)
- ✓ Ensure the water is exactly 110°F (warmer than lukewarm, cooler than boiling)
- ✓ Pack onions tightly before pouring (saves brine and ensures coverage)
- ✓ Use a non reactive glass jar (prevents metallic off flavors)
- ✓ Wait the full 2 minutes before refrigerating (allows the color to set)
Adjusting for Crowd Size
Scaling Down: If you only need enough for two people, use a small 8oz jar. Cut the ingredients exactly in half. Since there is less mass, the onions will actually pickle even faster check them after 60 seconds of resting.
Scaling Up: When making a double or triple batch for a BBQ, do not simply double the spices. Use 1.5x the salt and peppercorns to start, then taste. Liquids can be doubled exactly, but always work in batches if your mandoline is small to keep the slices uniform.
Personalized Seasoning Variations
Once you have the base method down, you can start playing with the profile. This recipe is essentially a blank canvas for whatever cuisine you are cooking.
- The Mexican Style: Add a squeeze of fresh lime juice and replace the black peppercorns with a few sprigs of fresh cilantro and a slice of fresh jalapeño.
- The Scandi Swap: Use white wine vinegar, add a teaspoon of dried dill, and swap the maple syrup for white sugar for a cleaner, more traditional Nordic flavor.
- The Warm Spice Version: Add a small cinnamon stick and two whole cloves to the jar. This is incredible on pulled pork or rich autumn stews.
Storing for Lasting Freshness
These onions will stay "shatter crisp" for about 5 to 7 days in the fridge. After that, they start to soften as the acid continues to break down the pectin in the cell walls. They are still perfectly safe to eat for up to 2 weeks, but they will lose that signature snap.
Storage: Always keep them in a glass jar with a tight fitting lid. Ensure the onions remain submerged in the brine; any onion exposed to air will turn brown and lose its flavor.
Zero Waste: Never pour that pink brine down the drain! It is essentially a pre made vinaigrette base. Use it to macerate berries, stir it into a potato salad, or use it as a marinating liquid for chicken.
Optimal Meal Pairings
These onions are the ultimate "utility player" in the kitchen. Their high acidity makes them the perfect partner for fatty, rich foods.
- Tacos and Tostadas: The brightness of the ACV cuts right through heavy carnitas or greasy chorizo.
- Avocado Toast: A few pink ribbons on top of mashed avocado add a necessary crunch and a pop of color that makes a basic breakfast feel special.
- Grain Bowls: If your quinoa or rice bowl feels flat, a spoonful of these onions provides the hit of acid needed to wake up the other ingredients.
Debunking Pickling Myths
One common myth is that you must boil the vinegar to "sanitize" the onions. While boiling is necessary for long term shelf stable canning, it is completely unnecessary for a refrigerator pickle. The acidity of the vinegar alone is enough to keep the onions fresh for several weeks in the cold.
Another misconception is that you need specialized "pickling salt." While pickling salt is great because it lacks anti caking agents that can cloud the brine, fine sea salt works just as well for quick batches and dissolves just as quickly in 110°F water.
Don't feel like you need a special trip to the store for a specific salt.

Recipe FAQs
How do you make pickled red onions?
Slice one large red onion into uniform 1/8th inch half moons, pack them into a 16oz glass mason jar, and pour a mixture of warm water, apple cider vinegar, salt, and maple syrup over them. Add the garlic, peppercorns, and red pepper flakes, then let the mixture sit for 2 minutes until the liquid turns neon pink.
What vinegar is best for pickling red onions?
Apple cider vinegar is the best choice because its mild acidity and subtle fruitiness perfectly complement the sharp, sweet profile of the red onion. If you enjoyed the acidity balancing in this recipe, see how we use the same acid technique in our ketchup recipe.
What are the ratios for pickled red onions?
Use a 1:1 ratio of vinegar to water. This balance ensures the acidity is potent enough to preserve the onions while remaining mellow enough to eat on their own.
How long will pickled red onions last?
They will stay fresh for 5 to 7 days in the refrigerator. While they remain safe to eat for up to two weeks, the texture will gradually lose its signature snap as the acid breaks down the onion cell walls.
Is it true I must boil the vinegar to make the brine?
No, this is a common misconception. You only need to use warm water at 110°F to dissolve the salt and maple syrup; boiling the vinegar actually risks dulling the vibrant color and softening the onions prematurely.
Why did my onions turn out rubbery instead of crisp?
This usually happens if the water used for the brine was too hot or if the onion slices were too thick. Stick to 110°F for the water and ensure you use a mandoline to maintain a consistent 1/8th inch thickness for the perfect crunch.
Can I freeze pickled red onions to extend their shelf life?
No, avoid freezing them. The process destroys the cell structure, turning the crisp, crunchy onions into a mushy, unappealing texture once they thaw.
Quick Pickled Red Onions

Ingredients:
Instructions:
Nutrition Facts:
| Calories | 14 calories |
|---|---|
| Protein | 0.3g |
| Fat | 0.1g |
| Carbs | 3.2g |
| Fiber | 0.4g |
| Sugar | 2.1g |
| Sodium | 284mg |
