Prime Rib Roast: the Ultimate Roasting Joint
- The Prime Rib Roast: Unlocking the Ultimate Centerpiece
- Achieving Edge-to-Edge Perfection: The Reverse-Sear Advantage
- Essential Components for the Herb-Crusted Prime Rib
- Master the Method: Step-by-Step Reverse-Sear Protocol
- Troubleshooting and Expert Tips for Your Roast
- Carving, Serving, and Preserving Leftovers
- Recipe FAQs
- 📝 Recipe Card
The Prime Rib Roast: Unlocking the Ultimate Centerpiece
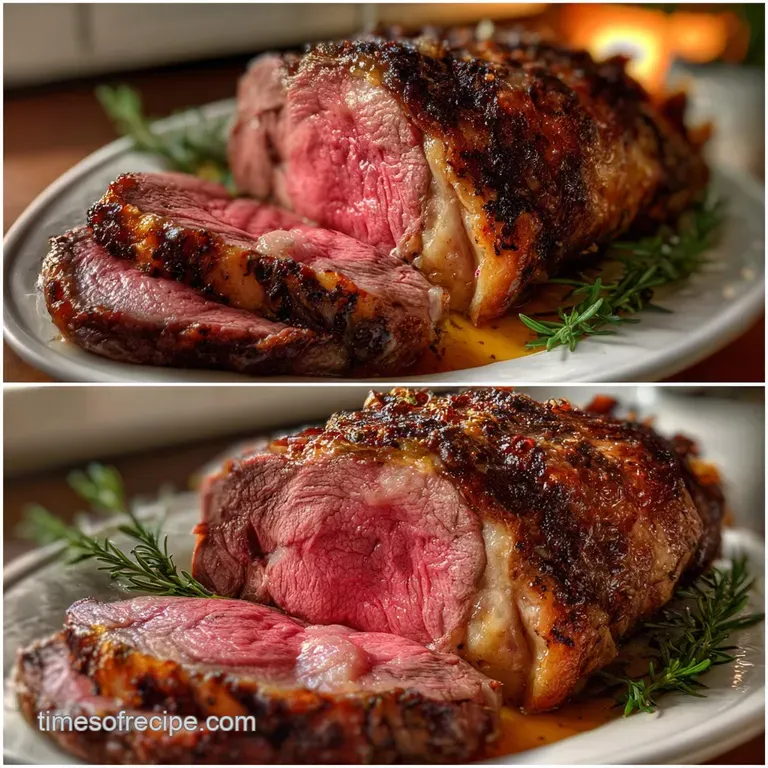
Can we talk about that smell? The moment the over high heat blast hits the deeply browned herb crust, your kitchen transforms into a fine dining establishment. That rich, garlicky scent, combined with the low, satisfying crackle of the fat cap, is the true sound of victory.
Nothing commands a holiday table quite like a perfectly cooked Prime Rib Roast .
Look, I know this cut of meat comes with a hefty price tag and a lot of pressure. But honestly, the reverse sear method we're using here is basically foolproof. It eliminates the guessing game and ensures you get glorious edge-to-edge medium rare meat, which is what we’re aiming for.
This technique is surprisingly low-stress, especially compared to the traditional over high heat starting methods most older rib roast recipe ovens demand.
Forget what you think you know about roasting. We are throwing out the old rules and focusing purely on internal temperature control. If you've been nervous about tackling this majestic joint, this recipe is your ultimate guide.
Let’s get you ready to carve the most succulent, flavorful Prime Rib Roast you’ve ever made.
Achieving Edge-to-Edge Perfection: The Reverse Sear Advantage
The traditional method of cooking a massive Prime Rib Roast involves starting hot and dropping the temperature, which often results in a wide band of grayish, overcooked meat just beneath the surface crust. We don't want gray; we want pink, glorious pink, right to the edge.
The reverse sear technique flips that script entirely, optimizing the cooking process for internal tenderness first and crust development second. This is how the pros do it, and frankly, it is the only way I make the Ultimate Roasting Joint now.
Defining the Standing Rib Roast: Why This Cut is Premium
A Standing Rib Roast Recipe uses the rib primal the same section we get our incredible Ribeye steaks from. When you buy this cut, you are investing in incredible intramuscular fat (marbling) and extremely tender muscle fibers that do not get overworked.
The bones, which are often called a "standing" rack, insulate the meat beautifully during cooking. When you see a properly cooked Prime Rib Roast , you understand why it’s the ultimate centerpiece.
Selecting Your Roast: Understanding Prime vs. Choice Grades
The term "Prime Rib" is often used generically, but technically, "Prime" refers to the USDA grading, indicating the highest level of marbling and quality. If your budget allows, always choose a USDA Prime grade roast. If not, USDA Choice is an excellent, still highly marbled runner-up.
The difference in marbling directly translates to juiciness and flavor. Don't be shy; ask your butcher about the grade when you’re planning your spectacular Prime Rib Roast .
The Magic of Reverse Searing: Precision Cooking Defined
The beauty of the reverse sear is its gentleness. We begin at a very low temperature 250°F (120°C) which allows the heat to penetrate the meat slowly and evenly. This eliminates the harsh temperature gradient and prevents that dreaded gray ring.
You are essentially bringing the entire roast up to temperature slowly, like a gentle hug, ensuring all the juices stay perfectly nestled within the fibers.
Minimizing the Gray Band: Moisture Retention Science
When you hit cold, dense protein with high heat (the traditional method), the exterior muscle fibers seize up and squeeze out moisture. By starting low, the enzymes in the meat have time to work, and the surface moisture evaporates slowly during the first phase of cooking (especially when dry-brined).
This pre-drying is vital, paving the way for a blisteringly effective sear later. You are guaranteeing that the final result of your Prime Rib Roast is succulent.
Low and Slow: Why Temperature Control is Crucial
Consistency is everything. If your oven temperature spikes or drops during the long, slow roast, you compromise the even cooking of the meat. You must verify your oven temperature with an independent thermometer. Roasting low at 250°F (120°C) also gives you a huge buffer.
If the internal temperature ticks up a degree or two, it’s not the end of the world, unlike the traditional over high heat roast where every minute counts. We aim for 120°F (49°C) internally for medium rare, and the slow pace makes hitting that exact temperature stress free.
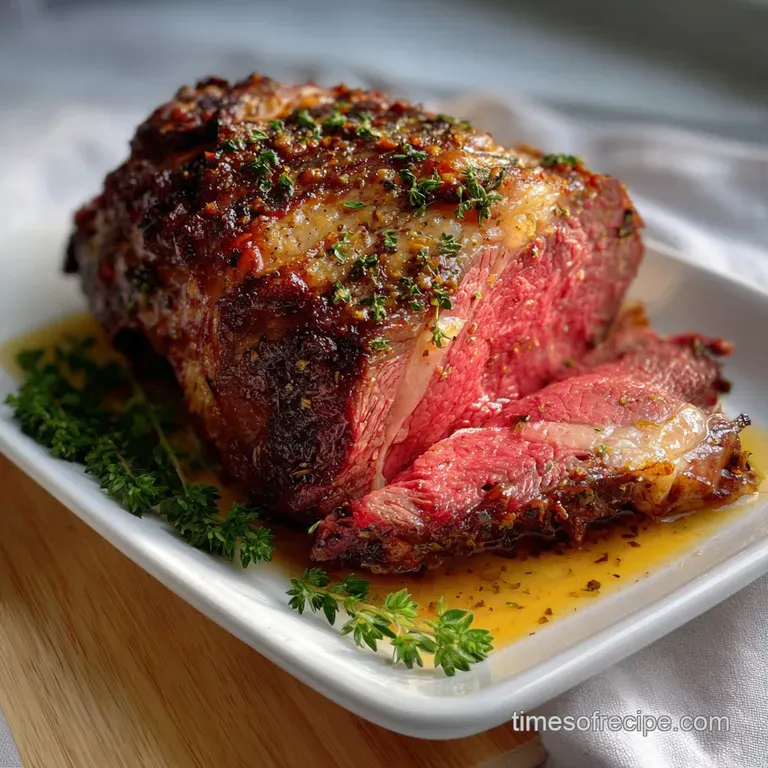
Developing the Flavor Crust: The Maillard Reaction at High Heat
After the low and slow cook, we rest the roast a non-negotiable step and then blast it at 500°F (260°C). This final, quick exposure to extreme heat causes the Maillard reaction (the browning) on the herb coated fat cap.
Because the surface of the roast is already dry from the low oven, that crust develops rapidly, turning nutty, savory, and incredibly crunchy in under 15 minutes.
This creates a brilliant contrast between the intense, crackling crust and the velvety pink interior of your finished Prime Rib Roast .
Essential Components for the Herb Crusted Prime Rib
If you want the Best Prime Rib Recipe , you have to start days ahead, not just hours. The quality of your ingredients and your patience during the 24 hour dry brine will make the difference between a good roast and an unforgettable one.
Building the Perfect Dry Rub: Salt, Pepper, and Aromatics
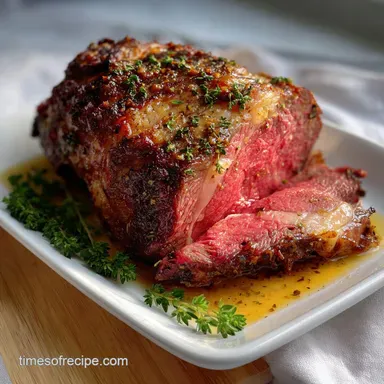
We are using a paste here, not just a simple dry rub. The softened butter provides a vehicle for the fresh herbs and minced garlic to adhere beautifully to the fat cap. When that butter melts and bubbles during the sear, it essentially fries the herbs, intensifying their flavor and locking them onto the roast.
Never skip the fresh herbs, especially rosemary and thyme; their aroma is central to this classic preparation.
Calculating Roast Size: How Much to Buy Per Guest
A good rule of thumb for a bone-in roast is to assume one rib feeds two people. For example, a 4 rib, 7.5 lb Prime Rib Roast should comfortably feed 8 to 10 guests. When in doubt, always over order slightly! Leftovers are incredible, and besides, who complains about having extra prime rib?
| Roast Size (Ribs) | Approximate Weight | Servings (Standard) |
|---|---|---|
| 2 Ribs | 4 5 lbs | 4 5 people |
| 4 Ribs | 7.5 8.5 lbs | 8 10 people |
| 6 Ribs | 11 13 lbs | 12 15 people |
Bone-In vs. Boneless: Analyzing Roasting Time and Flavor Impact
I am a bone-in purist when cooking a Standing Rib Roast Recipe . The bones act as natural insulation, especially during the low and slow cook, which helps maintain moisture and evenness.
If you use boneless, you must be extra vigilant with the thermometer, as it will cook faster and the internal temperature will fluctuate more quickly. If you choose boneless, reduce the estimated cooking time by about 20– 30 minutes.
Clarifying Fats: Why Ghee or Tallow Elevates the Sear
While softened butter is used in the rub for flavor and application ease, if you are making your own rib roast recipe ovens worthy drippings for a sauce later, consider swapping the butter for clarified butter (ghee) or beef tallow.
Since ghee has a higher smoke point, it ensures that your rub won't burn as easily during that final, brutal 500°F (260°C) sear.
Master the Method: step-by-step Reverse Sear Protocol
This is where the magic happens. Precision and patience are your best tools.
Preparation Day: Patting, Rubbing, and Tempering the Roast
- Prep the Roast: Use paper towels. Pat it until the surface feels dry, not just damp. If your butcher tied the bones on, ensure the twine is secure.
- Dry Brine: This is your secret weapon. Rub the 2 Tbsp of coarse Kosher salt all over the surface. Place the roast, uncovered and fat-cap-up, on a rack in the fridge for 24 hours. This step is non-negotiable for maximum crust development on your Prime Rib Roast Recipe Oven .
- Temper: One hour before cooking, remove the roast and let it sit on the counter. This step gently raises the internal temperature, which speeds up the initial cooking and promotes even heat absorption.
Phase One: The Initial Low-Temperature Cook
- Preheat Oven (Low): Set your oven to 250°F (120°C). Verify this temperature using a separate thermometer.
- Mix and Apply the Rub: Combine the softened butter, olive oil, garlic, fresh rosemary, thyme, flaky salt, pepper, and onion powder. Massage this glorious herb paste all over the roast, pressing the herbs firmly into the fat.
- Insert Probe: Insert your digital thermometer probe into the very center of the roast, away from any bone.
- Slow Roast: Place the roast in the oven. Roast until the internal temperature hits 120°F (49° C) . This will take 2.5 to 3. 5 hours, depending on your roast size and oven accuracy. Start checking around the 2 hour mark.
Phase Two: Resting and the Final over High heat Sear
- Remove and Rest: As soon as the thermometer hits 120°F (49°C), pull the roast out. Transfer it to a cutting board, tent it very loosely with foil, and let it rest for 30 full minutes. Do not skip this rest! This is when the internal temperature equalizes, preventing juice loss.
- Preheat Oven (High Sear): While resting, crank the oven up to 500°F (260°C). Let it preheat fully.
- The Sear: Remove the foil and place the roast back into the screaming hot oven. Sear for 10– 15 minutes. Watch the fat cap: it should sizzle dramatically and turn a deep, mahogany brown. The herbs will smell incredibly nutty and fragrant.
- Final Rest: Immediately remove the roast when the crust is perfect. Rest it again, loosely tented, for 10– 15 minutes before carving.
Measuring Doneness: The Critical Internal Temperature Guide
This is the only thing that matters. Use a fast, accurate digital thermometer.
| Desired Doneness | Pull Temperature (Low Roast) | Final Temperature (After Sear & Rest) | Sensory Description |
|---|---|---|---|
| Rare | 110 115°F (43 46°C) | 120 125°F (49 52°C) | Deep crimson, cool center |
| Medium Rare (Recommended) | 120°F (49° C) | 125 130°F (52 54° C) | Bright pink, warm center, incredibly juicy |
| Medium | 128 130°F (53 54°C) | 135 140°F (57 60°C) | Light pink throughout, firmer texture |
Troubleshooting and Expert Tips for Your Roast
Must Know Tool: Calibrating Your Leave-In Thermometer
Seriously, folks, this is crucial. Boil a pot of water and stick your thermometer into it. It should read 212°F (100°C) at sea level. If it’s off by more than a couple of degrees, you need to adjust or replace it.
Relying on an inaccurate reading is the number one way to ruin an expensive cut of Prime Rib Roast .
Handling Common Errors: Uneven Cooking Fixes
If you notice one side of the roast is heating up faster usually the side closer to the oven wall or element simply rotate your roasting pan 180 degrees. This is why having the meat tempered (starting at room temperature) is so important, as it minimizes the shock when it enters the oven.
If your roast has been sitting in the fridge for a long time, the center will be freezing cold, forcing uneven cooking.
Chef's Note: If you pull your Prime Rib Roast too early and the center is too rare after the rest, you can always put it back in the low oven (250°F) for 10- 15 minutes, checking the temperature every 5 minutes. You can't undo overcooking, but you can always cook it a little more!
Why the Post Sear Rest Is Non-Negotiable
You rested it after the low cook, so why again now? The initial rest allowed the temperature to equalize, making the meat perfectly pink. The final, post sear rest allows the newly formed, crunchy crust to settle and prevents the immediate rush of juices when you slice.
If you skip this, the carving board will look like a lake, and your beautiful slices of Prime Rib Roast will be noticeably drier.
Carving, Serving, and Preserving Leftovers
The moment of truth! Get your sharpest carving knife ready.
The Proper Carving Technique for Maximum Yield
First, stand the roast up on the bones. Using a long, sharp knife, separate the bones from the meat by cutting down close to the bones. You’ll want to save those bones for stock or simply for snacking later. Once the meat is separated, turn the roast so the grain runs parallel to your knife.
Slice across the grain into portions about 1/2 to 3/4 inch thick. Slicing against the grain ensures the meat remains tender and easy to chew.
Classic Pairings and Au Jus Preparation
You absolutely must serve this with a sharp counterpoint. Creamy, fiery horseradish is classic. If you're going all out for Christmas Lunch Main Courses, I highly recommend making some proper Creamed Onions Recipe: Velvety British Pearl Onions for Sunday Roast — they cut the richness of the fat beautifully.
As for the au jus, you just need the pan drippings! After removing the roast, pour off most of the fat, keeping about 1/4 cup of the liquid and all the flavorful browned bits. Deglaze the pan over the stovetop with a cup of dry red wine, scraping up the flavor.
Reduce slightly, and then add a cup of Prime Rib Roast stock or high-quality Ribeye Roast stock. Strain, season, and serve hot.
Safe Storage Guidelines and Freezing the Roast
Leftover Prime Rib Roast is a treasure! Store tightly wrapped slices in an airtight container in the refrigerator for up to 3 4 days. If you have large quantities, it freezes very well.
Wrap slices individually in plastic wrap, then place them in a freezer safe zip-top bag, pushing out all the air. It will keep well for up to three months.
Reheating Prime Rib Without Drying It Out
Never reheat the slices in the microwave unless you want tough, gray shoe leather. The best way is low and slow. Place the slices in an oven safe dish, pour a few spoonfuls of au jus or stock over them, and cover tightly with foil.
Reheat in a 250°F (120°C) oven for about 15– 20 minutes, or until just warmed through. This maintains moisture and keeps the texture perfect.
Making a magnificent Prime Rib Roast is definitely a project, but it is one hundred percent worth the effort. Follow these steps, trust your thermometer, and enjoy the silence that falls over your table when everyone takes that first, perfect bite.
This Prime Rib Roast Recipe Oven method truly delivers the ultimate holiday centerpiece.

Recipe FAQs
Why is resting the prime rib so critical, and how long should I rest it?
Resting is non-negotiable as it allows the contracted muscle fibers to relax and redistribute the internal moisture. If you skip this step, all the flavourful juices will run out when you slice, resulting in a dry roast.
Rest the prime rib loosely tented with foil for a minimum of 20 to 30 minutes, depending on the size of the roast.
What internal temperature should I target for perfect medium rare results?
For medium rare, you should pull the roast out of the oven when the internal temperature reaches 120°F (49°C) to 125°F (52°C) before the final sear. Remember that the temperature will rise by 5 10 degrees during the resting period (carry over cooking), achieving the ideal final serving temperature of 130°F (54°C).
Use a reliable probe thermometer inserted into the thickest part of the meat, avoiding bone contact.
How do I prevent the herb crust from burning during the final reverse sear?
If your crust is burning, your searing temperature might be too high, or the meat was too hot going into the sear. Ensure the roast rests briefly (10 15 minutes) after the slow roast, allowing the external temperature to drop slightly before the high heat blast.
Sear only for 5 8 minutes total, flipping the roast frequently to ensure even browning without scorching the herb layer.
My prime rib turned out dry and gray, what went wrong?
Dryness is almost always caused by overcooking, which occurs when the internal temperature exceeds 140°F (60°C), forcing the meat to release excessive moisture. The reverse sear is forgiving, but relying on time instead of a thermometer is risky for large roasts.
Additionally, insufficient resting time prevents the juices from setting, which can mimic a dry texture upon slicing.
Can I use the reverse sear method on other cuts of beef?
Yes, the reverse sear method works wonderfully for many thick cuts of beef, particularly a large Beef Tenderloin (Chateaubriand) or a dense bone-in New York Strip roast. The slow, low initial cook ensures the interior is evenly heated before the final high heat sear delivers the perfect golden crust.
You must adjust the initial cooking time based on the specific shape and density of the substitute cut.
Should I buy USDA Prime or Choice, and should I tie the roast?
Always look for "USDA Prime" or "Choice" grade beef for maximum marbling and tenderness, as quality fat is essential to the flavour profile of a prime rib. While tying is not strictly necessary if the roast is uniform, it ensures a tight cylindrical shape that promotes even cooking throughout the reverse sear process.
Ask your butcher to remove the chine bone and tie it back onto the roast for easier carving later.
How should I store leftover prime rib, and how long does it last?
Store leftover prime rib sliced or whole in an airtight container in the refrigerator for 3 to 4 days. When reheating, avoid high heat which will dry it out; instead, warm the slices gently in au jus or broth in a low oven (250°F / 120°C).
Freezing the cooked meat is not recommended as it significantly degrades the texture and quality upon thawing.
Reverse Seared Prime Rib Recipe
Ingredients:
Instructions:
Nutrition Facts:
| Calories | 1129 kcal |
|---|---|
| Protein | 47.0 g |
| Fat | 100.0 g |
| Carbs | 3.0 g |
