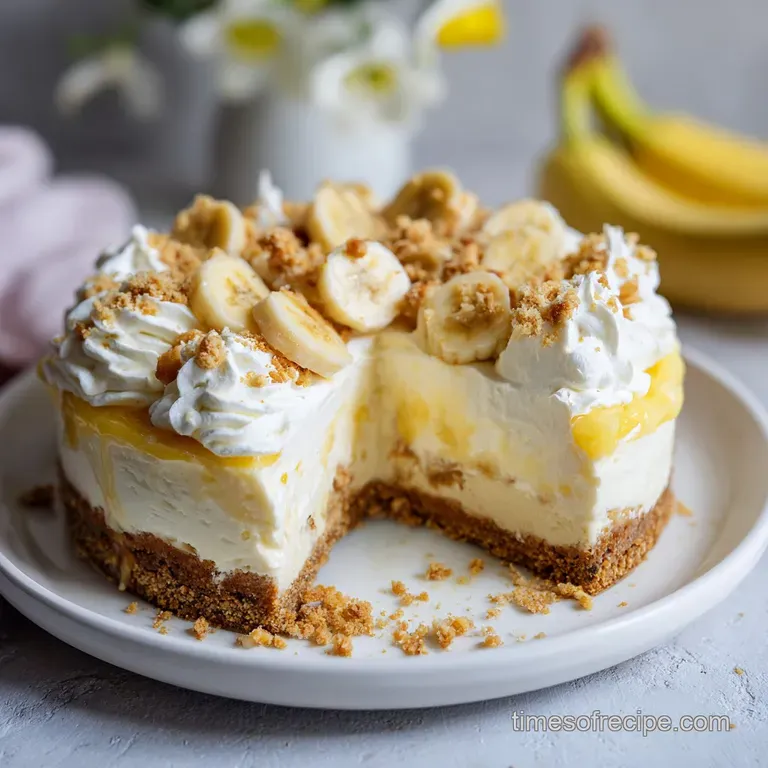
Banana Pudding Cheesecake: Silky and Baked
- Time: Active 30 minutes, Passive 6 hours 15 mins, Total 6 hours 45 mins
- Flavor/Texture Hook: Silky custard meets a buttery, wafer shatter crust.
- Perfect for: Weekend dinner parties or a magical birthday alternative.
- Crafting the Perfect Banana Pudding Cheesecake
- Why This Specific Recipe Works
- Essential Recipe Specs and Details
- Ingredient Deep Dive and Science
- Tools Required for Success
- Method for a Stunning Finish
- Fixing Common Texture Mistakes
- Smart Dietary and Flavor Subs
- Storing for Lasting Freshness
- Beautiful Serving and Presentation
- Debunking Baking Myths
- Recipe FAQs
- 📝 Recipe Card
Crafting the Perfect Banana Pudding Cheesecake
Can you smell that? It is the scent of toasting butter and vanilla wafers hitting the oven- a fragrance that instantly pulls me back to my aunt's kitchen. For years, I struggled with banana desserts that turned either grey or unpleasantly mushy.
I wanted that iconic pudding flavor but in a form that didn't just slide off the plate. I spent an entire summer testing ratios, trying to find the magic point where the cream cheese holds its shape while staying light as a cloud.
The secret was hiding in the fruit itself. We often think more banana means more flavor, but too much moisture turns a cheesecake into a soggy mess. I finally realized that using overripe, mashed bananas combined with a touch of citrus creates a bright, tropical aroma that cuts through the richness of the cream cheese.
When you pull this out of the oven, the house smells like a warm vanilla hug, and the first bite is pure magic.
We are going to skip the box mixes and focus on real ingredients here. You will learn how to stabilize the fruit so the filling stays pale and beautiful, and how to get that signature Nilla Wafer crust to stay crisp instead of turning into wet cardboard. It is a simple process, but the results are absolutely stunning.
Let's get into the science of why this actually works.
Why This Specific Recipe Works
- Enzymatic Control: The lemon juice prevents the polyphenol oxidase in bananas from reacting with oxygen, keeping the filling a pale, creamy yellow instead of turning grey.
- Starch Stabilization: Naturally occurring starches in overripe bananas act as a secondary binder alongside the eggs, creating a more cohesive, silky crumb.
- Osmotic Balance: Mixing the sugar directly into the cream cheese first ensures the fat molecules are coated, preventing the banana moisture from weeping during the bake.
- Protein Elasticity: Using room temperature eggs allows the proteins to emulsify perfectly with the fats, ensuring the cake rises evenly without unsightly cracks.
| Method | Time | Texture | Best For |
|---|---|---|---|
| Traditional Oven | 1 hours 15 mins | Velvety and dense | Dinner parties |
| Water Bath | 1 hours 30 mins | Ultra silky, no cracks | Professional look |
| No Bake Style | 30 minutes | Light and airy | Hot summer days |
Choosing the right method depends on how much time you have. While the no bake version is fast, the traditional oven method creates a deep, caramelized flavor in the crust that simply cannot be beat. If you are looking for that classic "shatter" in the wafer base, the oven is your best friend.
For another elegant option that uses a similar creamy technique, you might want to try The Tiramisu Cheesecake Recipe which balances coffee and mascarpone beautifully.
Essential Recipe Specs and Details
Before we start mixing, let's look at how we can optimize our ingredients. Freshness matters, but for bananas, "ugly" is actually better. You want skins that are covered in brown spots because that is where the sugar and aroma are concentrated.
| Ingredient | Science Role | Pro Secret |
|---|---|---|
| Cream Cheese | Structural base | Use full fat only for the proper emulsion. |
| Mashed Bananas | Flavor and moisture | Mash until completely liquid to avoid lumps. |
| Sour Cream | Acidic tenderizer | Adds a subtle tang that balances the sugar. |
| Nilla Wafers | Starch foundation | Pulse into fine crumbs for a tighter crust. |
Using high-quality cream cheese is non negotiable here. Lower fat versions contain more water and stabilizers, which can lead to a rubbery texture that won't melt on your tongue. Trust me, the full fat version is where the magic happens.
Ingredient Deep Dive and Science
When you are at the store, look for the most yellow speckled bananas you can find. If they are still green, they won't have the sugar content needed to flavor the dense cream cheese.
If you're in a rush, you can pop them in a 150°C oven for 15 minutes until the skins turn black- this mimics the ripening process perfectly.
- 2.5 cups Nilla Wafer crumbs (Substitute: Graham crackers if needed). Why this? Provides the authentic vanilla forward flavor of classic pudding.
- 6 tbsp unsalted butter, melted (Substitute: Salted butter, but skip the extra salt). Why this? Binds the crumbs and adds a rich, toasted aroma.
- 2 tbsp granulated sugar (Substitute: Brown sugar for a caramel note).
- 0.25 tsp salt (Substitute: Sea salt).
- 32 oz full fat cream cheese (Substitute: Mascarpone for a richer finish). Why this? Provides the essential "tang" and structure.
- 1 cup granulated sugar (Substitute: Cane sugar).
- 1 cup overripe bananas, mashed (Substitute: Banana puree). Why this? The primary flavor agent and natural sweetener.
- 0.25 cup sour cream (Substitute: Full fat Greek yogurt).
- 1 tsp pure vanilla extract (Substitute: Vanilla bean paste).
- 0.5 tsp fresh lemon juice (Substitute: Lime juice). Why this? Acid prevents browning and balances the sweetness.
- 4 large eggs (Substitute: 1 cup liquid egg substitute).
- 1 cup heavy whipping cream (Substitute: Coconut cream).
- 3 tbsp powdered sugar (Substitute: Honey for the topping).
- 15 whole Nilla Wafers (For garnish).
- 1 fresh banana, sliced (For garnish).
| Fresh Ingredient | Shortcut Swap | Flavor Impact |
|---|---|---|
| Mashed overripe bananas | Banana extract | Less texture, more "candy" flavor. |
| Homemade whipped cream | Whipped topping tub | More stable but lacks dairy richness. |
| Real lemon juice | Bottled lemon juice | Higher acidity, less bright aroma. |
While shortcuts are tempting, the fresh banana and lemon juice combination is what makes this Banana Pudding Cheesecake stand out from a store-bought version. The aroma of fresh citrus hitting the sweet fruit is a sensory experience you don't want to skip.
Tools Required for Success
You don't need a professional kitchen, but a few specific items will make your life much easier. A 9 inch springform pan is essential- trying to lift a cheesecake out of a standard cake pan is a recipe for heartbreak.
- Springform Pan (23cm): The removable sides ensure your edges stay clean and sharp.
- Stand Mixer: Using a KitchenAid or similar mixer helps incorporate air without overworking your arms.
- Food Processor: Necessary for turning those wafers into a fine, sandy dust.
- Rubber Spatula: For scraping the bottom of the bowl to ensure no cream cheese lumps remain.
- Large Roasting Pan: If you choose the water bath method for a crack free finish.
Chef's Note: If you don't have a food processor, put the wafers in a gallon sized bag and use a rolling pin. It is actually quite therapeutic to crush them by hand, and it gives the crust a slightly more rustic, chunky texture.
Method for a Stunning Finish
1. Constructing the Foundation
Preheat your oven to 180°C. Mix the 2.5 cups Nilla Wafer crumbs, 6 tbsp melted butter, 2 tbsp sugar, and salt until it feels like wet sand. Press this firmly into the bottom and 1 inch up the sides of your springform pan.
Bake for 10 minutes until the kitchen smells like toasted vanilla.
2. Crafting the Banana Emulsion
In your mixer, beat the 32 oz cream cheese and 1 cup sugar at medium speed. Stop and scrape the bowl twice. Note: Lumps now will stay lumps forever, so be thorough. Add the 1 cup mashed bananas, sour cream, vanilla, and lemon juice. Mix until the batter is silky and pale yellow.
3. The Controlled Bake
Add the 4 eggs one at a time, mixing on the lowest speed just until combined. Stop mixing the moment the yellow streaks disappear to prevent excess air bubbles. Pour the batter over your cooled crust and smooth the top.
4. The Critical Cooling Phase
Bake at 160°C for 1 hours 15 mins. The edges should be set, but the center should still have a slight "jiggle" like gelatin. Turn off the oven, crack the door, and let it sit for 1 hour.
Note: This gradual cooling prevents the surface from shocking and cracking.
5. The Finishing Touches
Chill the cake in the fridge for at least 6 hours. Before serving, whip 1 cup heavy cream and 3 tbsp powdered sugar until stiff, velvety peaks form. Pipe this onto the chilled cake and garnish with the 15 whole wafers and fresh banana slices.
Fixing Common Texture Mistakes
Why Your Cheesecake Cracked
Cracks usually happen because of a sudden temperature change or over beating the eggs. When you whip too much air into the eggs, the cake rises like a souffle and then collapses as it cools, tearing the surface.
Why Your Crust is Soggy
If the butter isn't fully incorporated or if the crust wasn't pre baked long enough, the moisture from the filling will seep down. Always make sure your crust is "set" and dry to the touch before adding the batter.
| Problem | Root Cause | Solution |
|---|---|---|
| Lumpy Filling | Cold cream cheese | Ensure cheese is room temp for 2 hours. |
| Grey Color | No acid used | Always add the lemon juice to the mash. |
| Soft Center | Underbaked | Bake until only the inner 2 inches jiggle. |
- ✓ Always use room temperature ingredients to ensure a smooth emulsion.
- ✓ Wrap the bottom of your springform pan in double foil if using a water bath.
- ✓ Don't open the oven door during the first 60 minutes of baking.
- ✓ Run a thin knife around the edge of the pan after the initial cooling hour.
- ✓ Let the cake chill completely before attempting to slice it.
If you love the combination of fruit and cream cheese but want something even more vibrant, you should check out the Red Velvet Strawberry recipe for a stunning color contrast.
Smart Dietary and Flavor Subs
To Make it gluten-free
Swap the Nilla Wafers for a gluten-free vanilla cookie brand. Most natural food aisles carry these, and they provide the same crunch. Double check that your vanilla extract is also certified gluten-free, as some cheaper brands use grain alcohol.
For a No Bake "Bites" Version
If you want a tiny treat, you can mix the cheesecake filling (minus the eggs) with a bit of extra whipped cream. Pipe them into mini wafer "cups" or small jars for a party friendly Pudding Cheesecake experience that doesn't require the oven.
To Avoid a Rubbery Texture
If you find your cheesecakes are often too "firm," replace the sour cream with heavy cream. This increases the fat content and lowers the protein density, resulting in a texture that is closer to a mousse than a traditional New York style block.
Storing for Lasting Freshness
Cheesecake is actually better on the second day. The flavors have time to marry, and the banana essence becomes more pronounced. You can store this in the fridge for up to 5 days. Just make sure it is tightly covered with plastic wrap so it doesn't absorb the scents of other foods in your refrigerator.
For long term storage, this freezes beautifully. Wrap the baked and cooled (but undecorated) cake in plastic wrap, then a layer of foil. It will stay fresh for up to 2 months. When you're ready for a treat, thaw it overnight in the fridge. Do not use the microwave, or you'll end up with a puddle!
To practice zero waste, save your banana peels! You can soak them in water for 24 hours to create a nutrient rich "tea" for your houseplants. Also, any leftover wafer crumbs can be toasted with a little cinnamon and sprinkled over yogurt or oatmeal the next morning.
Beautiful Serving and Presentation
- The Clean Slice: Dip a sharp knife in hot water and wipe it dry between every single cut. This ensures those professional, mirror smooth edges.
- Banana Preservation: If you're topping with fresh banana slices, toss them in a little extra lemon juice first so they don't turn brown before the party starts.
- Texture Contrast: Add the whole Nilla Wafers just before serving so they stay crispy against the soft whipped cream.
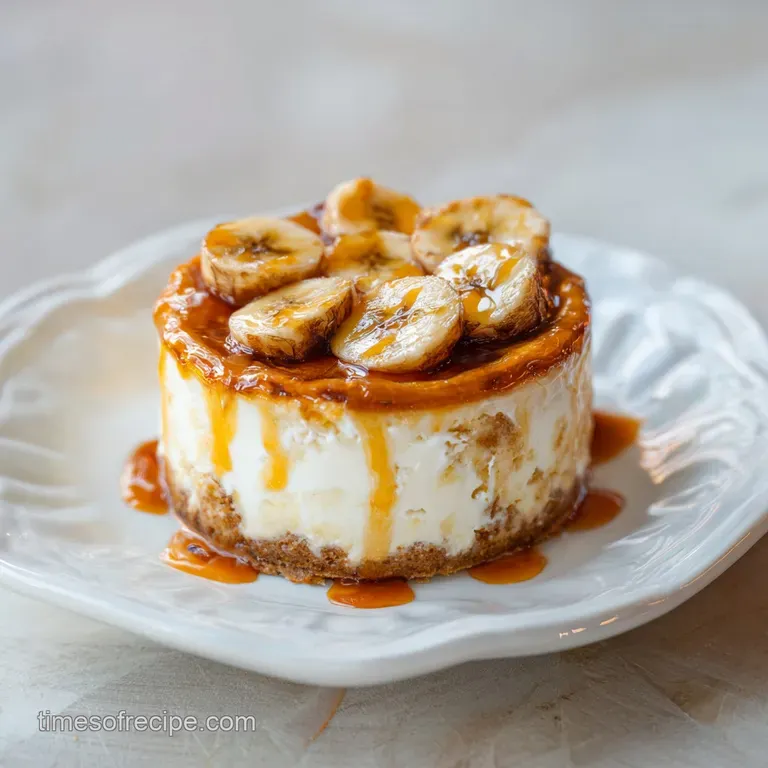
Searing or "torching" the banana slices with a bit of sugar (like a creme brulee) adds a sophisticated, smoky aroma that pairs perfectly with the vanilla. If you're feeling fancy, a drizzle of salted caramel over the top creates an incredible flavor profile that guests will talk about for weeks.
For another easy to share dessert that has that same comforting vibe, take a look at the Strawberry Cheesecake Dump Cake recipe — it's perfect for when you need a stunning result with even less active work.
Debunking Baking Myths
Myth: You must use a water bath for a good cheesecake. Truth: While a water bath helps, a low and slow temperature (160°C) combined with a gradual cooling period in the oven will produce a beautiful, crack free result without the risk of water leaking into your crust.
Myth: Over mixing the batter makes it fluffier. Truth: Over mixing incorporates too much air, which causes the cheesecake to rise and fall, leading to cracks and a grainy texture. You want a dense, creamy emulsion, not a sponge cake.
Myth: Bananas must be yellow to bake with. Truth: Yellow bananas lack the concentrated sugars and aromatic esters found in spotted or brown bananas. For the best flavor, use fruit that looks like it's a day away from the compost bin!

Recipe FAQs
Is it true that using overripe bananas will make the cheesecake filling turn grey?
No, this is a common misconception. Browning occurs due to oxidation, but using overripe bananas provides superior flavor and texture. To prevent grey discoloration, add fresh lemon juice, as the acid stabilizes the fruit.
What is the most important step to ensure the crust stays crisp after baking?
Pre-bake the crust for 10 minutes until fragrant. The initial bake sets the fat and starch structure of the wafer crumbs, creating a barrier against the moist cheesecake batter.
How to achieve a silky smooth, lump free cheesecake batter?
Combine cream cheese and sugar first until completely smooth before adding wet ingredients. This ensures the fat molecules are fully coated, which prevents lumps from forming when the cooler liquids are introduced later.
Must I use a water bath when baking this cheesecake?
No, a water bath is optional for this recipe. Baking low and slow at 160°C combined with a gradual cooling period in the turned off oven is often sufficient to prevent cracks.
What is the secret to achieving the signature soft texture rather than a rubbery one?
Avoid overmixing the eggs into the batter. Once the eggs are added, mix only until the yellow streaks disappear to prevent incorporating excess air, which causes the cake to rise too quickly and become tough upon cooling.
How long does the banana pudding cheesecake need to chill before topping?
Chill the cheesecake for a minimum of six hours, ideally overnight. This allows the custard structure to fully set, resulting in the clean slices you see in professional photographs.
Can I use this recipe to make individual servings, similar to a bite sized dessert?
Yes, you can easily adapt this for individual servings. Mix the cheesecake filling minus the eggs with extra whipped cream and pipe it into small wafer cups or jars for a no-bake treat that rivals our Peanut Butter Blossom Cookies recipe in portability.
Banana Pudding Cheesecake

Ingredients:
Instructions:
Nutrition Facts:
| Calories | 587 calories |
|---|---|
| Protein | 7.9g |
| Fat | 39.5g |
| Carbs | 47.2g |
| Fiber | 1.2g |
| Sugar | 34.6g |
| Sodium | 342mg |
