Honeybun Cake: the Ultimate Recipe for Sticky Swirl Perfection
- Welcoming the Ultimate Homestyle Comfort: The Honeybun Cake Revelation
- The Science of Swirl: Why This Honeybun Cake Recipe Achieves Perfection
- Essential Pantry List: Ingredients for the Moistest Honeybun Cake
- Mastering the Sticky Swirl: Step-by-Step Baking Method
- Expert Baking Hacks and Troubleshooting Your Honey Swirl
- Keeping the Comfort: Optimal Storage and Freezing Guide
- Elevating the Experience: Perfect Pairings and Presentation
- Recipe FAQs
- 📝 Recipe Card
Welcoming the Ultimate Homestyle Comfort: The Honeybun Cake Revelation
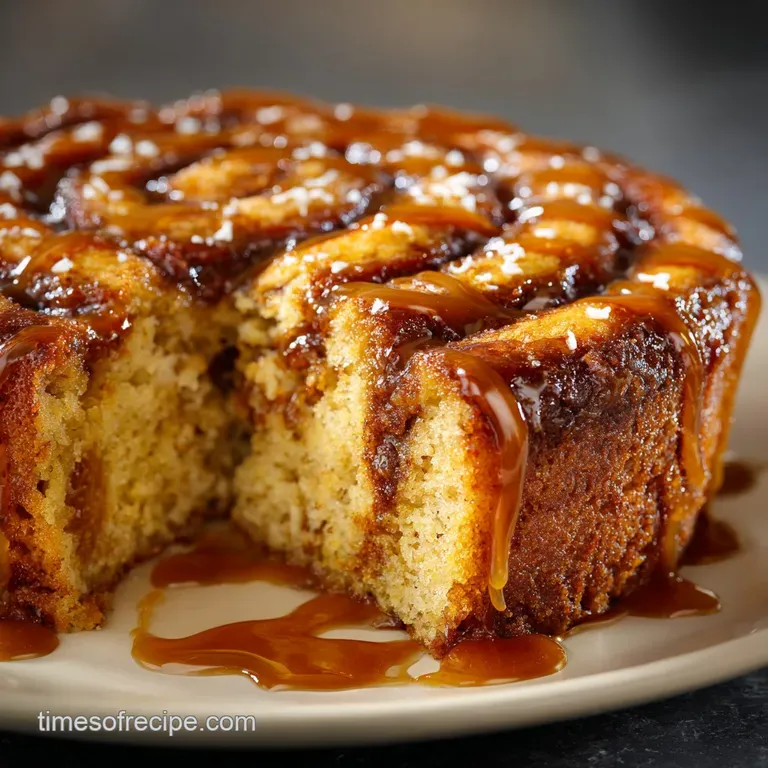
Can we just pause for a second and talk about that smell? When this Honeybun Cake bakes, your entire home transforms, suddenly smelling like the best bakery on earth. That warm, sticky ribbon of cinnamon and brown sugar melts into the moist sour cream cake, creating a texture that is simultaneously fluffy and beautifully gooey.
This is pure, unadulterated comfort food that begs for a strong cup of coffee.
Honestly, this particular honeybun cake recipe is a total lifesaver for gatherings, mainly because it uses everyday pantry ingredients. It comes together much faster than you think, relying on simple mixing techniques instead of finicky steps.
Plus, because we're baking it in a 9x13 pan, it feeds a crowd effortlessly and affordably.
Forget any box mixes you might have used before; we are making the real, glorious deal from scratch today, baby. I’ve refined the process, ensuring that signature sticky swirl stays perfectly centered instead of sinking to the bottom (a mistake I made approximately five times).
Let’s crack on and guarantee you nail the sticky swirl perfection.
The Science of Swirl: Why This Honeybun Cake Recipe Achieves Perfection
Beyond the Box: Defining the Texture and Flavor Profile
This isn’t just a spiced cake; it’s a delicate balance. We are aiming for a cake that is moist enough to stand up to that heavy, gooey cinnamon filling without collapsing. The subtle tang of the sour cream keeps the overall sweetness from being overwhelming, giving the cake a complex depth.
The glaze sets up shiny and firm, exactly like a real store-bought honey bun, but tasting a million times better.
A Dessert for Every Occasion: Ease Meets Elegance
The beauty of this cake is its minimal complexity and maximum payoff. You don't need fancy equipment, just a stand mixer or a good hand mixer to get the creaming step right. It truly is elegant enough for a holiday breakfast table, yet simple enough to whip up on a random Tuesday afternoon.
It’s accessible baking that delivers jaw-dropping results.
Is This Recipe Beginner Friendly? Assessing the Difficulty
Absolutely, 100% yes, this recipe is beginner friendly. The main technique you need to master is the creaming method whipping butter and sugar until fluffy. After that, it’s just alternating wet and dry ingredients.
The layering technique is simple, and the swirl is meant to be rustic and fast, not precise.
The Magic of Sour Cream: Ensuring Superior Moisture
Sour cream is the secret weapon in so many of my favorite bakes. It does two critical things: adds fat, which equals moisture, and the acid tenderizes the gluten in the flour. This combination results in an incredibly tender, soft crumb that stays fresh for days.
Don't skip the sour cream, or the cake will be dry and crumbly.
Density Control: Achieving the Perfect Cinnamon Ribbon Suspension
We achieve a perfectly suspended cinnamon ribbon by making the filling thick enough to sit on the first layer of batter without sinking immediately. The melted butter in the filling helps bind the brown sugar and cinnamon into a heavy paste, which resists gravity just long enough for the cake batter to bake up around it.
This is why we only swirl lightly.
Glaze Chemistry: Setting the Shiny, Non-Sticky Finish
The key to that signature shiny glaze is using a mix of powdered sugar and whole milk or heavy cream. Applying the glaze while the cake is still warm encourages the sugars to partially melt and soak into the top layer.
This results in a glaze that sets nicely, isn't totally rock hard, and retains that sticky, delicious quality.
Essential Pantry List: Ingredients for the Moistest Honeybun Cake
Trust me on this: having all your ingredients at room temperature before you start is non-negotiable. That includes the butter, eggs, and sour cream. If anything is cold, your batter will curdle and your cake will turn out heavy.
Key Ingredient Deep Dive: Selecting the Right Fat (Butter vs. Oil)
We use both butter and oil here for a reason. Butter provides amazing flavor that classic, rich bakery taste. The neutral oil, however, ensures the cake stays incredibly moist, acting as a backup fat that liquid even when the cake cools. Using both gives you the best of flavor and texture.
Dairy Swaps: Cultured Buttermilk or Greek Yogurt as Sour Cream Alternatives
Sour cream is truly fantastic, but life happens. If you’re caught short, you have options.
| Ingredient | Standard Amount | Viable Substitutes |
|---|---|---|
| All-Purpose Flour | 2 ½ cups | Measure for-measure gluten-free Blend |
| Unsalted Butter | 1 cup (total) | Salted butter (Omit salt from dry mix) |
| Granulated Sugar | 1 ½ cups | Caster sugar (finer grain) |
| Sour Cream | 1 cup | Full fat Greek yogurt or ½ cup Buttermilk + ½ cup Cream |
| Eggs | 3 large | Commercial egg replacement (Check package for equivalent) |
| Brown Sugar | 1 cup | Dark brown sugar for deeper molasses flavor |
Customizing the Swirl: Spice Blends Beyond Just Cinnamon
While cinnamon is classic, don't be afraid to enhance that swirl. I sometimes sneak in a quarter teaspoon of ground nutmeg and a pinch of cardamom. This subtle addition deepens the overall flavor, giving the cake a more complex, almost coffee cake feel. Experiment a little!
Measurement Accuracy: Why Weight Matters in Baking
If you really want to achieve consistently perfect results, stop using cups for flour. Fluffing flour before scooping is key, but weighing it is better. If you pack too much flour into your measuring cup, you will end up with a dry cake that cracks under the weight of the filling.
Invest in a cheap kitchen scale, seriously.
Mastering the Sticky Swirl: step-by-step Baking Method
This process is straightforward, but speed and temperature control are paramount. Don't rush the creaming step, but don't overmix the batter once the flour goes in.
Phase 1: Preparation and Dry Mix
- Preheat & Prep: Get that oven heated to 350°F (175°C) right away. Grease and lightly flour your 9x13 pan perfectly; nothing is worse than a stuck cake.
- Combine Dry Ingredients: Whisk the flour, baking powder, and salt together vigorously in a medium bowl. Set this bowl aside, ready for action.
Phase 2: Mixing the Cake Batter
- Cream Fats and Sugar: Cream the softened butter, granulated sugar, and oil on medium speed until the mixture is visibly pale and incredibly fluffy. This should take a solid 3 to 4 minutes. Scrape the bowl down often, forcing everything to mix evenly.
- Add Eggs and Vanilla: Introduce the eggs one at a time, mixing well after each addition until just incorporated. Follow this with the vanilla extract.
- Alternate Wet/Dry: This is the most crucial part! Reduce your mixer speed to low. Add half the flour mixture, mix until just blended. Add the cup of sour cream, mixing only slightly. Finish with the remaining flour, mixing until just no streaks of flour remain. Stop immediately!
Phase 3: Creating the Swirl and Baking
- Make the Filling: Whisk the brown sugar, cinnamon, and melted butter in a small bowl until it forms a thick, gooey, beautiful paste. It should smell nutty and rich.
- Layer the Cake: Spread exactly half of the cake batter into the prepared pan. Don't worry about it being perfectly smooth; just make sure it’s roughly even.
- Add the Filling: Carefully dollop the entire cinnamon filling mixture over the batter. Use a spatula to spread it gently, trying not to disturb the bottom layer. Leave about a half inch border around the edges.
- Top Layer: Gently spoon the remaining cake batter over the filling layer, like you're putting patchwork on a quilt. Slowly and carefully spread it to cover the cinnamon entirely.
- The Swirl: Grab a small butter knife and gently insert it about half an inch deep. Move it in a wide, slow figure eight motion across the length of the pan 4 or 5 times max. The swirl should be subtle; you are just marrying the layers, not mixing a marble cake.
- Bake: Bake for 45– 50 minutes. Test with a wooden skewer in the center it should come out clean or with a few moist crumbs.
- Cool: Let the cake cool on a rack for 15 minutes before glazing.
Phase 4: Glazing
- Prepare the Glaze: Sift the powdered sugar! Seriously, do it. Whisk it with the milk/cream, vanilla, and that tiny pinch of salt until perfectly smooth. It needs to be thick but easily pourable.
- Glaze the Cake: While the cake is still warm (you should be able to touch the pan comfortably), pour the glaze evenly over the top. Let it drip down the sides it's supposed to be messy and beautiful.
- Serve: Wait until the glaze sets, about 10– 15 minutes, before slicing.
Expert Baking Hacks and Troubleshooting Your Honey Swirl
Stage 1: Creaming the Batter to Voluminous Heights
When creaming the butter and sugar, you are physically incorporating air into the fat. If you cut this step short, your cake will be dense. The mixture should turn from dark yellow to a pale ivory color and look significantly increased in volume. This step is responsible for 80% of your lift.
Stage 2: Layering Technique for a Centered Swirl
My biggest mistake when I first started making honeybun cake was dumping the top layer of batter right onto the filling. Don't do that! Use a cookie scoop or spoon to dollop the top batter evenly over the filling first. This prevents the heavy cinnamon layer from being pushed down to the pan bottom.
Stage 3: The Doneness Test (When is Cake Properly Baked?)
Testing cake doneness can be tricky because of that dense cinnamon filling. Avoid testing directly where the swirl is thickest. Instead, choose a spot slightly off-center where you know it’s mostly just cake batter. The test toothpick should come out clean or with fluffy, moist crumbs, but never wet batter.
Stage 4: Preparing and Applying the Vanilla Glaze
The milk or cream you use here is important. Using heavy cream results in a slightly richer, thicker glaze that sets beautifully. Whole milk works fine, but avoid skim milk, as it can sometimes make the glaze watery.
Chef's Note: If your glaze is too thin, add another tablespoon of sifted powdered sugar. If it’s too thick, add milk a teaspoon at a time until you reach that slow, viscous flow.
Preventing a Sunken Swirl Center
The swirl sinks for two main reasons: 1) The filling wasn't thick enough (add a tablespoon of flour to the filling next time), or 2) The cake batter was overmixed and couldn't support the filling's weight. Remember, mix the final batter just until the flour disappears.
Why Your Glaze Might Be Too Thin or Too Thick
This is almost always a measurement issue. If you didn't sift your powdered sugar, you might have incorporated too much air, making it seem like you used enough when you didn't. Always start with less liquid than the recipe calls for, then add liquid slowly until the glaze coats the back of a spoon thickly.
Keeping the Comfort: Optimal Storage and Freezing Guide
Short Term Freshness: Countertop vs. Refrigerator Life
Because this cake is so incredibly moist, it holds up brilliantly at room temperature. Keep it tightly covered in its 9x13 pan, and it will stay fresh for 2 3 days on the counter. If you need it to last longer, transfer it to the refrigerator; it will keep well for up to a week.
Just make sure it’s fully sealed so the cake doesn't dry out.
Preparing Honeybun Cake for Long Term Freezing (Glazed vs. Unglazed)
If you plan to freeze, I recommend freezing the cake unglazed . Let the cake cool completely, then wrap the entire slab tightly in plastic wrap, followed by a layer of aluminum foil. It keeps well for up to 3 months. Glaze it fresh once you thaw it for the best result.
The Safest Way to Thaw and Reheat
Thawing should happen slowly in the refrigerator overnight. Once thawed, you can slice and reheat individual portions. Place a slice on a plate and microwave for 15 20 seconds to bring back that warm, gooey center, or pop it in a 300°F oven for about 5 minutes.
The warm cake is truly unmatched!
Elevating the Experience: Perfect Pairings and Presentation
Beverage Companions: Coffee, Tea, and Milk Pairings
This rich cake needs something sturdy to balance its sweetness. A strong black coffee is the perfect complement. For a weekend breakfast treat, I sometimes serve it alongside a stack of my OldFashioned Pancakes: The Ultimate Fluffy Buttermilk Stack , just to make sure everyone leaves completely full and happy. It also goes beautifully with a tall, cold glass of milk.
Dessert Variations: Serving Warm vs. Chilled
While it’s good cold, serving this cake slightly warm is the way to go. The warmth softens the cinnamon swirl, making it even gooier and more reminiscent of a fresh honey bun. Try it warm with a scoop of premium vanilla bean ice cream melting over the top.
Garnishes That Complement the Cinnamon Swirl
You don't need much, because the glaze is already doing a lot of heavy lifting. However, a light dusting of extra cinnamon on top of the fresh glaze looks beautiful. You could also sprinkle the cake with finely chopped toasted pecans or walnuts right after applying the glaze for a contrasting crunch.

Recipe FAQs
How should I store the Honeybun Cake, and how long does it last?
Store the cooled cake, tightly covered with plastic wrap or in an airtight container, at room temperature for up to 3 days. While the sour cream keeps the cake moist, if your kitchen is excessively warm, you may refrigerate it; however, ensure it is brought back close to room temperature before serving for the best texture.
Why did my Honeybun Cake turn out dry?
Dryness in baked goods is typically caused by overmixing the batter or overbaking the cake. Ensure you mix the flour just until combined and that you only bake until a toothpick inserted into the center (avoiding the cinnamon swirl) comes out clean.
Start checking for doneness 5 minutes earlier than the recipe suggests.
My powdered sugar glaze is too runny. How do I fix it?
To thicken a runny glaze, simply whisk in an extra tablespoon of sifted powdered sugar at a time until the desired thick, slow dripping consistency is achieved. Conversely, if the glaze is too thick, thin it slightly by adding milk or water a single teaspoon at a time. The glaze should fully coat the back of a spoon.
Can I substitute the sour cream for something else?
Yes, full fat Greek yogurt is an excellent substitute, as it provides a similar moisture level and acidity crucial for the cake’s tender crumb. Ensure the yogurt is plain and full fat, as low-fat alternatives often lack the necessary richness to achieve the classic honeybun texture.
You may also use buttermilk, though the final cake may be slightly less dense.
How do I prevent the cinnamon swirl layer from sinking to the bottom?
To prevent the dense filling from sinking, ensure the cake batter is thick enough to support the weight of the swirl. Before layering, toss the brown sugar and cinnamon mixture with about one teaspoon of all-purpose flour; this slight coating helps the filling adhere better to the surrounding batter.
Additionally, do not press the filling too aggressively when creating the swirl pattern.
Can I freeze the Honeybun Cake?
Yes, this cake freezes beautifully, but it is best to freeze it before applying the powdered sugar glaze. Once the cake has cooled completely, wrap it tightly first in plastic wrap and then in aluminum foil, and store it for up to 3 months.
Thaw the cake overnight in the refrigerator, and then apply the fresh glaze just before serving.
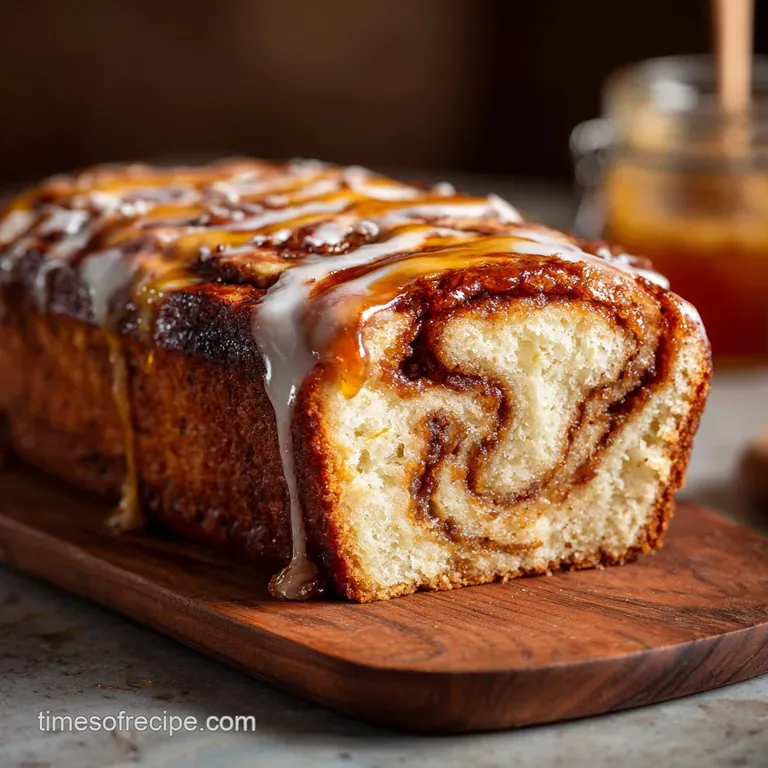
Can I bake this recipe in a Bundt pan instead of a 9x13 dish?
Absolutely, this recipe fits perfectly in a standard 10-cup Bundt pan, creating an impressive presentation. Be aware that the baking time will increase significantly, generally requiring 50 to 60 minutes, so rely on the toothpick test for doneness.
Ensure you grease the pan meticulously, as the sticky filling and glaze can make release difficult.
Classic Sticky Honeybun Cake Recipe

Ingredients:
Instructions:
Nutrition Facts:
| Calories | 799 kcal |
|---|---|
| Protein | 7.6 g |
| Fat | 14.8 g |
| Carbs | 159.0 g |
