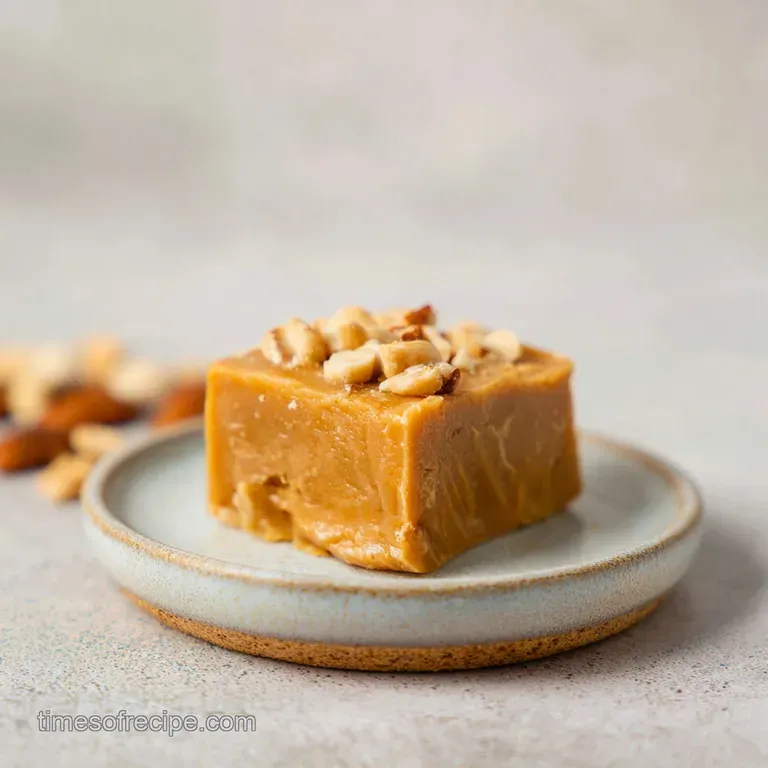
Creamy Peanut Butter Fudge Recipe Easy
- Time: Active 5 minutes, Passive 2 hours, Total 2 hours 5 minutes
- Flavor/Texture Hook: Supple, cloud like creaminess with a deeply toasted nut finish
- Perfect for: Holiday gifting, sudden dessert cravings, or beginner confectioners
- Master this peanut butter fudge recipe creamy easy
- The Magic Behind the Set
- Essential Recipe Specifications
- Deep Dive Into Ingredients
- Tools for Fudgy Success
- Bringing the Layers Together
- Pro Tips and Pitfalls
- Elegant Variations and Substitutions
- Essential Scaling Guidelines
- Debunking Fudge Myths
- Storage and Waste Prevention
- Stunning Serving Suggestions
- Recipe FAQs
- 📝 Recipe Card
Master this peanut butter fudge recipe creamy easy
The air in my kitchen currently smells like a toasted hug, thanks to the swirling ribbons of molten peanut butter and sweet cream currently cooling on the counter. There is something truly magical about the moment those two ingredients meet the heat, turning from separate entities into a glossy, unified river of gold.
I remember the first time I tried this - I was so nervous about the sugar "seizing" that I barely breathed, but then I realized that the beauty of this specific method is its sheer accessibility. It is almost impossible to mess up if you treat the ingredients with a little gentleness.
We have all had that fudge that feels like eating a block of sweetened sand, right? It is disappointing and leaves you reaching for a glass of water after one bite. This version is the complete opposite.
It has a structural integrity that allows for clean, elegant cubes, yet it possesses a velvety interior that feels like silk. It is the kind of treat that makes people stop talking the second they take a bite, simply because they are too busy enjoying the way the salt and sugar dance together.
The secret lies in the layering of flavors and the patience of the set. While it only takes a few minutes over the heat to bring everything together, the real magic happens in the quiet hours while it rests in the fridge.
We are going to walk through every nuance of this process together, from the specific way you sift your sugar to the technique for getting those razor sharp edges that make home baked treats look like they came from a high end boutique.
Trust me, once you see how simple it is to achieve this level of stunning results, you will never go back to the store-bought stuff.
The Magic Behind the Set
The Molecular Structure of Silk: The high fat content from the 18 oz creamy peanut butter and 0.5 cup unsalted butter surrounds the sugar crystals, preventing them from bonding into large, grainy clumps.
This creates a stable emulsion where the sweetened condensed milk acts as a bridge, resulting in a texture that is supple rather than brittle.
| Method | Time | Texture | Best For |
|---|---|---|---|
| Stovetop | 5 minutes | Glossy, consistent melt | Total control over heat |
| Microwave | 2 minutes | Quick, slight risk of hot spots | Rapid cravings |
| Double Boiler | 8 minutes | Ultra gentle, most velvety | Preventing any scorched notes |
When you are working with fats and sugars, the temperature is your best friend. If you have ever enjoyed the chewy goodness of a Peanut Butter Cookies recipe, you know that the way ingredients bind dictates the final bite. In this fudge, we aren't looking for the snap of a cookie, but rather the gentle yield of a ganache.
Essential Recipe Specifications
This recipe is built on a foundation of balance. Every gram of fat is designed to counter the sweetness of the 2 cups powdered sugar, ensuring that the final result isn't cloying. It is a dense, rich experience that serves 24 people, making it an ideal candidate for gifting in small, elegant boxes lined with parchment.
The hands on time is incredibly brief - just 5 minutes of active stirring - which means the quality of your focus during that window is paramount. You want to watch the way the 14 oz sweetened condensed milk incorporates into the butter, looking for that shimmering, unified appearance before you ever think about adding the dry ingredients.
Deep Dive Into Ingredients
| Ingredient | Science Role | Pro Secret |
|---|---|---|
| Creamy Peanut Butter | Primary fat and flavor base | Use a stabilized brand (not "natural" stir style) for a smoother set |
| Sweetened Condensed Milk | Binding agent and moisture provider | Do not boil; gentle warmth keeps the proteins from toughening |
| Powdered Sugar | Structural sweetener | Sift twice to aerate and remove every microscopic lump |
To achieve that stunning, professional finish, we use 18 oz creamy peanut butter. Why this? Provides the necessary oil to protein ratio for a non greasy, velvety mouthfeel. We also incorporate 0.5 cup unsalted butter.
Why this? Adds a luxurious dairy note that balances the saltiness of the nuts.
The addition of 14 oz sweetened condensed milk is non negotiable here. Why this? It provides a pre dissolved sugar base that guarantees zero grittiness. For the structure, we sift 2 cups powdered sugar.
Why this? It builds the "body" of the fudge so it holds its shape at room temperature. Finally, 1 tsp pure vanilla extract and 0.25 tsp fine sea salt act as the flavor anchors. Why this? Vanilla rounds the sweetness while salt makes the peanut flavor pop.
Tools for Fudgy Success
You don't need a lab full of equipment to make this work, but a few specific items will make your life much easier. I always reach for my heavy bottomed saucepan. This is crucial because thin pans have hot spots that can scorch the milk or the peanut butter, leaving you with a bitter, burnt aftertaste.
A silicone spatula is also your best friend here - it allows you to scrape every last bit of the shimmering mixture from the corners of the pan.
For the setting process, an 8x8 inch square baking pan is the gold standard. It gives you that perfect thickness for each cube. If you use a larger pan, the fudge will be too thin and lose that satisfying "heft" when you pick it up.
I also highly recommend using binder clips to hold your parchment paper in place while you pour. There is nothing more frustrating than the paper folding into your molten fudge while you are trying to smooth the top!
Bringing the Layers Together

1. Preparation and Lining
Line your 8x8 inch pan with parchment paper, leaving an inch of overhang on all sides. Note: This "sling" makes it effortless to lift the set fudge out later.
2. Gentle Melting for Smoothness
Combine 18 oz creamy peanut butter, 0.5 cup unsalted butter, and 14 oz sweetened condensed milk in your saucepan over medium low heat. Cook 3 minutes until the mixture is glossy and completely fluid.
3. Flavor Integration
Remove the pan from the heat immediately once the fats have emulsified. Note: Keeping it on the heat too long can cause the oils to separate.
4. Scenting the Gold
Whisk in 1 tsp pure vanilla extract and 0.25 tsp fine sea salt. Stir until the aroma of vanilla blooms through the kitchen.
5. The Structural Sweetness
Add the 2 cups powdered sugar into the warm liquid base. Note: Adding sugar to warm liquid helps it integrate without forming dry pockets.
6. The Final Fold
Use your spatula to fold the sugar in until no white streaks remain. Stir until the texture becomes matte and heavy.
7. Casting the Mold
Transfer the mixture into your prepared pan, spreading it to the corners. Press firmly until the surface is level and smooth.
8. The Patient Set
Place the pan in the refrigerator for at least 2 hours. Wait until the center feels firm and cold to the touch.
9. Achieving Professional Cubes
Lift the fudge out using the parchment sling and place it on a cutting board. Note: A warm, dry knife creates the cleanest slices.
10. The Finishing Cut
Slice into 24 even squares. Watch for a clean "snap" as the blade passes through.
Pro Tips and Pitfalls
To Prevent Granular Sandiness
The most common heartbreak in fudge making is a grainy texture. This usually happens when the powdered sugar isn't sifted or if the mixture is agitated too much as it cools. By sifting twice, you ensure the particles are as fine as possible before they ever hit the molten peanut butter.
If you find your fudge is already grainy, it might be that the milk was overheated. Keep the flame low and slow.
To Avoid a Greasy Surface
If you see beads of oil sitting on top of your fudge, the emulsion has broken. This typically happens if the peanut butter gets too hot too fast. If this happens while you are stirring, add a teaspoon of room temperature condensed milk and whisk vigorously off the heat. It usually pulls the oils back into the fold.
| Problem | Root Cause | Solution |
|---|---|---|
| Soft/Oily | Heat was too high | Chill for an extra hour; serve directly from fridge |
| Crumbly/Dry | Too much sugar | Add a tablespoon of melted butter to the mix |
| Grainy | Sugar not sifted | Sift sugar twice next time; melt more slowly |
Common Mistakes Checklist
- ✓ Avoid "natural" peanut butter with oil separation; it won't set correctly.
- ✓ Never boil the mixture; you only want to melt the fats.
- ✓ Sift your powdered sugar even if it looks fine in the bag.
- ✓ Use a sharp, non serrated knife for cutting to avoid jagged edges.
- ✓ Let the fudge come to room temperature for 10 minutes before eating for the best flavor.
Elegant Variations and Substitutions
If you are looking for a different profile, you can easily tweak this base. For those who enjoy a bit of a darker, more complex sweetness, a Fudge Recipe with chocolate layers can be swirled right into the top of this peanut butter version. The contrast of the dark cocoa against the tan peanut butter is visually stunning and tastes like a gourmet peanut butter cup.
| Original Ingredient | Substitute | Why It Works |
|---|---|---|
| Unsalted Butter | Salted Butter | Adds a more aggressive salt punch; skip the sea salt. |
| Powdered Sugar | Swerve Confectioners | Low carb alternative. Note: May have a slight cooling aftertaste. |
| Vanilla Extract | Almond Extract | Provides a cherry like floral note that pairs well with nuts. |
Salted Chocolate Marble
Melt a half cup of dark chocolate chips and dollop them onto the fudge before it sets. Use a toothpick to swirl them into elegant patterns. This adds a bitter contrast to the sweet base that is absolutely sophisticated.
Crunch Lover’s Alternative
While this recipe calls for creamy, you can swap half of it for crunchy peanut butter. It changes the "silky" narrative to one of texture and grit, which some people prefer for that old-fashioned candy shop feel.
Essential Scaling Guidelines
Scaling this recipe up for a big party is a breeze, but you have to be careful with the pot size. If you double the recipe (36 oz peanut butter, 28 oz milk), use a large Dutch oven. The extra volume takes longer to heat, so you must stir constantly to prevent the bottom from scorching.
Do not try to double the salt or vanilla exactly; start with 1.5x and taste.
For a tiny batch, you can halve everything and use a loaf pan. A loaf pan is the perfect size for a half batch, giving you about 12 generous cubes. The setting time remains about the same, as the thickness of the fudge is what determines the chill rate more than the total volume.
Debunking Fudge Myths
One of the biggest myths is that you need a candy thermometer to make "real" fudge. While that is true for old-fashioned boiled sugar recipes, this modern version relies on the stability of the condensed milk. You are not trying to reach a "soft ball" stage; you are simply creating a thick emulsion.
Another misconception is that fudge must be stored at room temperature to stay soft. In reality, because this recipe has a high fat content from the butter and peanut butter, it can actually get a bit too soft if the room is warm. Storing it in the fridge keeps the structure intact without making it hard or brittle.
Storage and Waste Prevention
To keep your fudge in its prime, store the cubes in an airtight container with sheets of parchment paper between the layers. This prevents them from sticking together and preserves that matte, elegant finish. In the fridge, it will stay fresh and velvety for up to 2 weeks.
If you want to keep it longer, this fudge freezes beautifully. Wrap individual squares in plastic wrap, then place them in a freezer bag. They will last for 3 months. To eat, just let them sit on the counter for 15 minutes.
If you end up with "fudge crumbs" or scraps from trimming the edges, do not throw them away! Those little bits are gold. I love to fold them into softened vanilla bean ice cream or sprinkle them over a warm brownie. You can even melt the scraps down and use them as a decadent dip for pretzels or apple slices.
It is a zero waste way to ensure every bit of that magical peanut butter flavor is enjoyed.
Stunning Serving Suggestions
When it comes to serving, presentation is everything. I love to place each cube in a small paper candy liner - the kind you find for truffles. It makes the experience feel much more intentional and prevents people's fingers from getting sticky.
If you want to add a final touch of elegance, a tiny pinch of Maldon sea salt flakes on top of each square just before serving adds a beautiful shimmer and a crunch that cuts through the richness.
For a dessert board, pair these fudge squares with tart green apple slices and some dark chocolate covered pretzels. The acidity of the apples and the crunch of the pretzels create a beautiful balance with the supple, sweet fudge.
It turns a simple treat into a curated experience that your guests will talk about for weeks. Honestly, there is nothing quite like seeing someone's face light up when they realize you made something this professional looking in your own kitchen.

Recipe FAQs
What is the secret to creamy fudge?
Use high-quality, room temperature creamy peanut butter and sweetened condensed milk. The secret lies in creating a stable emulsion where the high fat content surrounds the sugar crystals, preventing them from bonding into large, grainy clumps.
What are the common mistakes when making fudge?
The most common mistake is overheating the ingredients, especially the condensed milk. Overheating causes the proteins to seize, leading to a grainy or crumbly texture instead of a smooth melt.
What is cowboy fudge?
Cowboy fudge typically refers to a stovetop fudge made without any special temperature monitoring. It often relies heavily on condensed milk and butter, similar to this easy method, making it simpler than traditional boiled fudge.
Why is my peanut butter fudge not creamy?
Your fudge is likely grainy because the powdered sugar was not sifted thoroughly before mixing. Fine, aerated sugar dissolves faster into the warm base, ensuring a silky mouthfeel rather than grit.
How to ensure the fudge sets firmly without becoming hard?
Chill the fudge undisturbed in the refrigerator for a minimum of two hours. Do not be tempted to stir it while it cools, as this introduces air that can disrupt the fat structure, making it softer.
Can I substitute creamy peanut butter with natural style peanut butter?
No, stick with stabilized creamy peanut butter for the best results. Natural peanut butter separates too easily, leading to an oily surface and an unstable fudge structure that will struggle to set properly.
Is it true I must use an 8x8 inch pan for this recipe?
No, this is a common misconception, though 8x8 is ideal for thickness. If you use a 9x9 inch pan, the fudge will be thinner, requiring less chilling time, similar to how adjusting spread in our Haystacks recipe changes its final density.
Creamy Peanut Butter Fudge Easy
Ingredients:
Instructions:
Nutrition Facts:
| Calories | 251 kcal |
|---|---|
| Protein | 7g |
| Fat | 16g |
| Carbs | 23g |
| Fiber | 1.2g |
| Sugar | 20g |
| Sodium | 141mg |
