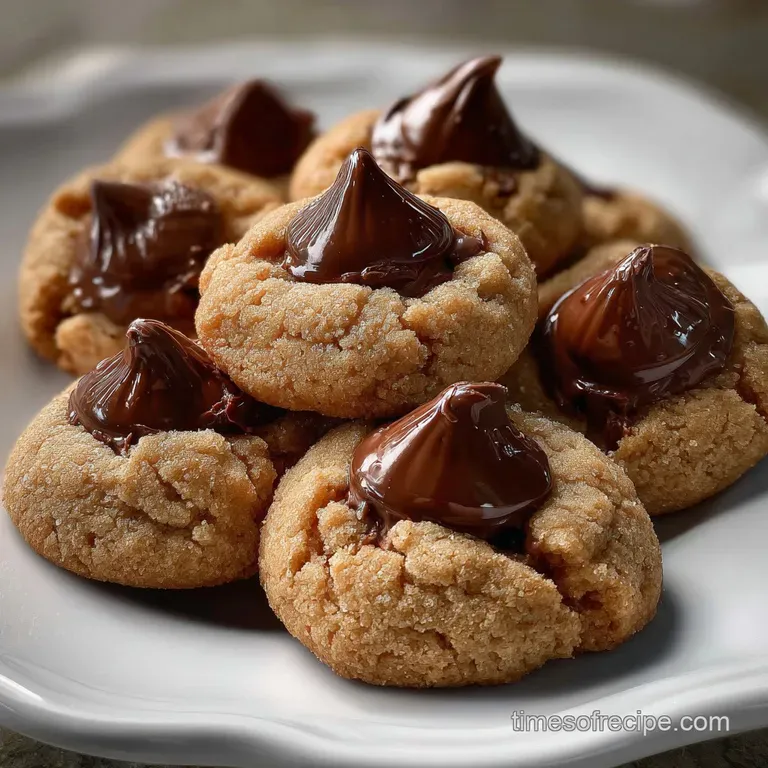
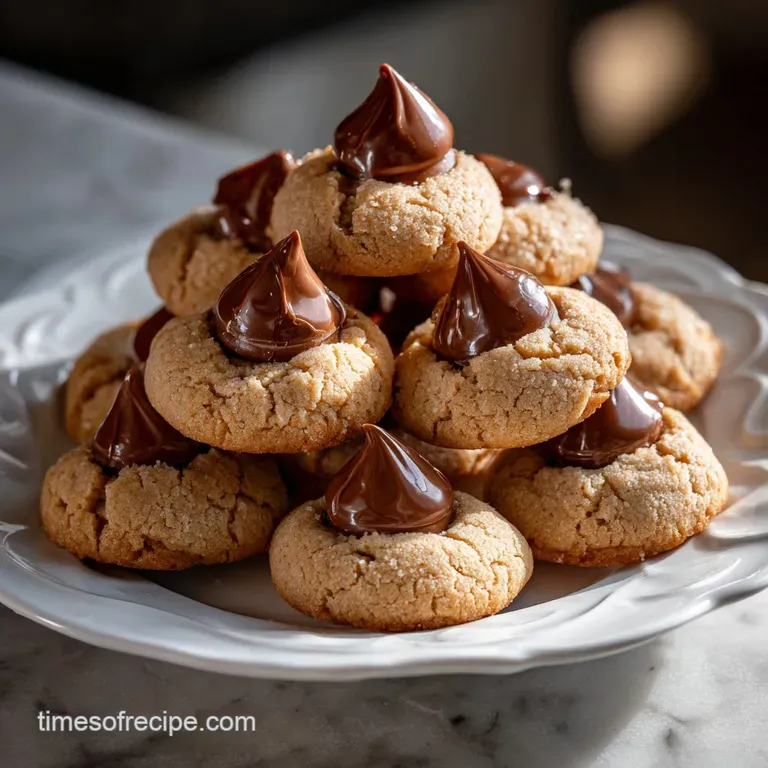
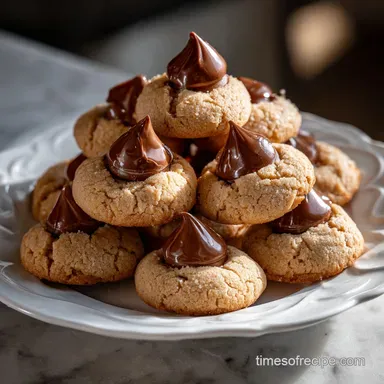
Hershey Kiss Cookies: the Ultimate Peanut Butter Blossom
- The Absolute Best Chewy Hershey Kiss Cookies Recipe You’ll Ever Need
- Stop Making Dry Cookies! The Secret to Perfect Hershey Kiss Cookies
- Why This Recipe for Hershey Kiss Cookies Just Works
- Ingredients and Essential Substitutions for Kiss Cookies
- How to Make Chewy Peanut Butter Hershey Kiss Cookies Step-by-Step
- Common Mistakes & Troubleshooting Your Hershey Kiss Cookies
- Storage, Freezing, and Making Ahead
- Recipe FAQs
- 📝 Recipe Card
The Absolute Best Chewy Hershey Kiss Cookies Recipe You’ll Ever Need
Stop Making Dry Cookies! The Secret to Perfect Hershey Kiss Cookies
Are you ready for the scent of rich, roasted peanut butter mixed with warm vanilla to completely flood your kitchen? Seriously, that distinct, sweet and salty aroma is the unofficial start of the holiday baking season for me.
For years, I struggled with Hershey Kiss Cookies that spread into flat pancakes or came out too crumbly and dry. It was frustrating!
But I cracked the code. This is the ultimate, guaranteed soft, melt-in-your mouth Hershey Kiss Cookies recipe, perfected through trial and error (and way too much snacking).
Forget the old-school recipes that leave you with hard edges; this dough is chewy, rich, and perfectly balanced, making the best Kiss Cookies you’ve ever had.
We are talking about easy Peanut Butter Hershey Kiss Cookies that deliver every single time. They are fast enough for a Tuesday night craving but look gorgeous enough to anchor any Christmas platter. If you love the classic Peanut Butter Blossom Cookies: Soft, Chewy, Classic Recipe but want the guarantee of softness, this is your recipe.
Why This Recipe for Hershey Kiss Cookies Just Works
The secret to perfectly soft, chewy Hershey Kiss Cookies isn't magic; it's smart ingredient deployment. We are deliberately manipulating three key factors: fat, sugar, and chilling.
The Science of the Perfect Peanut Butter Cookie
- The Sugar Blend: We use an equal mix of granulated sugar and brown sugar. Granulated sugar promotes spread and crispness, but brown sugar, which contains molasses, introduces crucial moisture. That molasses is slightly acidic, which helps keep the proteins in the flour and egg from setting too quickly, guaranteeing a soft, moist center instead of a hard, brittle cookie.
- The Peanut Butter: Always use creamy, processed peanut butter (like Jif or Skippy) for baking. Natural peanut butter (the kind you have to stir) separates oil too easily and will throw off the carefully calculated fat ratio, leading to greasy, flat cookies. Trust me, science demands processed peanut butter here.
- The Quick Press: Pressing the Hershey Kiss immediately after the cookie comes out of the oven is critical. The residual heat softens the chocolate just enough to adhere to the warm dough, slightly cracking the surface (that’s the beautiful "blossom" effect!), but not melting it into a puddle. This keeps your chocolate nice and structurally sound.
Ingredients and Essential Substitutions for Kiss Cookies
This recipe makes about 4 dozen delicious Peanut Butter Kiss Cookies Recipe , perfect for sharing (or not!).
| Ingredient | Role in Dough | Smart Substitution Options |
|---|---|---|
| All-Purpose Flour | Structure | 1:1 gluten-free Baking Blend (ensure it contains xanthan gum) |
| Baking Soda | Leavening/Spread | Baking Powder (use 3x the amount, but texture will be slightly cakey) |
| Unsalted Butter | Fat & Flavor | high-quality shortening or Plant based margarine sticks (ensure it's 80% fat or higher) |
| Creamy Peanut Butter | Flavor & Moisture | Almond butter or sunflower seed butter (Note: taste and texture will change) |
| Granulated Sugar | Sweetness, Crisp Edges | Caster sugar |
| Light Brown Sugar | Moisture, Chewiness | Dark Brown Sugar (will intensify molasses flavor) |
| Large Egg | Binder | Flax Egg (1 Tbsp flaxmeal + 3 Tbsp water, rested 5 mins) |
| Vanilla Extract | Flavor Depth | Maple extract or Almond extract (use half the amount) |
| Hershey's Kisses | Topping | Mini Reese’s Peanut Butter Cups, or Rolos |
How to Make Chewy Peanut Butter Hershey Kiss Cookies step-by-step
Preheat your oven to 375°F (190°C) and line two large baking sheets with parchment paper. Unwrap all 48 of your Kisses now seriously, you will regret trying to do this when the cookies are hot!
1. The Creaming Stage (Making Magic)
In a large bowl or the bowl of a stand mixer, beat the softened butter, creamy peanut butter, granulated sugar, and brown sugar together. Cream this on medium speed for a full 3 to 4 minutes.
You are aerating the mixture, turning it light and fluffy this process, called creaming, incorporates tiny air pockets that are essential for the cookie’s lift and tender texture. It should look thick, almost like pancake batter, but paler.
2. Binders and Flavor
Beat in the room temperature egg until just combined, then the vanilla extract. Scrape down the sides of the bowl. Meanwhile, in a separate medium bowl, whisk together the flour, baking soda, and salt.
3. Mixing the Dry Ingredients (Don't Overdo It!)
Gradually add the flour mixture into the wet ingredients, mixing on low speed until the dough just comes together. Stop the mixer as soon as you see no streaks of dry flour. Overmixing develops too much gluten, which leads to tough Hershey Kiss Cookies .
4. The Chill (Crucial Step!)
Cover the dough and chill it for at least 30 minutes. This is non-negotiable for a perfect kiss cookies recipe ! Chilling firms up the fat, which prevents your cookies from spreading too much in the hot oven. If I'm making these for a big event, like mixing them into a platter with my Christmas Cookies: Best Brown Butter Cut-Outs Recipe , I chill for an hour.
5. Scoop, Roll, and Bake
Use a small cookie scoop (about 1 tablespoon) to portion the dough. Roll each piece into a smooth ball between your palms. Roll the balls thoroughly in the reserved granulated sugar this gives the Hershey Kiss Cookies their signature sparkling crust and helps contain the moisture.
Place the sugared balls 2 inches apart on your prepared baking sheets.
Bake for 8 to 10 minutes. The cookies are done when the edges are just set and slightly golden brown, but the centers still look soft and slightly underbaked. Your kitchen will smell heavenly!
6. The Instant Press
This is the fast part! Immediately upon removing the baking sheet from the oven, gently press one unwrapped Hershey Kiss right into the center of each hot cookie. Don't push too hard, just enough to make the dough edges crack slightly and the Kiss adhere.
Let the cookies cool on the baking sheet for 5 minutes (this allows the structure to set) before moving them carefully to a wire rack to cool completely. The chocolate Kiss must be fully set and firm before storing or stacking, or you’ll end up with smashed centers!
Common Mistakes & Troubleshooting Your Hershey Kiss Cookies
If your Hershey Kiss Cookies aren't turning out like the classic chewy treat, here are the likely culprits and their quick fixes.
| Mistake | Problem Description | The Fix (Why It Happens) |
|---|---|---|
| Cookies Spread Too Much | They look like flat discs, thin edges. | Fix: Your butter was too soft (partially melted) or the dough wasn't chilled long enough. Also, ensure you are not using natural peanut butter. |
| Kisses Melt Away | The chocolate loses its cone shape and puddles. | Fix: You pressed the Kiss and then returned the tray to the oven, or your cookies were severely overbaked. Press immediately and let them cool on the counter. |
| Cookies Are Dry/Crumbly | They taste like sawdust and break easily. | Fix: Too much flour (measure by weight!) or you overmixed the dough. Next time, use less flour or stop mixing the moment the dry streaks disappear. |
| No Crinkle Texture | The sugar coating disappeared completely. | Fix: Ensure you roll the dough balls generously in sugar just before baking. This sugar layer locks in moisture and prevents the dough from spreading flat immediately. |
Storage, Freezing, and Making Ahead
If you’re preparing a huge batch of Christmas cookies (maybe alongside some Crinkle Cookies: The Ultimate Fudgy Chocolate Recipe ), planning ahead is essential.
- Counter Storage: Once the Hershey Kiss Cookies are completely cooled and the chocolate Kisses are firm, store them in an airtight container at room temperature for up to 5 days. Layer them gently, separated by wax paper, to prevent the Kisses from being knocked off.
- Freezing Baked Cookies: You can absolutely freeze these! Arrange cooled cookies in a single layer on a sheet pan until frozen solid (about 2 hours). Then transfer them to a freezer safe zip-top bag or container. They last up to 3 months. Thaw completely on the counter before serving.
- Making Ahead (Freezing Dough): Scoop and roll the dough balls (without the final sugar coating) and freeze them on a tray. Once frozen, transfer to a freezer bag. When ready to bake, thaw the dough balls slightly, roll in sugar, and bake as directed, adding 1- 2 minutes to the bake time.
This easy hershey kiss cookies recipe is truly a timeless classic for a reason. Get ready to enjoy the softest, chewiest Hershey Kiss Cookies that will instantly transport you back to childhood!

Recipe FAQs
Why are they sometimes called "Peanut Butter Blossom Cookies"?
This is their formal name, derived from the way the Hershey Kiss is pressed into the warm cookie, causing the dough edges to spread out and resemble a blooming flower or blossom. The iconic recipe originated with a Pillsbury Bake Off contest winner in 1957, securing their place as a classic American holiday cookie.
Why did my Hershey Kisses melt completely instead of just softening?
The kisses should be added immediately after the cookies exit the oven, but wait approximately 30-60 seconds before pressing them down firmly. If your cookies are still too hot, or if the oven temperature was slightly high, the chocolate will melt entirely upon contact.
Ensure all kisses are unwrapped and ready before the baking timer ends.
What is the best way to store these cookies to keep them fresh?
Store the cookies in an airtight container at room temperature for up to one week to maintain optimal freshness. If you need to stack the cookies, place a layer of parchment paper between the rows to prevent the soft chocolate kisses from sticking to the cookies below them.
Can I use natural or chunky peanut butter in this recipe?
It is highly recommended to use smooth, processed peanut butter (such as Jif or Skippy) because natural peanut butter separates and can make the dough too oily or crumbly. While chunky peanut butter can technically be used, the chunks may interfere with the smooth rolling process and the final texture of the cookie.
Can I freeze Peanut Butter Blossom dough or the baked cookies?
Yes, both the dough and the baked cookies freeze well. For dough, roll into balls, freeze on a tray, and then transfer to a freezer bag for up to 3 months (add 2-3 minutes to the bake time). Baked cookies should have the chocolate fully set before freezing; thaw them at room temperature when ready to serve.
Why do I roll the dough balls in granulated sugar before baking?
Rolling the dough in sugar serves two main purposes for the Peanut Butter Blossom. It prevents the sticky dough from adhering to your hands when shaping, and critically, it creates a beautifully crisp, sparkling exterior crust that provides a textural contrast to the soft, chewy interior.
My cookies spread too much and look flat. What went wrong?
Excessive spreading is often caused by using overly softened or melted butter, or by inaccurately measuring the flour content. Ensure your butter is only slightly pliable (not liquid) and always use the scoop and-level method for flour measurement.
If the kitchen is warm, chilling the prepared dough balls for 30 minutes before baking can also help mitigate spreading.
Easy Hershey Kiss Cookies Recipe
Ingredients:
Instructions:
Nutrition Facts:
| Calories | 656 kcal |
|---|---|
| Protein | 9.1 g |
| Fat | 37.9 g |
| Carbs | 69.8 g |
