The Best Fudgy Chewy Browkie with Chocolate Chips
- Time: Active 15 minutes, Passive 22 minutes, Total 37 minutes
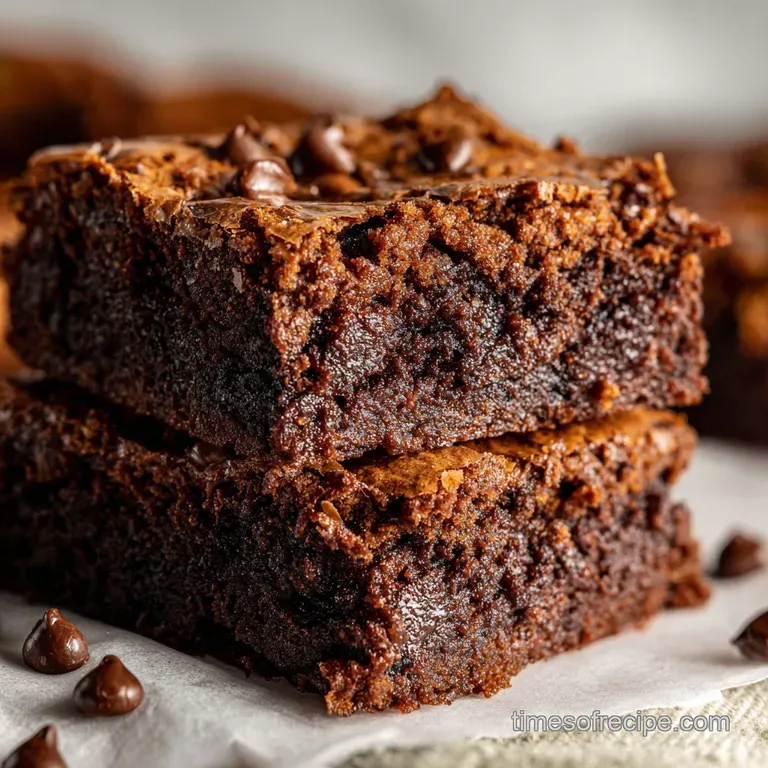
- Flavor/Texture Hook: A shatter thin top with a dense, fudgy middle
- Perfect for: Elegant dinner parties or upscale afternoon tea
- Fudgy Chewy Browkie Savvy Bite with Chocolate Chips
- Layered Science Behind Fudgy Texture
- Precise Measurements for Elegant Results
- Selecting Elements for Velvety Richness
- Professional Tools for Baking Magic
- Executing the Multi Stage Transformation
- Correcting Common Baking Texture Mishaps
- Creative Profiles and Ingredient Swaps
- Preserving Freshness and Reheating Methods
- Elegant Pairings for Chocolate Treats
- Recipe FAQs
- 📝 Recipe Card
Fudgy Chewy Browkie Savvy Bite with Chocolate Chips
Imagine the scent of browning butter hitting a cold mixing bowl, that distinct sizzle as the heat transforms into a golden liquid. The first time I pulled these from the oven, the kitchen was filled with an aroma so deep and chocolatey it felt like a warm velvet blanket.
I’ve spent years trying to find the bridge between a cookie’s chew and a brownie’s richness, and this specific formula is the magic result. Indulge in The Best Fudgy Chewy Browkie Savvy Bite with Chocolate Chips for an irresistible dessert experience.
We are looking for more than just a sweet treat here; we are aiming for a stunning contrast of textures. The outer shell should have a delicate shatter when your teeth sink into it, followed immediately by a center that feels almost like ganache.
It's a simple process, but the way we layer the flavors makes it feel like an elegant creation from a high end patisserie.
Don't be intimidated by the name. While it sounds complex, the "savvy bite" is all about precision in your technique rather than the difficulty of the steps. We're going to treat the cocoa and the espresso like fine spices, building a profile that isn't just "sweet" but deeply resonant.
You'll see exactly how a few minor tweaks in how you handle your butter and eggs can change everything about the final crumb.
Layered Science Behind Fudgy Texture
The magic of this recipe lies in the "physics of the crinkle," where the interaction of sugars and proteins creates that iconic shiny surface.
- Sugar Saturation: Whisking granulated sugar with eggs for several minutes creates a meringue like structure that rises to the surface, forming the thin, crackly crust.
- Fat Emulsification: The melted butter provides a velvety mouthfeel and prevents the flour from developing too much gluten, ensuring a dense rather than cakey bite.
- Starch Gelatinization: Using a small amount of all purpose flour allows the cocoa powder to dominate the structure, leading to a much richer, darker profile.
| Preparation Method | Texture Result | Best Use Case |
|---|---|---|
| Stovetop Melting | Ultra fudgy, dense core | Maximum chocolate indulgence |
| Microwave Melting | Lighter, slightly airier | Quick weeknight treats |
| Oven Baking | Crispy edges, soft center | Classic browkie balance |
Choosing the right method depends on how much "snap" you want in your bite. Using the oven for the entire baking process is essential for the crinkle top, as it relies on dry, even heat to set the sugar film. If you've ever enjoyed a Crinkle Cookies recipe, you'll recognize the importance of that specific heat circulation for texture.
1. The Dual Fat Synergy
By using melted butter instead of creamed butter, we are intentionally removing air from the equation. This results in a heavy, moist crumb that stays fudgy for days. The butter coats the flour particles, effectively shortening the gluten strands and keeping things tender.
2. Sugar Solubilization for Crinkle
Granulated sugar is the key to the shine. When it dissolves into the egg whites, it creates a viscous syrup. As the browkie bakes, this syrup migrates to the top and dries out, creating that stunning, elegant "paper" crust that bakers dream about.
3. Selective Flour Hydration
We use just enough flour to hold the chocolate together. Because we are adding cocoa powder which is highly absorbent the flour doesn't need to do all the heavy lifting. This keeps the dessert from becoming bread like or dry.
Precise Measurements for Elegant Results
For a stunning result every time, precision is your best friend in the kitchen. We use imperial measurements here, but I've included the weights because baking is ultimately a science experiment you can eat.
- Checkpoint 1 (Weight): Ensure your butter is exactly 115g (1/2 cup) to maintain the fat to flour ratio.
- Checkpoint 2 (Temperature): Let the butter cool to about 165°F before adding eggs; you want it warm enough to dissolve sugar but not hot enough to scramble eggs.
- Checkpoint 3 (Time): Set your timer for 22 minutes exactly; even two minutes over can turn a fudgy bite into a dry one.
| Ingredient | Science Role | Pro Secret |
|---|---|---|
| Unsalted Butter | Moisture and fat | Cool after melting to avoid greasy dough |
| Granulated Sugar | Crinkle crust formation | Whisk with eggs until the color pales |
| Cocoa Powder | Structural flavor | Sift to ensure a velvety, lump free batter |
| Espresso Powder | Flavor enhancer | Intensifies chocolate without adding coffee taste |
Using high-quality cocoa makes a world of difference here. It’s the primary building block of your flavor layers. If you find yourself wanting more variety in your baking, the techniques used here are very similar to what you'd find in a Smores Brownie Bars recipe, where layering textures is the name of the game.
Selecting Elements for Velvety Richness
The ingredients for The Best Fudgy Chewy Browkie Savvy Bite with Chocolate Chips are simple, but their quality dictates the elegance of the finish.
- 1/2 cup (115g) unsalted butter
- Substitute: Salted butter (reduce added sea salt to a pinch).
- Why this? Provides the foundational fat for a dense, silky texture.
- 3/4 cup (150g) granulated sugar
- Substitute: Caster sugar for even faster dissolving.
- Why this? Essential for creating the crackly, shiny top layer.
- 1/4 cup (50g) light brown sugar, packed
- Substitute: Dark brown sugar for a deeper molasses note.
- Why this? Adds moisture and that signature chewy pull.
- 2 large eggs, room temperature
- Substitute: 1/2 cup unsweetened applesauce (will be much cakier).
- Why this? Acts as the primary binder and creates the "meringue" top.
- 1 tablespoon vanilla extract
- Substitute: Almond extract (use only 1/2 teaspoon).
- Why this? Rounds out the sharp notes of the cocoa.
- 3/4 cup (95g) all purpose flour
- Substitute: 1:1 gluten-free baking flour.
- Why this? Provides enough structure without making the bite heavy.
- 1/2 cup (45g) unsweetened cocoa powder, sifted
- Substitute: Dutch processed cocoa for a darker, smoother flavor.
- Why this? The soul of the recipe; provides the deep chocolate base.
- 1/2 teaspoon sea salt
- Substitute: Table salt (use slightly less).
- Why this? Brightens the chocolate and balances the sugar.
- 1/2 teaspoon espresso powder
- Substitute: Instant coffee granules crushed into a fine powder.
- Why this? A secret weapon that makes chocolate taste more like chocolate.
- 1 cup (170g) semi sweet chocolate chips
- Substitute: Chopped dark chocolate bars for better melting.
- Why this? Provides pockets of velvety, melted joy in every bite.
Professional Tools for Baking Magic

You don't need a commercial kitchen to achieve these results, but having a few specific tools will make the process feel simple and magical.
- Whisk and Spatula: A sturdy whisk is needed for the egg sugar stage, while a silicone spatula is better for folding in flour.
- Baking Sheet: A heavy duty aluminum pan (like Nordic Ware) ensures even browning without burning the bottoms.
- Parchment Paper: Never skip this; it prevents the sticky, fudgy bottoms from clinging to the pan.
- Cooling Rack: Elevating the bites after baking prevents steam from making the bottoms soggy.
Chef Tip: Freeze your chocolate chips for 10 minutes before folding them into the batter. This prevents them from melting instantly, leaving you with distinct, beautiful "pockets" of chocolate in the finished product.
Executing the Multi Stage Transformation
- Preheat the oven to 350°F. Note: A fully preheated oven is crucial for the initial rise.
- Melt the 1/2 cup of butter in a small saucepan. Cook until it reaches a clear liquid state and begins to sizzle slightly.
- Combine the melted butter, 3/4 cup granulated sugar, and 1/4 cup brown sugar in a large bowl. Note: The warmth helps the sugar start to dissolve.
- Whisk in the 2 eggs and 1 tablespoon vanilla extract vigorously for 2 to 3 minutes until the mixture looks pale, thick, and velvety.
- Sift the 1/2 cup cocoa powder, 3/4 cup flour, 1/2 teaspoon sea salt, and 1/2 teaspoon espresso powder over the wet ingredients.
- Fold the dry ingredients gently with a spatula until no white streaks of flour remain.
- Stir in the 1 cup of chocolate chips. Note: Don't overwork the batter here or it will become tough.
- Scoop rounded tablespoons of dough onto a parchment lined baking sheet, spacing them 2 inches apart.
- Bake for 22 minutes until the edges are set and the tops have a delicate shatter crust.
- Cool on the pan for 10 minutes before transferring to a wire rack. Note: They finish setting as they cool.
1. The Thermal Foundation
Starting with warm butter is a specific choice. It allows the sugars to begin breaking down immediately, which is the first step toward that glossy top. If the butter is cold, the sugar stays granular, and you lose that elegant finish.
2. Emulsifying for Texture
The whisking stage is where the magic happens. You aren't just mixing; you are aerating the egg whites. This creates the structural foam that eventually dries into the crinkle crust. If you stop too early, the tops will be dull.
3. Folding and Inclusion
When adding the flour and cocoa, treat the batter with care. Folding ensures you don't develop the gluten in the flour. We want the structure to come from the eggs and chocolate, not from tough wheat strands.
4. The Finish
Pulling them out at 22 minutes might make them look slightly underbaked in the center. This is intentional. The residual heat will continue to cook the starch without drying out the moisture.
Correcting Common Baking Texture Mishaps
Even the most experienced bakers run into trouble sometimes. The key is understanding the "why" so you can fix it for the next batch.
Solving Dry Cakey Textures
If your browkies come out resembling bread more than fudge, you've likely overmeasured the flour or overmixed the batter. Cocoa powder is very drying, so even a little extra flour can tip the balance. Always use the "spoon and level" method for your flour.
Achieving the Crinkle Top
Missing that shiny crust? It’s almost always because the sugar didn't dissolve enough or the eggs weren't whisked long enough. The sugar must bond with the egg proteins to form that thin film.
| Problem | Root Cause | Solution |
|---|---|---|
| Greasy Bottoms | Butter was too hot when adding eggs | Cool butter to 165°F before mixing |
| No Crinkle Top | Under whisking eggs and sugar | Whisk for a full 3 mins until pale |
| Flat and Spreading | Oven temp too low | Use an oven thermometer to verify 350°F |
Common Mistakes Checklist
- ✓ Never skip sifting the cocoa powder; lumps will leave bitter spots in your dessert.
- ✓ Don't use cold eggs; they won't emulsify properly with the warm butter.
- ✓ Avoid over baking; the center should still look a bit "soft" when you pull them out.
- ✓ Let the butter cool slightly; if it's boiling, it will cook the eggs instantly.
- ✓ Use a metal pan; glass retains too much heat and can burn the bottoms.
Creative Profiles and Ingredient Swaps
While the original is stunning, I love playing with the layers of flavor to suit different moods.
The Salted Toffee Twist
Replace half of the chocolate chips with toffee bits and add an extra sprinkle of flaky sea salt on top immediately after baking. The salt cuts through the richness, while the toffee adds a butterscotch note that complements the espresso.
The gluten-free Savvy Bite
You can easily swap the all purpose flour for a high-quality 1:1 gluten-free blend. Because this recipe relies heavily on cocoa and eggs for structure, the transition is remarkably seamless. The result is just as fudgy and elegant.
- If you want a denser bite, chill the dough for 30 minutes before baking.
- If you want a fudgier center, pull them out at 20 minutes.
- If you want extra shine, whisk the eggs and sugars until they reach a ribbon consistency.
Preserving Freshness and Reheating Methods
Keeping your The Best Fudgy Chewy Browkie Savvy Bite with Chocolate Chips fresh is easy if you follow a few simple rules.
Storage: Keep these in an airtight container at room temperature for up to 4 days. If you find them getting a bit firm, placing a piece of white bread in the container will help maintain their moisture.
You can also store them in the fridge for up to a week, though they will become much firmer and more "truffle like" in texture.
Freezing: These freeze beautifully. Wrap individual bites in plastic wrap and place them in a freezer bag for up to 3 months. To eat, simply let them thaw at room temperature for an hour.
Zero Waste Tip: If you happen to have leftovers that have gone a bit stale, crumble them over vanilla bean ice cream or use them as a base for a chocolate trifle. The concentrated chocolate flavor is too good to let go to waste.
Elegant Pairings for Chocolate Treats
A dessert this rich deserves a partner that can stand up to its intensity.
- Cold Milk: The classic choice. The fat in the milk cleanses the palate after each dense, chocolatey bite.
- Raspberry Coulis: The tartness of the berries provides a beautiful contrast to the deep, earthy notes of the espresso and cocoa.
- Salted Caramel Sauce: For an over the-top indulgence, drizzle a bit of warm caramel over a freshly baked browkie.
Whether you are baking these for a special occasion or just a Tuesday afternoon, remember that the "magic" is in the details. The way the light hits the crinkle top, the sound of the parchment paper sliding across the pan, and that first, velvety bite make the whole process worth it.
Enjoy the journey of creating something truly stunning!

Recipe FAQs
Why are my browkies cakey instead of fudgy and dense?
Flour overmeasurement or overmixing is the cause. Too much flour or developing gluten leads to a dry, bread like crumb; ensure you spoon and level the flour gently.
How to achieve that perfect, shiny, paper thin crinkle top?
Whisk the eggs and sugars vigorously for at least three minutes until pale and thick. This process dissolves the granulated sugar, allowing it to migrate and dry into the signature crust layer.
Can I substitute melted butter with softened, creamed butter?
No, this will significantly alter the texture. Creaming incorporates air, which results in a lighter, cakier product, while melted butter ensures the dense, fudgy mouthfeel this recipe targets.
How to tell when these browkies are perfectly baked and not underdone?
Pull them when the edges are set but the center still looks slightly soft and glossy. The residual heat continues to set the center after removal, ensuring ultimate fudginess.
Is it true that adding instant coffee doesn't make the dessert taste like coffee?
Yes, that is true when using espresso powder sparingly. It acts as a flavor amplifier, deepening the perception of the chocolate rather than introducing a distinct coffee flavor.
How to keep leftover browkies chewy for several days?
Store them in an airtight container with a slice of white bread. The bread slowly transfers its moisture into the baked goods, helping to maintain that soft, chewy pull, similar to the technique used for keeping Chocolate Chip Oatmeal recipe moist.
How to quickly cool the melted butter before adding the eggs?
Pour the warm butter into a large, heat proof bowl and whisk rapidly for 60 seconds, or pour it over the sugars while whisking constantly. You want the butter warm enough to dissolve the sugar but cool enough not to scramble the eggs; mastering this temperature precision is also key for perfect crust development in recipes like the Chess Squares Recipe.
Fudgy Chewy Browkie Recipe
Ingredients:
Instructions:
Nutrition Facts:
| Calories | 189 kcal |
|---|---|
| Protein | 2.6 g |
| Fat | 9.8 g |
| Carbs | 25.3 g |
| Fiber | 1.8 g |
| Sugar | 17.9 g |
| Sodium | 88 mg |
