Homemade Chili: Award-Winning and Hearty
- Time:10 minutes prep + 45 minutes cook = 55 minutes total
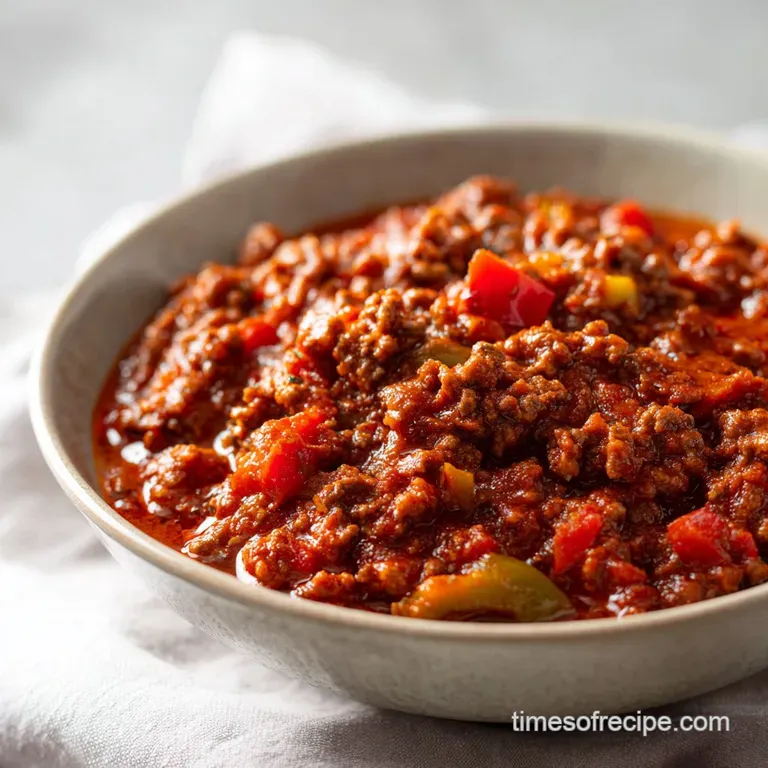
- Flavor/Texture Hook: Thick, velvety sauce with a rich, savory beef base
- Perfect for: Game day gatherings, cold winter nights, or easy meal prep
Get a Hearty Bowl of Homemade Chili
The first thing you notice is the sound. That aggressive sizzle when two pounds of beef hit the hot oil is the starting gun for something special. Then comes the smell, a heavy, earthy cloud of cumin and smoked paprika that starts to drift into every room of the house, making everyone suddenly very hungry.
It's the kind of aroma that feels like a warm hug on a rainy Tuesday.
I remember my grandmother used to make a version of this every single November. She had this old, heavy pot that looked like it had survived a war, and she'd stir it with a wooden spoon that was worn down in the middle. She taught me that the secret isn't in some rare ingredient, but in the patience of the simmer.
If you rush it, you just have meat soup. If you wait, you get a thick, velvety Homemade Chili that tastes like a family heirloom.
Trust me on this, the magic happens in the transition from "cooking" to "simmering". We're going to walk through the exact process I use now to get those bold, satisfying flavors. This Homemade Chili isn't about being fancy, it's about being comforting.
It's the kind of meal that makes you want to put on your favorite sweatpants and forget about the rest of the world for a while.
The Recipe Basics
Right then, let's look at the logistics. We're aiming for a balance of protein and texture. Using a mix of kidney and pinto beans gives the dish a bit more variety than just using one type, and the lean ground beef keeps it from feeling too greasy while still providing that hearty bite.
Because we're using a Dutch oven, the heat is distributed evenly, which is key for that long simmer. You'll notice the total time is 55 minutes, which is surprisingly quick for such a deep flavor. Most of that is the simmer, where the ingredients get to know each other and the sauce thickens up.
For those who are wondering about the method, I've found that a stovetop approach is the most reliable for controlling the thickness. But for the sake of variety, I've put together a quick comparison for you.
| Method | Time | Texture | Best For |
|---|---|---|---|
| Stovetop | 55 min | Velvety & Thick | Quick weeknight meal |
| Crockpot | 6-8 hrs | Very Soft/Tender | Set it and forget it |
| Oven | 2-3 hrs | Concentrated/Rich | Large batch parties |
Since this is a protein heavy dish, it's worth noting that lean beef is the way to go here. According to USDA FoodData, choosing lean cuts helps manage the overall fat content without sacrificing the savory depth we need for Homemade Chili.
The Ingredient Logic
I'm a big believer in understanding why we put things in the pot. It's not just about following a list, it's about building a flavor profile. In Homemade Chili, we're looking for a contrast between the acidity of the tomatoes, the earthiness of the cumin, and the subtle sweetness of brown sugar.
The Beef Sear: Browning the meat undisturbed creates a crust. This isn't just for looks, it adds a charred, savory note that you can't get from just graying the meat.
The Spice Bloom: When we stir the spices into the beef fat, we're "blooming" them. The heat releases essential oils from the powder, making the flavor more intense and integrated.
The Bean Balance: Using both kidney and pinto beans adds different levels of creaminess and structure, preventing the Homemade Chili from feeling one dimensional.
The Sugar Secret: A tiny bit of brown sugar doesn't make it sweet, but it cuts through the sharp acidity of the canned tomatoes, rounding out the whole experience.
| Ingredient | Science Role | Pro Secret |
|---|---|---|
| Ground Beef | Umami Base | Brown it hard for a deeper crust |
| Cumin | Earthy Note | Freshly toasted powder is 10x better |
| Brown Sugar | Acid Balance | Only add at the end if it's too tart |
| Beef Broth | Fluidity | Use low sodium to control the salt |
The Kitchen Tools
You don't need a professional kitchen to make a killer Homemade Chili, but a few specific tools make the process a whole lot easier. Honestly, don't even bother with a thin bottomed pot; you'll just end up with scorched beef.
The star of the show is a 6 quart Dutch oven. Whether it's enameled cast iron (like Le Creuset) or classic cast iron (like Lodge), the heavy walls hold heat consistently. This means your Homemade Chili simmers at a steady pace without hot spots that could burn the beans.
You'll also want a sturdy wooden spoon or a heat resistant silicone spatula. You'll be doing a fair amount of scraping to get those brown bits (the fond) off the bottom of the pot, and those bits are where the most flavor lives.
A whisk is useless here, but a good potato masher can be a secret weapon if you like your chili a bit thicker.
Finally,, have a fine mesh strainer handy for the beans. Even if the can says "rinsed," giving them a quick wash under cold water removes that metallic tasting canning liquid, which keeps the flavor of your Homemade Chili clean and bright.
Step by step Cooking
Let's crack on with the actual cooking. This is where the layers come together. I like to take my time with the first few steps because that's where the foundation of the Homemade Chili is built.
- Heat your 6 quart Dutch oven over medium high heat. Add the 1 tbsp olive oil and then the 2 lbs lean ground beef. Note: Don't stir it immediately.
- Cook the beef undisturbed for 3-4 minutes until a dark brown crust forms on the bottom. Now, stir and break it apart with your spoon, cooking until no longer pink.
- Carefully drain the excess fat. I usually leave about 1-2 tablespoons in the pot because we need that fat to cook the vegetables and bloom the spices for our Homemade Chili.
- Turn the heat down to medium. Toss in the diced yellow onion, bell pepper, and jalapeño. Sauté for 5 minutes until the onions are translucent and smelling sweet.
- Sprinkle in the 3 tbsp chili powder, 1 tbsp ground cumin, and 1 tsp smoked paprika. Stir constantly for 60 seconds. Note: The spices should smell toasted and fragrant, not burnt.
- Pour in the two cans of diced tomatoes, the tomato sauce, 1 cup beef broth, 1 tsp salt, 1/2 tsp black pepper, and 1 tsp brown sugar. Stir well to scrape up all those brown beef bits from the bottom.
- Fold in the drained kidney beans and pinto beans. Ensure everything is submerged in the liquid.
- Bring it to a gentle bubble, then lower the heat. Simmer the Homemade Chili for 45 minutes, stirring occasionally, until the sauce is thick, velvety, and clings to the meat.
The most important part here is that final simmer. If you see it bubbling too aggressively, turn it down. We want a lazy bubble, not a rolling boil, to keep the beef tender. If you're looking for other hearty meat dishes, you might enjoy my Texas Cowboy Stew recipe which uses a similar browning technique.
Solving Common Issues
Even for experienced cooks, Homemade Chili can sometimes go sideways. Usually, it's a matter of liquid ratios or flavor balance. The good news is that since this is a stew, it's very forgiving.
Troubleshooting Common Issues
| Issue | Solution | ||
|---|---|---|---|
| Why Your Chili Is Watery | This usually happens if the beef wasn't browned enough or if the simmer was too short. If the liquid hasn't had time to reduce, it won't have that characteristic "cling" to the spoon. You can fix this | ||
| Why Your Chili Tastes Sour | Canned tomatoes vary wildly in acidity. If your Homemade Chili tastes too sharp or "tinny", it's likely an acid imbalance. A pinch more brown sugar or a tiny knob of butter stirred in at the end can n | ||
| Why Your Chili Is Too Spicy | If the jalapeño was a "hot one" or you went heavy on the chili powder, the heat might be overwhelming. Adding a dollop of sour cream or a squeeze of lime juice helps cut the capsaicin. | Problem | Roo |
Fun Flavor Twists
Once you've nailed the basic Homemade Chili, it's fun to play with the recipe. I often change the protein or the heat level depending on who's coming over for dinner. If you want something a bit lighter, you can swap the beef for ground turkey, but you'll need to add a bit more olive oil since turkey is leaner.
For a smokier profile, try adding a teaspoon of cocoa powder or a splash of Worcestershire sauce. The cocoa doesn't make it taste like chocolate, but it adds a dark, earthy complexity that makes the Homemade Chili taste like it's been cooking for twelve hours.
If you're in the mood for something different, you can try my White Chicken Chili recipe for a creamier, zesty alternative. Or, for those who prefer a bean less version, just omit the beans and add extra diced carrots and celery to keep the bulk.
Decision Shortcut for Customizing: If you want a richer, darker flavor, add 1 tsp cocoa powder. If you want a "Texas style" feel, skip the beans and add extra cumin. If you want a milder heat, remove the jalapeño seeds entirely.
Keeping Leftovers Fresh
One of the best things about Homemade Chili is that it actually tastes better the next day. The flavors have more time to marry, and the starches from the beans further thicken the sauce. It's the ultimate meal prep dish.
For the fridge, keep your Homemade Chili in an airtight container for up to 4 days. When you're ready to eat, reheat it on the stove over medium heat. I always add a tiny splash of water or beef broth when reheating, as the chili tends to thicken up significantly in the cold.
If you're looking to save it for later, this freezes beautifully. Put it in freezer safe bags or containers and it'll stay great for up to 3 months. Just make sure to leave a little headspace in the container, as the liquid expands when it freezes.
To avoid waste, don't toss the stems of the bell peppers or the ends of the onions. I throw mine into a freezer bag for making a basic vegetable scrap broth later. Also, if you have leftover bean liquid from a different recipe, you can use it to thin out the Homemade Chili during reheating for extra creaminess.
Plating and Serving
You can't just scoop Homemade Chili into a bowl and call it a day. The toppings are where you can really personalize the experience. I like to set up a "toppings board" in the middle of the table and let everyone go wild.
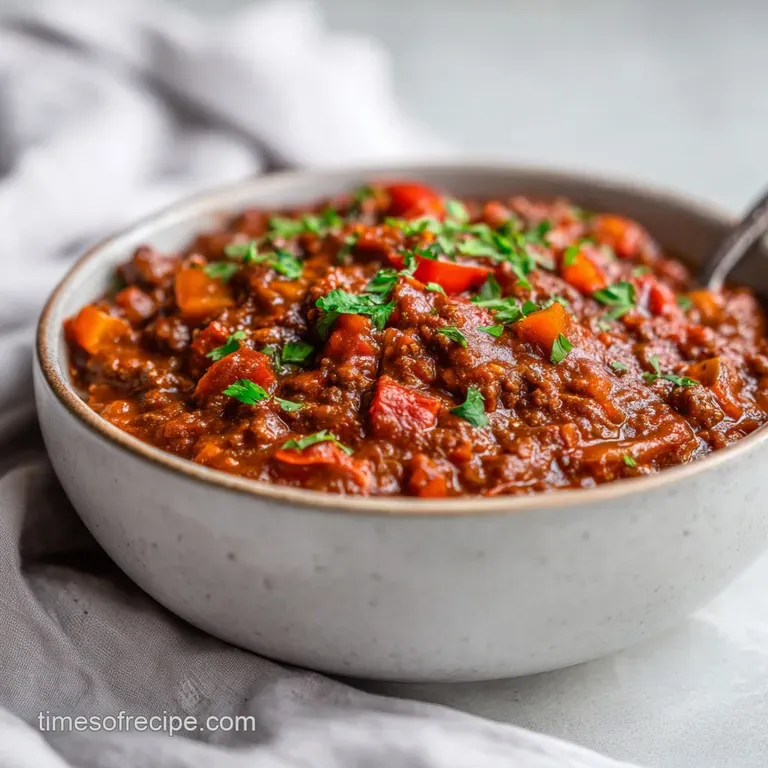
Start with a base of shredded sharp cheddar cheese, which melts into the hot chili to create silky pockets of gold. Then, add a dollop of cool sour cream to balance the heat. I'm a big fan of sliced green onions and fresh cilantro for a bit of brightness and crunch.
For the sides, a warm piece of honey butter cornbread is the classic choice. But if you want something different, try some salty tortilla chips or even a slice of toasted sourdough rubbed with garlic. The contrast between the velvety Homemade Chili and a crispy side is what makes the meal feel complete.
When serving, I like to use deep bowls to keep the heat in. A final sprinkle of smoked paprika on top adds a professional look and a hint of extra aroma. It's a simple dish, but when presented with all the fixings, it feels like a feast.
This Homemade Chili is more than just a meal, it's a way to bring people together around the table.
High in Sodium
980 mg 980 mg of sodium per serving (43% 43% of daily value)
The American Heart Association recommends a daily sodium limit of 2,300mg for most adults to reduce the risk of cardiovascular disease.
Tips to Reduce Sodium
-
Swap the Broth-30%
Replace the beef broth with low-sodium or no-salt added beef broth to significantly cut the base salt content.
-
Eliminate Added Salt-25%
Omit the 1 tsp of salt entirely, as the canned tomatoes and broth already provide substantial sodium.
-
Choose No-Salt Added Canned Goods-20%
Use no-salt added versions of the diced tomatoes and tomato sauce to avoid hidden processed sodium.
-
Enhance with Aromatics
Increase the cumin and smoked paprika, or add fresh cilantro and lime juice to boost flavor without adding sodium.
Recipe FAQs
How to make a quick and easy chili?
Sauté beef and aromatics, add liquids and beans, then simmer for 54 minutes. Using a Dutch oven helps maintain the consistent heat needed for a faster reduction.
What are the basic chili ingredients?
Lean ground beef, kidney and pinto beans, diced tomatoes, tomato sauce, and a blend of chili powder, cumin, and smoked paprika. These are supported by a base of onion, garlic, bell pepper, and jalapeño.
What is the secret to making good chili?
Brown the beef undisturbed for 3-4 minutes to develop a dark brown crust. Blooming the spices in the beef fat for 60 seconds before adding liquids also unlocks a deeper flavor profile.
How to make chili from scratch?
Brown ground beef in a Dutch oven, sauté diced vegetables, bloom your spices, and simmer with tomatoes and beans for 45 minutes. This process creates layered flavor without relying on pre-packaged mixes.
Is it true that chili must simmer for several hours to taste authentic?
No, this is a common misconception. A focused 45-minute simmer is sufficient to thicken the sauce and meld the flavors into a velvety finish.
Why is my chili too watery?
The beef likely wasn't browned enough or the simmer time was too short. Ensure the meat develops a dark crust and allow the liquid to reduce fully during the 45-minute cook.
What other beef dishes can I make with similar savory flavors?
Experiment with garlic and beef broth in a high heat stir fry. If you enjoyed the savory beef base here, see how the same protein works in our Beef Chow Mein.
Hearty Homemade Chili

