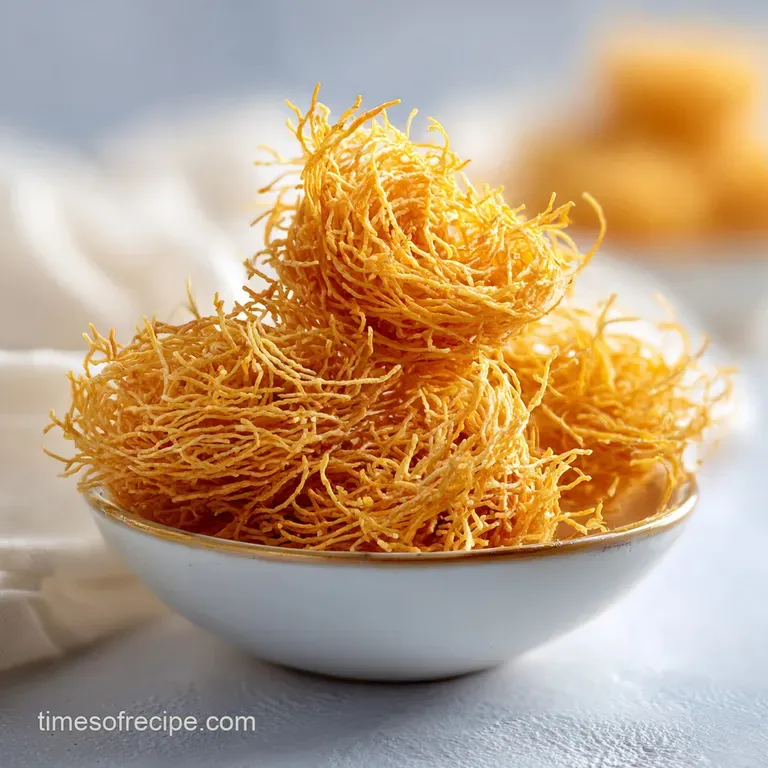
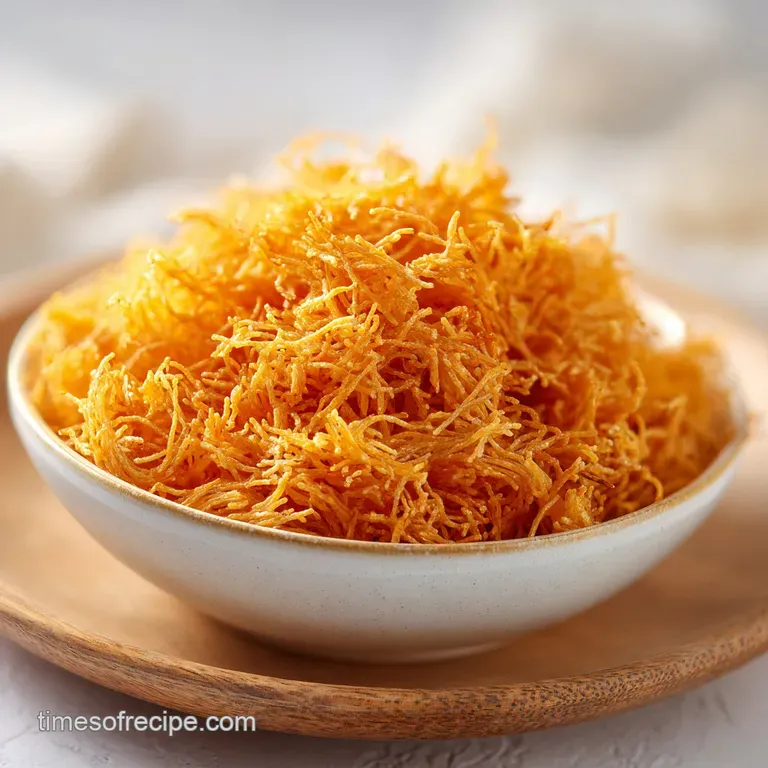
Homemade Crispy Kataifi Dough
- Time:15 minutes active + 30 minutes rest + 30 minutes cooking = 75 minutes total
- Flavor/Texture Hook: Delicate, lace like threads with a crisp, brittle finish
- Perfect for: Elegant dinner parties, Middle Eastern desserts, or viral chocolate bars
- Creating Ethereal Strands with Homemade Kataifi Dough
- Understanding the Delicate Textural Science
- Essential Elements for Every Strand
- Selecting Your Professional Pastry Tools
- Mastering the Fluid Motion Technique
- Correcting Common Thread Formation Issues
- Creative Flavor and Texture Swaps
- Preserving Your Fresh Pastry Nests
- Presenting Your Crisp Pastry Magic
- Recipe FAQs
- 📝 Recipe Card
Creating Ethereal Strands with Homemade Kataifi Dough
Have you ever excitedly pulled a box of frozen pastry from the store, only to find a stubborn, rubbery block that refuses to separate without tearing into a gummy mess? It is a heartbreaking moment for any baker wanting to create those stunning, nest like desserts.
That clumped texture is usually the result of multiple freeze thaw cycles in the supply chain, which ruins the delicate structure of the threads.
We are going to fix that today by learning how to make kataifi from scratch in your own kitchen. There is a specific magic in watching a liquid batter transform into golden, hair fine silk right before your eyes.
By controlling the hydration and the starch ratio, we ensure every single strand remains distinct and light, rather than turning into a heavy pancake.
This recipe is your targeted fix for those lackluster, soggy results. We're moving away from the industrial, preservative laden versions and toward a fresh, vibrant alternative. You can expect a batter that flows like heavy cream and cooks into brittle, golden filigree that adds a sophisticated crunch to any plate.
Let’s get our squeeze bottles ready and start this whimsical transformation.
Understanding the Delicate Textural Science
The beauty of this dough is found in its simplicity and the specific way ingredients interact under heat. By balancing protein and starch, we create a batter that is strong enough to hold a thread but brittle enough to shatter elegantly.
- Starch Gelatinization: Cornstarch prevents the flour from forming too much elastic gluten, ensuring the threads snap rather than stretch.
- Hydration Balance: The high water content allows the batter to atomize through a fine nozzle while providing steam to lift the strands.
- Thermal Set: The rapid evaporation of moisture in the pan "locks" the shape of the thread in under 45 seconds.
| Thickness | Pan Temperature | Cook Time | Visual Cue |
|---|---|---|---|
| Hair fine | Low Medium (150°C) | 30 seconds | Strands lift and curl |
| Medium thread | Medium (160°C) | 45 seconds | Edges turn opaque |
| Thick lace | Medium High (175°C) | 60 seconds | Slight golden hue |
The rest period is perhaps the most vital part of the entire process. Without those 30 minutes, your batter will likely be "wobbly" and prone to snapping inside the bottle.
Letting the flour fully hydrate creates a velvety consistency that flows without interruption, which is the cornerstone of a successful kataifi from scratch experience.
Essential Elements for Every Strand
When you decide to make kataifi from scratch, the quality of your base ingredients dictates the final "shatter" of the pastry. We aren't just making a pancake mix; we are creating a technical emulsion that must survive being squeezed through a needle thin tip.
| Ingredient | Science Role | Pro Secret |
|---|---|---|
| All purpose Flour | Provides structural protein | Sift twice for zero lumps |
| Cornstarch | Inhibits gluten formation | Increases the brittle "crunch" |
| Neutral Oil | Lubricates the nozzle | Adds a subtle, elegant sheen |
Using a high speed blender is a trick I learned after many frustating afternoons of clogged nozzles. Even the smallest microscopic flour pearl can ruin your flow. If you find your batter isn't perfectly smooth, don't be afraid to pass it through a sieve twice.
This ensures that when you start your kataifi from scratch journey, the physical process is as fluid as the batter itself.
For those who enjoy experimenting with different types of doughs, you might find the hydration levels here reminiscent of a very thin Filipino Pandesal recipe starter, though our goal here is crispness rather than a soft, pillowy crumb.
Selecting Your Professional Pastry Tools
To achieve that stunning, professional look, you need a squeeze bottle with a very fine tip. I prefer using a precision tip often found in cake decorating kits or even a clean "needle nose" condiment bottle. The finer the hole, the more elegant your final nests will look.
- High Speed Blender: Essential for creating a completely homogenous, silky emulsion.
- 12 inch Non Stick Skillet: A large surface area allows for wider circular motions, creating longer, continuous strands.
- Fine Mesh Sieve: This is your insurance policy against clogs and uneven cooking.
- Clean Kitchen Towel: Used to trap just enough residual steam to keep the cooked threads pliable.
Chef's Tip: If you don't have a precision squeeze bottle, you can use a piping bag with a number 1 or 2 round tip, but the bottle gives you much better control over the "flow" during the rapid circular motions.
Mastering the Fluid Motion Technique
Now we reach the most exciting part bringing the kataifi dough to life. The key here is confidence and speed. If you hesitate, the strands will become thick and uneven. Think of it like drawing delicate lace with sugar.
- Emulsify components. Combine 250g all purpose flour, 125g cornstarch, 0.5 tsp salt, 540ml water, and 30ml oil in a blender.
- Blend thoroughly. Pulse on high for 60 seconds until the mixture resembles heavy cream.
- Refine the texture. Pour the batter through a fine mesh sieve to catch any tiny lumps.
- Rest the batter. Cover and wait 30 minutes at room temperature to allow the starch to hydrate.
- Prepare the bottle. Transfer the silky liquid into your squeeze bottle.
- Heat the pan. Set a non stick skillet over low medium heat without adding any grease.
- Pipe the threads. Squeeze the bottle in rapid, overlapping circular motions across the pan.
- Cook briefly. Wait 30-45 seconds until the strands dry and lift naturally.
- Harvest the pastry. Lift the threads with a spatula and place them on a towel.
- Steam and soften. Cover the pile briefly to ensure they remain pliable for later use.
Getting the motion right is similar to the patience needed for a Dutch Apple Bread recipe, where the timing of the bake determines the crust's integrity. To make kataifi from scratch successfully, you must resist the urge to brown the dough in the pan; the "baking" happens later when you assemble your final dish.
Correcting Common Thread Formation Issues
Even seasoned cooks can run into a few wobbly moments when dealing with such thin pastry. Usually, if the threads are breaking, it's a sign that the batter is too thick or the pan is too hot. If they are gummy, they simply haven't dried out enough.
Why is my nozzle clogging?
If your flow stops mid circle, it’s almost certainly a microscopic lump of flour. This is the most common hurdle when you make kataifi from scratch. Always ensure you have sieved the batter. If it still happens, your needle tip might be too narrow for the specific brand of flour you are using.
Why are the strands gummy?
Gummy strands happen when the pan isn't quite warm enough to evaporate the water instantly. The batter essentially boils instead of drying. Increase your heat by a tiny fraction and ensure you aren't piling the batter too thickly in one spot.
| Problem | Root Cause | Solution |
|---|---|---|
| Brittle/Snapping | Overcooked in the pan | Remove as soon as they lift |
| Thick/Heavy Threads | Nozzle tip is too large | Use a finer needle nose tip |
| Batter won't flow | Under hydrated flour | Add 1 tbsp water and re blend |
Common Mistakes Checklist
- ✓ Never grease the pan; oil will cause the batter to bead up rather than form lines.
- ✓ Always rest the batter for the full 30 minutes to relax the gluten.
- ✓ Sift your dry ingredients before blending to prevent stubborn micro lumps.
- ✓ Keep a damp towel over finished strands to prevent them from becoming "shattery" too early.
- ✓ Work in small batches; don't try to fill the entire pan with a single squeeze.
Creative Flavor and Texture Swaps
While the traditional recipe is neutral to allow the honey or syrup to shine, you can certainly play with the profile. Just be careful with additions, as any solids will immediately clog your squeeze bottle. If you want to vary your kataifi from scratch experience, stick to liquid extracts or very finely ground spices.
| Original Ingredient | Substitute | Why It Works |
|---|---|---|
| Water (540ml) | Rose Water (diluted) | Adds a floral, Middle Eastern aroma |
| Vegetable Oil | Melted Ghee | Provides a richer, buttery toasted flavor |
| All purpose Flour | Rice Flour | Creates an even more brittle, gluten-free snap |
If you are following the viral "Dubai Chocolate" trend, you'll want to toast these strands in a separate pan with plenty of butter until they are deeply bronzed. The resulting crunch is much more satisfying when the kataifi from scratch is fresh.
You can also use these threads to wrap around prawns for a stunning "Bird's Nest" appetizer that will have your guests asking for the recipe.
Preserving Your Fresh Pastry Nests
Freshly made kataifi is a delicate thing. Because it is so thin, it loses moisture rapidly. If you aren't using it immediately, you must be diligent about how you store it. Think of it like a delicate lace fabric it needs protection from the elements.
- Fridge Storage: Place the strands in an airtight container or a zip top bag. They will stay fresh for up to 3 days. Ensure the bag is squeezed of all air to prevent drying.
- Freezer Storage: You can freeze these for up to 2 months. Lay them flat in a freezer bag. When you're ready to use them, thaw them in the fridge overnight. Avoid thawing at room temperature, as condensation can make them wobbly and damp.
- Zero Waste Tip: If you have broken bits or "ugly" strands, don't throw them away! Toast them in a pan with a little sugar and butter to use as a crunchy topping for yogurt, ice cream, or even oatmeal.
To make kataifi from scratch is to respect the fragility of the threads. If they do dry out too much, a very light mist of water can sometimes revive them, but it’s better to keep them sealed from the start.
Presenting Your Crisp Pastry Magic
The final presentation is where your hard work truly shines. Whether you are building a classic Kunefe or a modern pastry tower, the goal is to highlight the intricate texture. Since these strands are so fine, they catch light beautifully, creating a stunning visual on the plate.
When you use your kataifi dough for baking, remember that it browns very quickly due to the high surface area. Always keep a close eye on the oven. I find that a lower temperature for a longer period results in a more even, golden color rather than burnt tips and a pale center.
Serving these at a party is always a conversation starter. People are genuinely fascinated when they realize you didn't buy the "bird's nest" from a specialty shop but instead took the time to make kataifi from scratch. It adds an elegant, sophisticated touch that turns a simple dessert into a memorable occasion.
Enjoy the process, keep your circular motions fluid, and watch as your kitchen turns into an artisanal pastry studio!

Recipe FAQs
How to make your own kataifi pastry?
Blend ingredients until smooth, rest for 30 minutes, then drizzle onto a non-stick pan. Combine all-purpose flour, cornstarch, salt, water, and oil in a blender for 60 seconds, strain, rest the batter to allow gluten relaxation, and use a squeeze bottle to form thin strands over low-medium heat for
30-45 seconds.
What is kataifi made of?
This dough consists exclusively of all-purpose flour, cornstarch, fine sea salt, water, and neutral vegetable oil. It relies on a precise emulsion of these five ingredients to achieve its signature thread like, brittle texture.
What is a substitute for kataifi?
Phyllo dough is the only viable alternative. While it lacks the iconic shredded appearance, you can achieve a similar crunch by slicing thin sheets of phyllo into fine ribbons with a sharp knife.
Can I turn phyllo dough into kataifi?
Yes, by manually shredding it. You can mimic the aesthetic of kataifi by stacking several sheets of phyllo and cutting them into hair thin strips, though it will not provide the same authentic lace like structure as a poured batter.
Is it true I can use a high speed blender for the batter?
Yes, it is the preferred method for the best texture. Blending for 60 seconds ensures the emulsion reaches a consistency similar to heavy cream, which is vital for the strands to flow cleanly from your squeeze bottle.
Why is resting the batter for 30 minutes necessary?
Resting allows the starch to fully hydrate and the gluten to relax. If you enjoyed learning how to control dough structure here, you can see how proper resting times influence the texture of our fluffy cinnamon rolls as well.
How to store finished kataifi strands?
Keep them in an airtight container in the refrigerator for up to three days. Ensure they are completely cool and covered with a clean kitchen towel to retain their pliability before storing, which prevents them from becoming brittle or drying out too quickly.
Homemade Crispy Kataifi Dough

Ingredients:
Instructions:
Nutrition Facts:
| Calories | 116 kcal |
|---|---|
| Protein | 1.8 g |
| Fat | 2.1 g |
| Carbs | 21.7 g |
| Fiber | 0.5 g |
| Sugar | 0.1 g |
| Sodium | 84 mg |
