Vegan Puff Pastry: Flaky and Golden
- Time: Active 40 mins, Passive 130 mins, Total 170 minutes
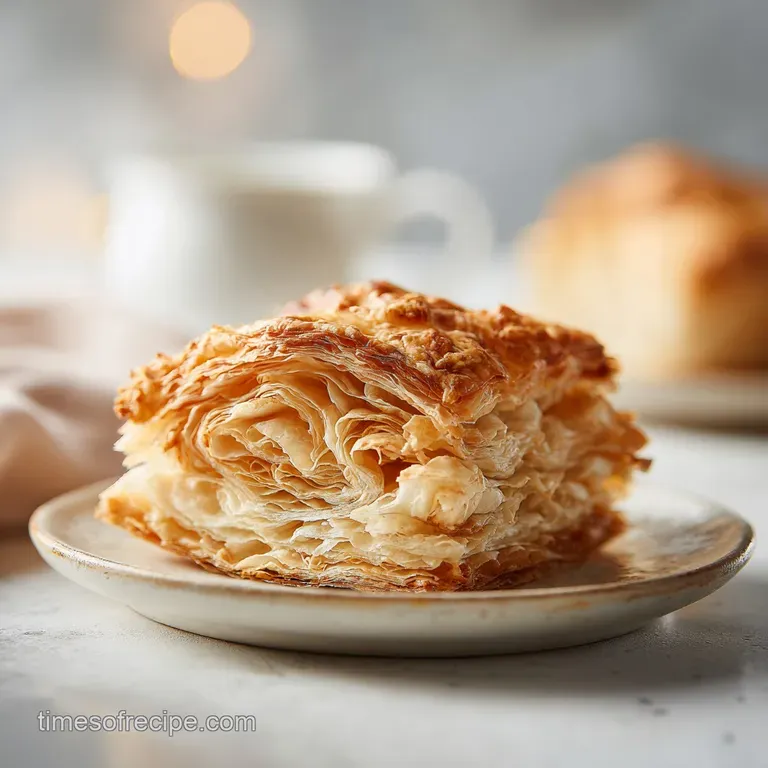
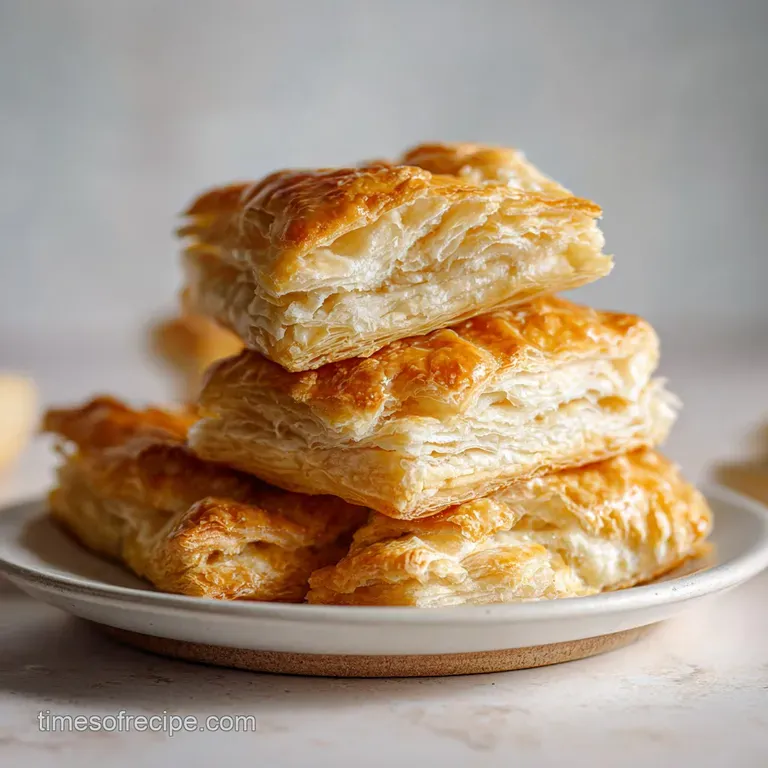
- Flavor/Texture Hook: Shatter crisp, golden layers with a buttery, velvety finish
- Perfect for: Elegant dinner party appetizers, fruit tarts, or sophisticated breakfast pastries
- Creating Flaky Magic with Vegan Puff Pastry
- Why This Recipe Works
- Component Analysis and Science
- Selecting Your Essential Elements
- Necessary Tools for Success
- The Step by Step Guide
- Solving Common Baking Problems
- Scaling and Flavor Variations
- Storage and Waste Management
- Elegant Finishing Touches
- Recipe FAQs
- 📝 Recipe Card
Creating Flaky Magic with Vegan Puff Pastry
Forget everything you have been told about the impossibility of dairy-free pastry. There is a persistent myth in the baking world that you need high fat European butter to achieve those elegant, sky high layers that shatter upon impact.
I used to believe that too, staring at my dense, sad vegan crusts and wondering where the magic went. But honestly, the secret isn't the cow; it is the temperature and the geometry. You don't need animal products to create a stunning bake that makes your guests whisper, "Is this actually vegan?"
This recipe is about reclaiming the joy of lamination without the three day ordeal. We are going to treat our plant based fats with the respect they deserve, turning simple flour and water into a golden, wobbly masterpiece.
We will use a "shingle" technique where we leave large, visible pieces of fat in the dough rather than rubbing them into fine crumbs. This creates pockets of steam that force the dough upward in the oven, resulting in that iconic puff we all crave.
When you pull this from the oven, the aroma is buttery and toasted, and the sound of the first bite is a literal symphony of crackling crust. It is sophisticated, it is whimsical, and it is far easier than you think once you understand the simple dance between the cold fat and the flour.
Let's get into how we make this happen without losing our minds.
Why This Recipe Works
- Mechanical Leavening: The water in the vegan butter and coconut oil evaporates rapidly at 200°C, creating steam that physically lifts each thin layer of dough.
- Acidity and Elasticity: Apple cider vinegar slightly weakens the gluten bonds, allowing you to roll the dough out thinly without it snapping back like a rubber band.
- Thermal Stability: Mixing a small amount of solid coconut oil with the vegan butter raises the melting point slightly, giving you more time to work before the fat turns into a greasy puddle.
- Gluten Relaxation: The specific 30 minute rest periods allow the proteins to uncoil, ensuring the pastry stays tender rather than becoming tough or bready.
| Method | Time Commitment | Texture Result | Best Use Case |
|---|---|---|---|
| Quick Lamination | 170 minutes | Crisp and airy | Tarts and appetizers |
| Classic Block | 2 days | Maximum height | Professional patisserie |
| Rough Puff | 90 minutes | Flaky but denser | Pie crusts and galettes |
Understanding the difference between these methods helps you choose the right path for your afternoon. While the classic block method is impressive, this "Quick Lamination" version provides 90% of the result with significantly less heartache.
It balances the precision of turns with a more forgiving dough structure that handles plant based fats beautifully.
Component Analysis and Science
| Ingredient | Science Role | Pro Secret |
|---|---|---|
| All Purpose Flour | Provides the structural framework via gluten. | Keep it around 10-11% protein for the best lift. |
| high-quality Vegan Butter | Creates the fat barriers between dough layers. | Use a block style, not a tub spread, for stability. |
| Apple Cider Vinegar | Lowers pH to prevent gluten from becoming too "tight." | It also helps prevent the dough from turning gray in the fridge. |
| Ice Cold Water | Hydrates the flour without melting the fat shingles. | Add a few ice cubes to the measuring cup to ensure it is freezing. |
A quick tip for the curious baker: the magic happens because the flour isn't fully hydrated at first. By tossing the water in with a fork, you create a "shaggy" dough. This uneven hydration is actually your friend.
It prevents the dough from becoming a monolithic block and instead encourages the formation of distinct, flaky sheets that will later shatter beautifully.
Selecting Your Essential Elements
- 250g All Purpose Flour: This is our canvas. Why this? Provides enough protein for structure without making the pastry tough or chewy. (Substitute: 1:1 gluten-free baking blend, but expect less "puff" and a more crumbly texture).
- 225g high-quality Vegan Butter Block: This must be cold and cubed. Why this? The fat creates the physical separation between the layers of dough. (Substitute: Solid vegetable shortening, though you will lose that rich, buttery flavor profile).
- 25g Solid Coconut Oil: Keep this firm, not melted. Why this? It has a higher melting point than most vegan butters, aiding in lamination stability. (Substitute: Extra vegan butter if you prefer a single fat profile).
- 125ml Ice Cold Water: The colder, the better. Why this? Keeps the fat pieces solid while binding the flour into a workable dough. (Substitute: Cold vodka, which evaporates faster and can lead to an even flakier result).
- 5g Sea Salt: For flavor balance. Why this? Sharpens the buttery notes and strengthens the gluten network slightly. (Substitute: Table salt, but use slightly less by volume).
- 1 tsp Apple Cider Vinegar: Our secret weapon. Why this? Relaxes the dough for easier rolling and helps the pastry brown beautifully. (Substitute: Lemon juice for a similar acidic effect).
Necessary Tools for Success
You don't need a professional bakery setup, but a few specific items make this much more elegant. A heavy rolling pin preferably a French tapered one gives you better control over the pressure as you perform your turns.
You will also need a large mixing bowl and a sharp knife or a pastry wheel to cut the dough.
Avoid using your hands too much; the warmth from your palms is the enemy of lamination. Instead, a simple metal bench scraper is a lifesaver for folding the dough and keeping your workspace clean.
If you are feeling particularly sophisticated, a marble rolling board stays naturally cool and prevents the vegan butter from softening too quickly.
The step-by-step Guide
1. Incorporating the Fat
Combine the 250g all purpose flour and 5g sea salt in a large mixing bowl. Add the 225g cubed vegan butter and 25g solid coconut oil. Use your fingertips to press the fat into flat shingles rather than crumbs, until you see large, visible pieces of fat remaining.
Note: These shingles are what create the layers; don't overwork them into a paste.
2. Hydrating and Binding
Whisk the 125ml ice cold water and 1 tsp apple cider vinegar together. Gradually add the liquid to the flour mixture, tossing with a fork until a shaggy, messy dough forms. Note: It might look like it won't come together, but resist the urge to add more water.
3. The Initial Rest
Wrap the dough tightly in plastic wrap or a reusable beeswax wrap. Chill for 30 minutes until the dough feels firm and the flour has hydrated. Note: This resting period is non negotiable for gluten relaxation.
4. The First Turns
On a floured surface, roll the dough into a 12x6 inch rectangle. Fold the bottom third up to the center and the top third down like a letter. Rotate 90 degrees and repeat the process until you have completed two full turns. Note: Work quickly to keep the fat from melting into the flour.
5. Second Chill Cycle
Wrap the dough again and chill for 20 minutes until the butter feels solid to the touch. Note: If the dough feels "springy" or hard to roll, give it an extra 5 minutes.
6. Final Lamination
Perform the final two turns (for a total of four). Roll, fold, rotate, and fold again until the dough looks smooth with visible streaks of fat. Note: You are literally stacking layers of fat and dough like a deck of cards.
7. The Long Rest
Wrap the dough tightly and chill for at least 1 hour until the entire block is cold and set. Note: This ensures the pastry won't shrink or pull back when you bake it.
8. The Bake
Roll out for your final application and bake at 200°C (400°F) for approximately 20 minutes until the pastry is golden brown and the layers have visibly separated.
Note: If it looks pale, give it another 3-5 minutes for maximum crunch.
Solving Common Baking Problems
The most frequent heartache with vegan puff pastry is the "greasy puddle" effect. This happens when the fat melts before the dough has a chance to set its structure in the oven. If you see oil leaking out onto the baking sheet, your dough was likely too warm before it went in.
Always ensure your pastry is refrigerator cold when it hits the hot oven.
Why Your Pastry Stayed Flat
If your layers didn't puff, it usually comes down to the lamination process. If you worked the fat in too much at the start, you created a "short" crust rather than a layered one. Think of it like this: the fat must remain as a distinct barrier. If it's mixed in, there is no place for the steam to go but out.
| Problem | Root Cause | Solution |
|---|---|---|
| Greasy texture | Fat melted during rolling | Chill the dough for 15 mins between every single turn. |
| Tough/Chewy result | Overworked gluten | Increase the rest time by 10 minutes to allow proteins to relax. |
| Layers didn't rise | Fat was mixed too thoroughly | Keep fat pieces the size of walnut halves during the first mix. |
Common Mistakes Checklist
- ✓ Ensure the water is truly ice cold; room temp water will melt the butter shingles instantly.
- ✓ Avoid over flouring the surface; excess flour makes the pastry dry and prevents layers from sticking.
- ✓ Never skip the resting periods; they are essential for preventing the dough from shrinking in the oven.
- ✓ Check your oven temperature with a thermometer; if it’s too cool, the fat will melt before the steam can lift the layers.
- ✓ Cut the dough with a very sharp knife in a straight downward motion to avoid sealing the edges shut.
Scaling and Flavor Variations
If you want to make a larger batch, scaling up is relatively simple. For a double batch (24 servings), use 500g of flour and 450g of vegan butter. However, keep the salt and vinegar at about 1.5x the original amount (8g salt and 1.5 tsp vinegar) to ensure the texture doesn't become too acidic or salty.
When working with larger amounts of dough, it is often easier to split the batch into two smaller blocks for rolling, as it keeps the temperature more manageable.
For those looking for a different vibe, you can incorporate dry spices directly into the flour. A teaspoon of smoked paprika or dried thyme creates beautiful savory herb infused layers that pair perfectly with vegetable fillings. If you are leaning into the sweet side, a pinch of cinnamon or cardamom in the dough adds a sophisticated warmth that complements Date Snickers recipe flavors or fresh fruit tarts.
If you want X, do Y
- If you want a sweeter crust: Add 10g of powdered sugar to the flour mix.
- If you want a more rustic look: Use a mix of 200g AP flour and 50g whole wheat pastry flour.
- If you want maximum height: Perform six turns instead of four, but chill longer between each.
Storage and Waste Management
Proper storage is the key to maintaining that delicate, shatter crisp texture. Freshly baked pastry is best enjoyed within 4 hours, but if you have leftovers, store them in a paper bag at room temperature for up to 24 hours.
Avoid plastic containers, as they trap moisture and turn your beautiful layers into a soggy mess. For longer storage, the raw dough can be wrapped tightly and frozen for up to 2 months; just thaw it overnight in the fridge before rolling.
Don't you dare throw away the "scraps" after cutting your shapes! These odd shaped trimmings are a baker's treat. Gather them up don't ball them together, just stack them and roll them out one last time.
Cut them into thin strips, sprinkle with cinnamon sugar or nutritional yeast, and bake them into "pastry fries." They won't have the same uniform puff, but they will be just as crisp and buttery.
Elegant Finishing Touches
Presentation is where your whimsical side can truly shine. To get that sophisticated golden glow without eggs, use a wash of soy milk mixed with a tiny pinch of turmeric or agave syrup. This creates a stunning, lacquered finish that looks professional.
When the pastry comes out of the oven, the visual appeal is all about the contrast between the golden crust and your garnishes.
To achieve a perfect color balance, I recommend focusing on three specific accents. First, a sprinkle of flaky sea salt adds a crystalline sparkle that catches the light. Second, adding a touch of emerald green with finely minced fresh herbs (like chive or thyme) immediately after baking provides a fresh pop.
Finally, if you are making a dessert, a few ruby red pomegranate arils or a dusting of snow white powdered sugar creates a high contrast look that is absolutely breathtaking. Arrange them with geometric precision for a modern look, or scatter them loosely for a more rustic, enchanting vibe.

Recipe FAQs
Which puff pastry brands are vegan?
Many store-bought frozen brands are accidentally vegan. Check the label for "palm oil" or "vegetable oil" instead of butter, though cross contact is always a possibility with mass produced baked goods.
Is Pepperidge Farm puff pastry vegan?
Yes, the Pepperidge Farm frozen puff pastry sheets are technically vegan. They contain no dairy, though they do use hydrogenated vegetable oils rather than the high-quality vegan butter block used in this scratch recipe.
Can puff pastry be vegan?
Yes, absolutely. By substituting traditional dairy butter with a high-quality chilled vegan butter block and solid coconut oil, you can achieve the exact same lamination and lift as traditional versions.
Is supermarket puff pastry vegan?
Often, but not always. You must verify the ingredient list, as many premium brands still use dairy butter for flavor, while budget versions typically rely on plant based shortenings.
How to prevent puff pastry from shrinking during baking?
Never skip the resting periods. Chilling the dough for at least 1 hour after your final turn relaxes the gluten, which prevents the pastry from snapping back to a smaller size once it hits the 400°F (200°C) oven.
How to fix dough that gets too warm while folding?
Stop immediately and place it in the freezer for 10 minutes. If you enjoyed mastering the temperature management required here, you will find it equally critical when preparing delicate plant based dishes that require precise heat control.
Is it true I must use dairy butter for successful lamination?
No, this is a common misconception. You achieve perfect flaky layers by keeping your vegan butter and coconut oil in visible, flat shingles during the folding process, which creates steam pockets regardless of the fat source.
Homemade Vegan Puff Pastry

Ingredients:
Instructions:
Nutrition Facts:
| Calories | 228 kcal |
|---|---|
| Protein | 2.1 g |
| Fat | 17.1 g |
| Carbs | 15.8 g |
| Fiber | 0.6 g |
| Sugar | 0.1 g |
| Sodium | 296 mg |
