Red Velvet Chocolate Chip Cookies
- Time: Active 20 mins, Passive 2 hours 10 mins, Total 2 hours 30 mins
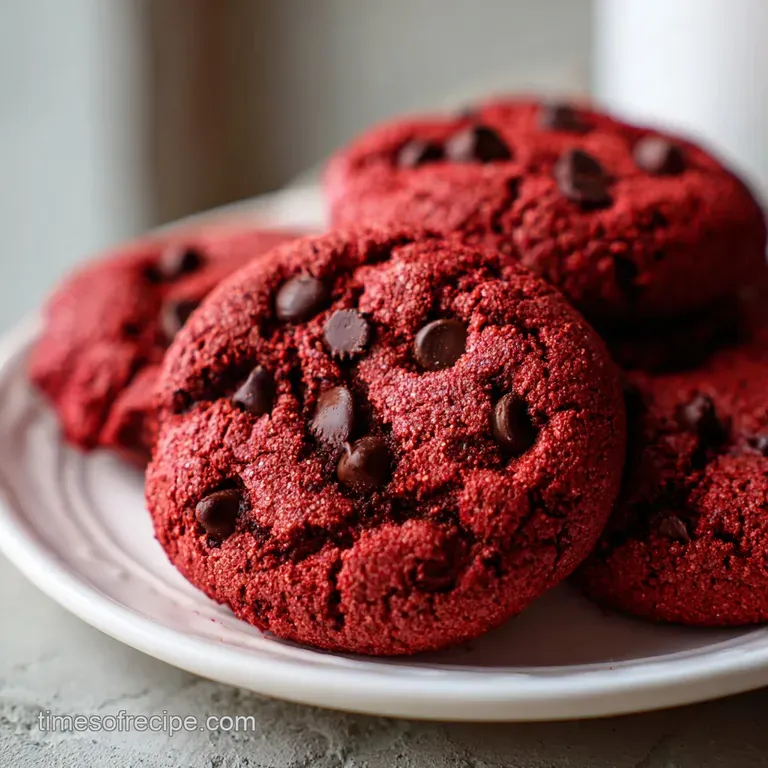
- Flavor/Texture Hook: Velvety crumb with molten chocolate chips
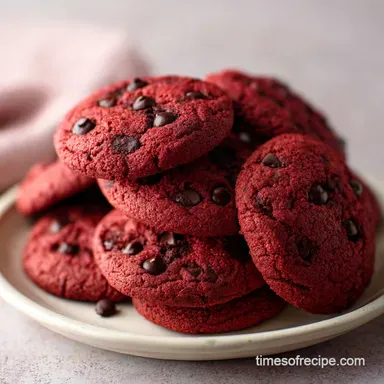
- Perfect for: Holiday gifting, Valentine's Day, or stunning dessert platters
- Master These Red Velvet Chocolate Chip Cookies
- The Science of Crimson Hues
- Component Analysis for Success
- Selecting Your Baking Elements
- Essential Tools for Best Results
- Step by Step Precision Baking
- Pro Fixes for Common Mistakes
- Creative Flavor Variations
- Freshness and Storage Guide
- Perfect Pairings for Dessert
- Recipe FAQs
- 📝 Recipe Card
Master These Red Velvet Chocolate Chip Cookies
I still remember the first time I pulled a tray of these out of the oven. The kitchen was filled with that unmistakable scent part rich vanilla, part toasted cocoa and the cookies were a shade of crimson so deep it looked like velvet.
I let them cool just enough to handle, and when I broke one open, the center was impossibly soft while the edges had that delicate shatter I've spent years trying to get right.
It wasn't always this way, though. My first few attempts were a disaster. I ended up with cookies that looked like brownish hockey pucks because I didn't understand how cocoa powder interacts with pH levels. I was so frustrated I almost gave up on red velvet entirely.
But after some tinkering with acids and temperatures, I finally found the magic formula.
This recipe isn't just about adding food dye to a standard base. It’s about building layers of flavor the tang of the cream cheese, the hint of vinegar, and the way the chocolate chips melt into the cocoa scented dough.
If you've been looking for that stunning, bakery style result at home, we've finally found it. Trust me, once you see that vibrant red against the dark chocolate, you'll never go back to the boxed stuff.
The Science of Crimson Hues
The Acid Catalyst: Adding white vinegar reacts with the non Dutch processed cocoa powder to preserve the anthocyanins, ensuring the red color stays bright rather than turning muddy brown.
The Moisture Anchor: Cream cheese introduces extra fat and lactic acid, which prevents the flour proteins from over bonding, resulting in a velvety, cake like interior.
Starch Gelatinization: Cornstarch interferes with gluten development by absorbing excess moisture, which gives these cookies their signature soft bite texture that never turns brittle.
| Dough State | Baking Time | Final Texture | Best For |
|---|---|---|---|
| Room Temp | 8 mins | Thin, crispy edges | Quick snacking |
| Chilled 2 hrs | 10 mins | Thick, fudgy center | Bakery style look |
| Chilled 24 hrs | 11 mins | Deep flavor, soft | Ultimate indulgence |
Chilling the dough is the most important step for achieving that elegant, thick profile we all love. When the fats are cold, they take longer to melt in the oven, which gives the structure time to set before the cookie spreads too far across the pan.
If you are looking for more festive inspirations, you might enjoy trying my Red Velvet Cookies recipe which features a luscious cream cheese filling. Both recipes rely on that perfect balance of cocoa and acidity to get the flavor just right.
Component Analysis for Success
| Ingredient | Science Role | Pro Secret |
|---|---|---|
| Unsweetened Cocoa | Provides structure and flavor | Use natural (not Dutch) for the best color reaction |
| Cornstarch | Softens the crumb | Sift it with flour to avoid any tiny chalky clumps |
| White Vinegar | Brightens the red hue | Don't skip it; it evaporates but leaves the color |
| Red Food Gel | Provides intense pigment | Use gel over liquid to keep the hydration levels stable |
The magic of these cookies lies in how the ingredients interact. While the vinegar might seem strange for a cookie, it's the secret to that classic red velvet tang. Just like when I make my Crinkle Cookies recipe, getting the dry to wet ratio exact is what ensures that stunning contrast in every bite.
Selecting Your Baking Elements
Finding the right ingredients makes a world of difference for these Red Velvet Chocolate Chip Cookies. I always recommend using a high-quality butter with at least 82% fat content for the best flavor.
- 375g All Purpose Flour: The structural backbone of the cookie.
- Substitute: 1:1 gluten-free baking flour. Why this? Maintains the weight and volume without the gluten.
- 25g Unsweetened Cocoa Powder: Adds the subtle chocolate base.
- Substitute: Cacao powder. Why this? More bitter but works with the color gel.
- 10g Cornstarch: Ensures the "velvet" texture.
- Substitute: Arrowroot powder. Why this? Provides similar thickening and softening properties.
- 5g Baking Soda: The leavening agent.
- Substitute: 15g Baking powder. Why this? Note: May result in a fluffier, more cake like texture.
- 225g Unsalted Butter (Softened): Provides richness and fat.
- Substitute: Vegan butter sticks. Why this? High fat content mimics dairy butter well.
- 150g Granulated Sugar: For sweetness and crisp edges.
- 110g Light Brown Sugar (Packed): For chewiness and moisture.
- 30g Cream Cheese (Full Fat): The secret to the soft crumb.
- 2 tsp Red Food Gel: For that stunning visual pop.
- Substitute: Beet powder (2 tbsp). Why this? Natural alternative, though color will be more earthy.
- 340g Semi Sweet Chocolate Chips: The classic mix in.
Chef's Tip: Freeze your chocolate chips for 20 minutes before folding them in. This prevents them from melting too quickly during the initial bake, leaving you with distinct, beautiful pockets of chocolate.
Essential Tools for Best Results

You don't need a professional kitchen, but a few specific tools make this simple. I highly recommend using a digital scale; it’s the only way to be 100% sure you aren't adding too much flour, which is the number one reason cookies turn out dry.
A stand mixer or a sturdy hand mixer is vital for the aeration phase. You want to whip that butter and sugar until they are pale and fluffy. I also swear by using heavy duty baking sheets thin ones tend to warp and cause uneven browning on the bottom. If you have silicone baking mats, use them!
They provide a little extra insulation, which is helpful for keeping the red color from darkening too much on the bottom.
step-by-step Precision Baking
- Sift the dry base. Combine 375g flour, 25g cocoa, 10g cornstarch, 5g baking soda, and 3g salt. Note: Sifting removes lumps and ensures the cocoa is evenly distributed.
- Cream the fats. Beat 225g butter, 150g granulated sugar, and 110g brown sugar until pale and airy.
- Incorporate the dairy. Add the 30g cream cheese and mix until no white streaks remain.
- Emulsify the liquids. Add the egg, 5ml vinegar, 10ml vanilla, and 2 tsp red food gel. Beat until the color is vibrant and uniform.
- Fold in the dry. Gradually add the flour mixture to the wet ingredients. Note: Stop as soon as the last bit of white flour disappears to prevent toughness.
- Add the chips. Fold in 340g chocolate chips by hand using a spatula.
- The mandatory rest. Cover the dough and chill in the fridge for at least 2 hours.
- Portion the dough. Scoop 2 tablespoon sized balls onto a lined sheet.
- The precision bake. Bake at 350°F (180°C) for 10 minutes until the edges are set but the center looks soft.
- Cool on the pan. Let them rest for 5 minutes until they firm up enough to move.
Just like with my Snickerdoodles Cookies recipe, letting the cookies rest on the hot pan is part of the cooking process. It allows the carryover heat to finish the center without drying out the exterior.
Pro Fixes for Common Mistakes
Getting that elegant look requires a little attention to detail. If your cookies aren't looking quite like the pictures, it's usually a small environmental factor or a measurement slip up.
Solving Spread and Texture Issues
When cookies spread too much, it's usually because the butter was too oily or the dough was too warm. Always make sure your butter is "cool softened" it should take an indent from your thumb but not feel greasy or melted.
If the cookies come out brown, it's often a temperature issue or using the wrong cocoa powder.
| Problem | Root Cause | Solution |
|---|---|---|
| Flat cookies | Dough was too warm | Chill for at least 2 full hours before baking |
| Muddy color | Oven temp too high | Use an oven thermometer to ensure 350°F (180°C) |
| Dry/Crumbly | Too much flour | Use a digital scale to measure exactly 375g |
Common Mistakes Checklist
- ✓ Ensure your egg and cream cheese are at room temperature to avoid curdling the batter.
- ✓ Use gel food coloring instead of liquid to prevent adding unnecessary moisture.
- ✓ Don't overmix the dough once the flour is added; this keeps the texture velvety.
- ✓ Let the baking sheets cool completely between batches so the dough doesn't melt instantly.
- ✓ Check your cocoa powder label natural cocoa is essential for the red color reaction.
Creative Flavor Variations
If you want to take these Red Velvet Chocolate Chip Cookies to the next level, there are a few simple tweaks you can try. Sometimes I swap the semi sweet chips for white chocolate chips; the stark white against the deep red is absolutely stunning and adds a creamy, vanilla forward sweetness.
Another favorite of mine is the "Inside Out" variation. You can take a small cube of cold cream cheese mixed with powdered sugar and wrap the red velvet dough around it. When it bakes, you get a hidden cheesecake like center that is pure magic.
For the chocolate lovers, try the "Triple Chocolate Threat" by adding 50g of dark chocolate chunks alongside the semi sweet chips for different melting points and textures.
Freshness and Storage Guide
These cookies stay soft for quite a while thanks to the brown sugar and cream cheese, but proper storage is key to maintaining that "day one" magic.
- Storage: Keep them in an airtight container at room temperature for up to 4 days. If your kitchen is very warm, the fridge is safer, but let them come to room temp before eating.
- Freezing: You can freeze the baked cookies for up to 3 months. Even better, freeze the raw dough balls! You can bake them straight from the freezer just add 1 to 2 minutes to the bake time.
- Zero Waste: If you have any cookies that go a bit stale, crumble them up! They make an incredible topping for vanilla bean ice cream or can be used as a base for a chocolatey cheesecake crust.
Perfect Pairings for Dessert
Since these Red Velvet Chocolate Chip Cookies are quite rich, they pair beautifully with something that has a bit of a bite or a cooling element. A cold glass of whole milk is the classic choice, but if you're serving these at a dinner party, a small dollop of lightly sweetened whipped cream on the side is elegant and simple.
For a hot beverage, a medium roast coffee or a London Fog tea (earl grey with steamed milk and vanilla) complements the cocoa notes without overpowering the cookie. If you're feeling adventurous, try serving them alongside a tart raspberry sorbet the acidity of the berries cuts through the richness of the chocolate and cream cheese perfectly.
These are the kind of simple touches that turn a casual snack into a stunning dessert experience.

Recipe FAQs
What makes red velvet cookies different from chocolate chip cookies?
The acidity and cocoa profile. Red velvet introduces a subtle tang from vinegar and cream cheese, which reacts with natural cocoa powder to maintain the signature crimson color, whereas standard chocolate chip cookies rely on deeper, less acidic cocoa.
Can you turn boxed cake mix into cookies?
Yes, you can make basic cookies this way. Boxed cake mix works as a shortcut because it already contains flour, leavening, and sugar, but you will need to add extra binding agents like an egg and fat to control the spread.
Can I put chocolate chips in red velvet?
Absolutely, it is the standard practice. Red velvet flavors are enhanced by chocolate, but chilling your dough fully, similar to the steps required for my Hershey Kiss Cookies Recipe, is crucial to prevent the chips from sinking or melting too fast.
What are common mistakes when baking red velvet cookies?
Using Dutch processed cocoa or skipping the chilling time. Dutch cocoa neutralizes the acid needed to keep the red bright, resulting in a brownish cookie; chilling the dough for at least two hours controls spread for a thick, velvety texture.
How do I ensure my red velvet cookies stay vibrant red and don't turn brown?
Use natural (non-Dutched) cocoa powder and include an acid. The acid, typically white vinegar or buttermilk, must react with the anthocyanins in the cocoa for the bright red hue to set during baking.
Why are my cookies spreading too thin?
The fat was too warm or the flour measurement was too low. Make sure your butter is only cool softened, not melted, and always measure flour by weight or by spooning and leveling. If you enjoyed controlling the spread here, see how that fat-to-flour logic applies to the chewiness in our Peanut Butter Cookies recipe.
Is it true that adding cream cheese makes red velvet cookies softer than regular cookies?
Yes, the cream cheese is key to the soft texture. The extra fat and lactic acid in the cream cheese tenderize the dough by interfering with gluten formation, resulting in that sought after cake like, velvety crumb.
Red Velvet Cookies Recipe
Ingredients:
Instructions:
Nutrition Facts:
| Calories | 294 kcal |
|---|---|
| Protein | 3.4g |
| Fat | 15.1g |
| Carbs | 39.2g |
| Fiber | 1.4g |
| Sugar | 27.8g |
| Sodium | 148mg |
