Sugar Cookie Frosting: Chefs Crispy Royal Icing
- Elevate Your Bakes: Achieving the Perfect Royal Icing Finish
- The Science of Stackability: Why Royal Icing Triumphs Over Buttercream
- Mise en Place: Essential Ingredients for Professional Sugar Cookie Icing
- From Powder to Perfection: Step-by-Step Mixing and Consistency Guide
- Troubleshooting Your Flood: Pro Tips and Avoiding Common Royal Icing Mistakes
- Shelf Life Secrets: Storing and Preparing Your Icing Ahead of Time
- Beyond the Biscuit: Creative Uses for Leftover Icing
- The Perfect Pour: Chef's Classic Royal Icing for Crisp Sugar Cookies
- Recipe FAQs: The Perfect Pour Royal Icing
- 📝 Recipe Card
Elevate Your Bakes: Achieving the Perfect Royal Icing Finish
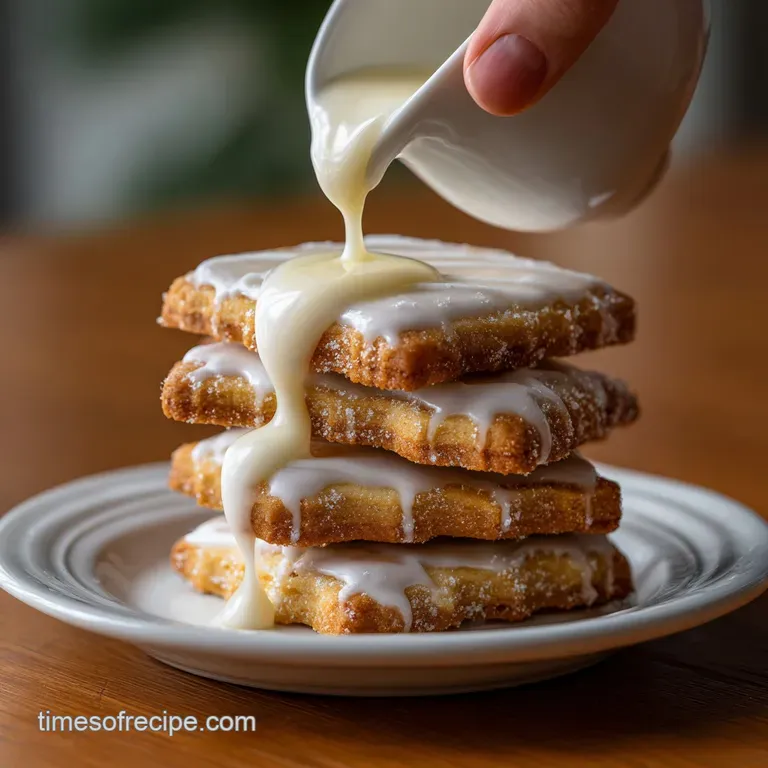
Seriously, the best sound in holiday baking is the crack when you bite into a perfect cookie covered in flawless Sugar Cookie Frosting . That glossy, mirror smooth finish?
That's what we’re aiming for, and it’s surprisingly within reach, even if you’ve only ever wrestled with floppy buttercream before.
I know Royal Icing has a scary reputation, but trust me, this specific Sugar Cookie Frosting recipe is a lifesaver. It uses meringue powder, so it’s super stable, incredibly fast to whip up, and unlike soft frosting, you can stack these cookies sky-high without a single smear.
Plus, it only uses a handful of ingredients, making it an incredibly cheap way to produce professional looking bakes.
We're going to break down the consistency game, the secret to a great shine, and exactly why this is the only Sugar Cookie Frosting you’ll ever need for serious decorating. Let’s crack on and get that perfect "hard set" texture.
Defining the Royal Icing Difference (Glossy Texture, Crisp Finish)
This specific type of Sugar Cookie Frosting is designed to dry completely hard, which is why we call it Royal Icing. If you need a sugar cookie frosting that hardens so you can ship boxes of gorgeous Christmas cookies across the country, this is your champion.
Unlike regular buttercream, which stays tacky and soft, Royal Icing cures into a clean, crisp shell.
That incredible glossy texture you see on professionally decorated treats comes from the combination of meringue powder, finely sifted powdered sugar, and controlled hydration. We’re essentially making a sophisticated, edible cement, but with delicious flavor and a brilliant white shine.
Tools of the Trade: What You Need to Get Started
While you can mix this by hand, I absolutely beg you to use a stand mixer if you have one. Whipping the icing to its necessary volume takes about 8 minutes, and trust me, your arm will fall off if you try that with a whisk.
You'll also need a very fine mesh sieve this is crucial for eliminating lumps, which are the main enemy of beautiful piping work.
Once the icing is made, having piping bags and coupler sets for the outlining, and dedicated squeeze bottles for the flooding consistency, makes the decorating process so much faster and tidier.
You don't need fancy equipment, but a scribe tool (or a simple toothpick) for correcting mistakes and popping air bubbles is a must have.
Understanding the Medium Consistency Ratio
The biggest hurdle for beginners making Royal Icing is learning to spot the correct consistency. We don't just make one batch; we create a very stiff base and then thin it out into two main consistencies: piping (stiff) and flooding (thin).
The stiff piping icing should hold a definite peak and feel like thick peanut butter this creates the borders for your sugar cookie frosting for decorating . The flooding consistency is the medium one, which should look like thick paint and obey the famous 10 Second Rule.
If you understand this ratio, you’ve mastered 90% of the technique.
The Science of Stackability: Why Royal Icing Triumphs Over Buttercream
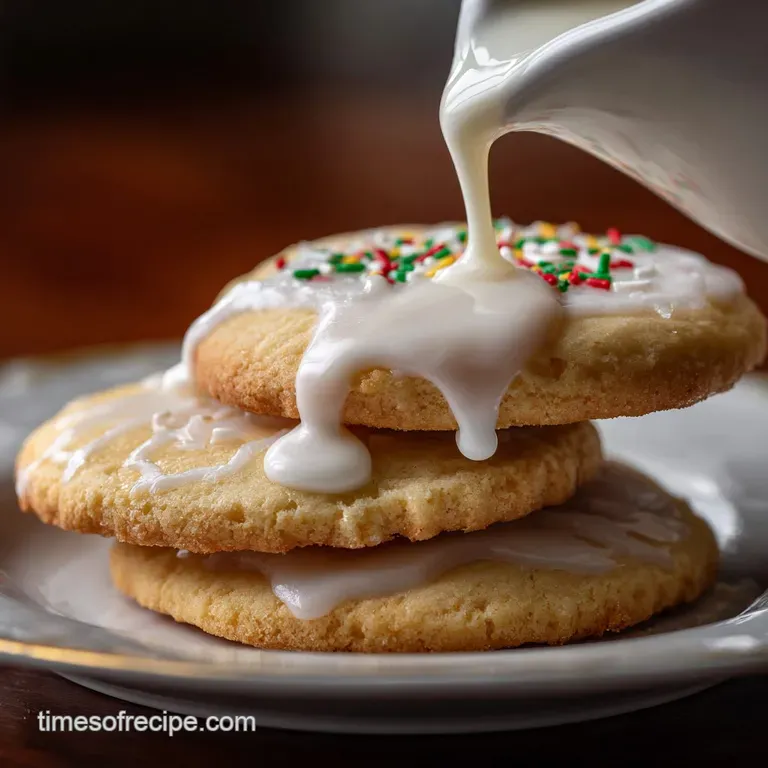
If you’ve ever tried to stack cookies frosted with American buttercream, you know the heartbreak. Everything smears, edges get mushed, and suddenly your beautiful display looks like a pastel disaster. Royal Icing completely bypasses that issue because of the meringue powder and lack of fat.
Meringue powder provides protein and stabilizer that, when mixed with pure sugar, creates an irreversible chemical structure when exposed to air. When this sugar cookie frosting without butter cures, it locks into place, creating a durable shell that protects the cookie underneath.
This means you can pack, ship, and stack to your heart’s content.
Mise en Place: Essential Ingredients for Professional Sugar Cookie Icing
The secret to great results is starting with quality ingredients that are exactly where they should be. This incredibly reliable cookie frosting recipe hinges on using precise amounts and high-quality extracts.
| Ingredient | Role | Substitution (If necessary) |
|---|---|---|
| Powdered Sugar (Sifted!) | Structure & Sweetness | No direct sub; icing sugar is key. |
| Meringue Powder | Stabilizer & Safety | Pasteurised liquid egg whites (less shelf stable). |
| Warm Water | Hydration/Flow | Lemon juice (for flavor, but slightly changes set). |
| Clear Extracts | Flavor | Regular vanilla (will discolor the white base). |
The Meringue Powder Advantage (Safety and Stability)
Meringue powder is non-negotiable for this recipe. It's pasteurized dried egg white, which completely eliminates the food safety concerns associated with raw egg whites, especially when serving children or pregnant guests. It also provides unmatched stability.
Think of it as the scaffolding for your frosting. It keeps the stiff peaks exactly where they need to be, resulting in less cracking and a faster, more reliable dry time.
Is This Royal Icing the Same as Traditional Sugar Cookie Glaze?
Absolutely not, and this is a common confusion! A traditional sugar cookie frosting recipe easy enough for kids usually relies on powdered sugar mixed with milk or melted butter. That's a glaze, and it stays soft, fudgy, or slightly tacky.
Royal Icing, while also simple in execution, uses meringue powder and water. That’s the key difference. If you want that hard, breakable shell perfect for highly detailed sugar cookie frosting for decorating , you need the meringue powder, period.
The Role of Confectioners’ Sugar Density
You must, must , MUST sift your powdered sugar, ideally twice. I learned this the hard way when I clogged an entire bag trying to pipe a tiny detail on a batch of cookies for a client. The density of the sugar means it clumps easily, and those clumps become piping tip killers.
Sifting incorporates air and ensures every particle dissolves evenly when wet. For the best result, use high-quality, fresh powdered sugar that hasn't been sitting in your pantry for a year.
Hydration Control: Water vs. Lemon Juice
We start with warm water because it helps the meringue powder activate quickly and smoothly dissolve the sugar. If you need a sugar cookie frosting without corn syrup for added shine, you can skip that step, but hydration control remains the most critical phase.
You can substitute some or all of the water with fresh lemon juice if you want a tart flavor, but be cautious. Acid can sometimes break down the structure slightly, so only make that substitution if you know exactly what the perfect consistency looks like.
Flavoring Notes: Vanilla, Almond, and Beyond
Always use clear extracts if you intend to keep your icing a brilliant white base. Regular vanilla extract, even the good stuff, is brown and will tint your icing a creamy beige.
My go-to flavour profile for Christmas cut-outs uses clear vanilla and a tiny touch of almond extract. Almond is potent, so use it sparingly, but that marriage of sweet almond and vanilla is absolutely irresistible, especially paired with my Christmas Cookies: Best Brown Butter Cut-Outs Recipe .
From Powder to Perfection: step-by-step Mixing and Consistency Guide
Making the base is easy; the magic is in the method. We use low speed to prevent air bubbles, which can cause ugly craters later, and we pay attention to the sound and feel of the mixture.
The Low-Speed Mixing Method for Preventing Air Bubbles
Do not blast this on high right away! Start on the lowest setting (Stir or 1) for the first minute after adding the water. The mixture will look runny and strange, almost like liquid glue. Keep scraping down the sides with a rubber spatula until all the sugar is incorporated.
Chef's Note: Mixing on high speed initially forces air into the icing base, resulting in massive, hidden air bubbles. When these bubbles pop during the drying stage, they leave unsightly craters. Go slow and steady.
Achieving Piping Consistency (The Stiff Peak Test)
After the initial minute on low, ramp the speed up to medium high (I use setting 6). Now, you whip for 6 to 8 minutes. Listen to the mixer; the sound will deepen as the icing thickens and clings to the paddle.
When the icing pulls away from the sides and forms stiff, glossy peaks when you lift the paddle attachment, you’ve reached piping consistency. This thick icing is perfect for creating the crucial borders on your Sugar Cookie Recipe: Best Cutout for Perfect Decorating and for highly detailed line work.
The '10 Second Rule' for Perfect Flooding Consistency
This is the make-or-break moment for your Sugar Cookie Frosting . You need the icing thin enough to flow and fill the border, but thick enough that it won't run right off the edge of the cookie.
To thin it down, transfer your stiff icing into a separate bowl and add water, 1/4 teaspoon at a time. Mix it gently until you reach the sweet spot. Run a knife through the surface of the icing, creating a gash. Start counting immediately. If the line disappears completely in 10 to 12 seconds, you nailed it.
If it takes longer, add a drop more water. If it disappears instantly, you need to add a teaspoon of powdered sugar to thicken it up again.
Coloring Your Icing Safely (Gel vs. Liquid Dyes)
Never, ever use liquid food colouring with Royal Icing. Adding even a few drops will completely wreck your painstakingly perfected consistency. The only acceptable options are high-quality gel or paste food colouring.
Gel dyes are highly concentrated, so you only need a toothpick sized amount to achieve a deep colour. To avoid bubbles, stir the colour in gently rather than beating it with the mixer.
Troubleshooting Your Flood: Pro Tips and Avoiding Common Royal Icing Mistakes
It is inevitable: something will go wrong. Your icing might crater, separate, or simply refuse to dry. But don't despair! Every issue has a fix.
Eliminating the Dreaded Crater Effect
Cratering happens when the surface of the flood icing dries before the air trapped beneath has a chance to escape. This is usually caused by too many air bubbles in the initial mixing (remember: low speed!) or an icing that is slightly too thin.
The Fix: Use the 10 second rule consistently, but the real secret weapon is placing the freshly flooded cookies under a dehydrator or a low-speed fan immediately for the first 30 minutes. This forces the surface to cure evenly.
Reviving Icing That Has Separated or Crusted
If you leave your icing uncovered, it will crust instantly. If you store coloured icing for a few days, you might notice the water separating from the sugar, creating a watery pool on top.
The Fix: If it’s crusted, gently stir the crust back into the deeper icing or scrape it out. If it has separated, stir it very gently with a rubber spatula until it recombines. Do not use the mixer, as that will whip more air into it.
Speeding Up the Drying Process (Using a Dehydrator or Fan)
The ideal drying process takes 8- 12 hours in a dry, room temperature environment. If you’re rushing or dealing with humid weather, use forced air.
Set up a standard box fan pointed across your cooling racks of cookies. Run it on low for 4- 6 hours. This drastically accelerates the cure time and helps create that super glossy, hard finish that makes this such a perfect sugar cookie frosting that hardens .
Shelf Life Secrets: Storing and Preparing Your Icing Ahead of Time
One of the great things about this cookie frosting recipe is its stability. You can absolutely prep this ahead of time, which is essential if you’re batch baking.
Best Practices for Refrigerating Unused Icing
Store your unused Royal Icing in an airtight container at room temperature for up to 2 weeks, or in the refrigerator for up to 3 weeks. Always cover the surface of the icing directly with plastic wrap before sealing the container. This prevents the top from drying out and forming an unusable crust.
When you take refrigerated icing out, allow it to come fully back to room temperature before you attempt to stir it and use it. It might require a tiny drop of water to regain its flow.
Can You Freeze Cookies Decorated with Royal Icing?
Yes, absolutely! The dried Royal Icing protects the cookie perfectly. Once the icing is 100% hard and set, layer the cookies between sheets of parchment paper in an airtight freezer container.
They freeze beautifully for up to 3 months. When thawing, just open the container and let them come to room temperature while still inside the container. This manages condensation and prevents the icing from becoming sticky or weeping.
Beyond the Biscuit: Creative Uses for Leftover Icing
Even if you’ve already decorated your beautiful Haystacks: The Ultimate Chewy No-Bake Cookie Recipe or your cutout sugar cookie frosting recipe cookies, you'll probably have some icing left over. Don't toss it!
Creating Edible Decorations and Transfers
Use the leftover stiff icing to pipe simple flowers, leaves, or tiny letters onto a sheet of parchment paper. Let them dry for 24 hours. Once cured, you can peel them off and use them as adorable, pre-made decorations for future cakes or cookies.
These royal icing transfers last forever when stored dry.
The Perfect Pour: Chef's Classic Royal Icing for Crisp Sugar Cookies
Yields: Approx. 3 cups | Prep Time: 15 minutes | Drying Time: 8– 12 hours
Ingredients
- 4 cups Powdered Sugar (Confectioners’ Sugar), sifted
- 3 Tbsp Meringue Powder
- Pinch Fine Sea Salt
- 1/2 cup Warm Water (Filtered is best)
- 1 tsp Clear Vanilla Extract
- 1 Tbsp Light Corn Syrup (Optional, for extra shine)
- Additional Water, as needed for consistency
Equipment
- Stand Mixer
- Scribe Tool or Toothpicks
- Piping Bags/Squeeze Bottles
Instructions
Stage 1: Creating the Stiff Icing Base
- Sift Dry Ingredients: In the stand mixer bowl, thoroughly combine the sifted powdered sugar, meringue powder, and salt. Sift this mixture together for best results.
- Initial Mix: Add the 1/2 cup of warm water, vanilla extract, and optional corn syrup.
- Low and Slow: Mix on the lowest speed for 1 minute until the sugar is just incorporated and the mixture looks lumpy. Stop and scrape down the sides completely.
- Whip to Stiff Peak: Increase the mixer speed to medium high (6 8) and whip for 6 to 8 minutes. The icing will increase in volume, look glossy, and become extremely thick.
- Check Piping Consistency: The icing should hold a firm, defined peak when you lift the whisk or paddle. This is your stiff, piping consistency.
Stage 2: Colouring and Adjusting Consistency
- Divide and Colour: Scoop the stiff base icing into separate bowls, one for each color. Use only concentrated gel food coloring.
- Reserve Piping Icing: Reserve about 1/3 of the coloured icing in each bowl for outlining. Keep this covered tightly with plastic wrap pressed directly against the surface.
- Create Flooding Consistency: For the remaining 2/3 of the icing, slowly add water, 1/4 teaspoon at a time, stirring gently until you hit the 10 second flow rule. Remember: if a line drawn through the surface disappears in 10 seconds, it is perfect.
Stage 3: Application and Drying
- Outline: Fill your piping bags with the stiff icing and pipe borders around the cooled cookies. Let the border dry for 5 minutes.
- Flood: Fill squeeze bottles or larger piping bags with the thinner flooding icing. Fill the interior of the outlined cookie. Use the scribe tool to push the icing to the edges and immediately pop any surface air bubbles.
- Cure: Set the decorated cookies on a cooling rack in a dry, cool, draft free place to cure completely. Do not touch them for at least 8 hours. Once dry, they will be hard and stackable. This is the ultimate sugar cookie frosting without corn syrup that still dries brilliantly.

Recipe FAQs: The Perfect Pour Royal Icing
How do I achieve the perfect consistency for detailed piping versus smooth flooding?
Start by achieving a medium consistency (ideal for outlining). To thin a portion for flooding, add water sparingly, about 1/4 teaspoon at a time, until it reaches the 10-15 second rule. This means when you drag a knife through the icing, the line disappears and becomes completely smooth within 10 to 15 seconds.
Why is my Royal Icing taking too long to dry, or remaining sticky after several hours?
Delayed drying usually indicates high humidity or that too much liquid was added. Ensure your cookies are drying in a location with good air circulation and low moisture; avoiding icing on very rainy days is helpful. If the icing remains sticky, it likely needs more powdered sugar to properly stabilize the ratios.
Can I substitute fresh egg whites for the meringue powder in the recipe?
While possible, meringue powder is preferred as it eliminates the risk of salmonella and provides a more consistent, reliable setup. If substituting, use 2 pasteurized large egg whites whipped slightly per 1 cup of powdered sugar, omitting the initial water measurement.
Adjust consistency carefully, as fresh egg whites vary greatly in moisture.
My icing has dried with noticeable craters or pits after flooding; how do I prevent this?
Craters often occur when the icing is too thin or when air bubbles get trapped during flooding. Ensure your flooding consistency adheres to the 10-15 second rule, and use a toothpick or scribe tool immediately after flooding to gently pop any surface bubbles before the icing begins to set.
What is the best way to store leftover Royal Icing, and how long does it last?
Store Royal Icing in an airtight container in the refrigerator for up to two weeks. To prevent a crust from forming, press a layer of plastic wrap directly onto the surface of the icing before sealing the container.
Always bring the icing back to room temperature and remix thoroughly before using, adding a drop of water if it seems too stiff.
What kind of food coloring should I use to achieve deep, vibrant colors?
Always use gel food coloring, not liquid water based coloring. Liquid colors compromise the consistency and drying structure necessary for Royal Icing. Professional concentrated gels allow you to achieve intense, vibrant hues using minimal product, preserving the icing's texture.
Is it possible to make a vegan version of Royal Icing that still dries hard?
Yes, the classic meringue powder or egg white protein can be substituted with aquafaba (the brine from canned chickpeas). Whip 3 tablespoons of chilled aquafaba until it forms soft peaks, then slowly incorporate the powdered sugar until stiff peaks form.
This provides a stable, hard drying, and odor neutral vegan option.
Royal Icing For Sugar Cookies

Ingredients:
Instructions:
Nutrition Facts:
| Calories | 812 kcal |
|---|---|
| Protein | 0.0 g |
| Fat | 0.0 g |
| Carbs | 214.5 g |
