The Best Tiramisu Cheesecake Recipe

- Time: Active 30 minutes, Passive 1 hours 15 mins, Total 1 hours 45 mins
- Flavor/Texture Hook: Silky mascarpone filling with a shattering espresso biscuit crust
- Perfect for: Elegant dinner parties or a sophisticated weekend treat
- Master The Best Tiramisu Cheesecake Recipe
- The Magic of Balanced Textures
- Component Analysis of Key Ingredients
- Essential Ingredients and Smart Substitutes
- Tools for a Flawless Finish
- Step by Step Baking Guide
- Troubleshooting Common Baking Issues
- Adapting Your Dessert Variations
- Storage and Waste Reduction Tips
- Finishing Touches and Pairings
- Recipe FAQs
- 📝 Recipe Card
Master The Best Tiramisu Cheesecake Recipe
The first time I pulled this beauty out of the oven, the aroma of toasted butter and deep espresso filled my kitchen like a warm hug. I remember standing there, watching the steam rise, terrified that the ladyfingers hidden inside would turn into a soggy mess.
But as I sliced through that first velvety layer, the "shatter" of the chocolate biscuit crust followed by the creamy sigh of the filling told me I’d found something special.
We’ve all had those cheesecakes that feel too heavy or tiramisus that lack structure. This is the solution. It’s an elegant dessert that brings the soul of Italy into a pan, making the baking process feel like a simple bit of kitchen magic.
You aren't just making a cake; you’re creating a moment that feels both grand and incredibly intimate.
I’ve learned the hard way that you can't rush the chill time, and you definitely shouldn't skip the quality of the coffee. But once you master the balance of these textures, you’ll never look at a standard Tiramisu the same way again.
Trust me, the way the cocoa powder clings to the whipped topping is just stunning.
The Magic of Balanced Textures
Creating this masterpiece requires a bit of understanding about how fats and proteins interact under heat. It isn't just about mixing; it’s about timing.
- Emulsification: Room temperature cream cheese and mascarpone bond more effectively, creating a silky batter without air bubbles that cause cracking.
- Protein Denaturation: Adding the egg yolk separately provides extra lecithin, which acts as a bridge between the water in the coffee and the fats in the cheese.
- Starch Gelatinization: A tiny amount of all purpose flour absorbs excess moisture from the coffee liqueur, ensuring the center isn't "soupy."
- Lipid Stability: Mascarpone has a higher fat content than cream cheese; over mixing can actually turn it into butter, so we keep the speed low and steady.
| Feature | Quick "No Bake" Version | This Classic Baked Version |
|---|---|---|
| Texture | Mousse like and airy | Dense, velvety, and rich |
| Depth | Sweet and light | Complex, caramelized, and deep |
| Stability | Needs constant refrigeration | Holds its shape beautifully for hours |
This comparison shows why taking the time to bake your cheesecake creates a far more sophisticated result. The heat allows the espresso and chocolate to bloom, which you simply don't get with a chilled only version.
Component Analysis of Key Ingredients
Success in the kitchen starts with knowing your tools and by tools, I mean your ingredients. Each element here plays a specific role in the final harmony.
| Ingredient | Science Role | Pro Secret |
|---|---|---|
| Mascarpone Cheese | Adds high fat silkiness | Use only full fat for that specific Italian mouthfeel |
| Espresso Powder | Flavor catalyst | Bloom it in the melted butter to intensify the aroma |
| Savoiardi Ladyfingers | Structural moisture | Dip for exactly 1 second to prevent a "sponge leak" later |
| Egg Yolk (Extra) | Emulsifier and color | Provides the golden hue and a custard like richness |
Between the layers of this cake, you'll find a texture similar to the semolina soak in my Turkish Cuisine Desserts recipe, but with a much creamier finish. It's that contrast between the soaked sponge and the firm cheese that makes every bite interesting.
Essential Ingredients and Smart Substitutes
Gathering your elements is the first step toward baking magic. Ensure everything is at the same temperature before you begin.
- 200g chocolate digestive biscuits Why this? Provides a darker, earthier base than graham crackers.
- Substitute: Graham crackers with 1 tbsp cocoa powder.
- 60g unsalted butter, melted
- Substitute: Salted butter (omit the extra sea salt).
- 1 tbsp instant espresso powder
- Substitute: Very finely ground instant coffee.
- 0.25 tsp sea salt
- 500g full fat cream cheese, room temperature Why this? The foundation of the cake's structure.
- Substitute: Neufchâtel (result will be less creamy).
- 250g mascarpone cheese, room temperature
- Substitute: High fat Greek yogurt strained for 24 hours.
- 200g granulated sugar
- 3 large eggs
- 1 large egg yolk
- 1 tbsp vanilla extract
- 2 tbsp coffee liqueur Why this? Adds a complex, boozy depth to the filling.
- Substitute: Strong cold brew coffee concentrate.
- 2 tbsp all purpose flour
- 110g Savoiardi Italian ladyfingers
- 120ml strong brewed espresso, cooled
- 2 tbsp cocoa powder
- 240ml heavy whipping cream, cold
- 2 tbsp powdered sugar
Tools for a Flawless Finish
You don't need a professional pastry kitchen to achieve stunning results, but a few specific items make the process much smoother.
- 9 inch springform pan (crucial for easy removal)
- Electric hand mixer or stand mixer (like a KitchenAid)
- Large roasting pan (for the water bath)
- Extra wide aluminum foil (to waterproof the pan)
- Fine mesh sieve (for that perfect cocoa dusting)
- Silicone spatula (to scrape every bit of mascarpone)
step-by-step Baking Guide
Prepare your kitchen for a wonderful sensory experience. The smell of the coffee hitting the butter is one of my favorite parts of this process.
- Prep the base. Pulse 200g chocolate digestive biscuits into fine crumbs and mix with 60g melted butter, 1 tbsp espresso powder, and 0.25 tsp salt.
- Press the crust. Firmly pack the crumbs into the bottom of a 9 inch springform pan. Note: Use the bottom of a flat glass to get an even layer.
- Cream the cheeses. Beat 500g cream cheese and 250g mascarpone with 200g sugar on low speed until smooth and glossy.
- Incorporate the eggs. Add 3 eggs and 1 egg yolk one at a time, mixing just until the yellow streaks disappear.
- Add flavorings. Fold in 1 tbsp vanilla, 2 tbsp coffee liqueur, and 2 tbsp flour. Note: Sifting the flour prevents tiny lumps.
- Layer the ladyfingers. Briefly dip 110g ladyfingers into 120ml cooled espresso and arrange them over the raw cheesecake batter.
- Cover and seal. Pour the remaining batter over the ladyfingers and smooth the top.
- Prepare the bath. Wrap the pan in foil, place in a roasting tray, and add 1 inch of hot water.
- The long bake. Bake at 325°F for 1 hours 15 mins until the edges are set but the center wobbles slightly.
- The cold cure. Turn off the oven, crack the door for 1 hour, then refrigerate for at least 4 hours.
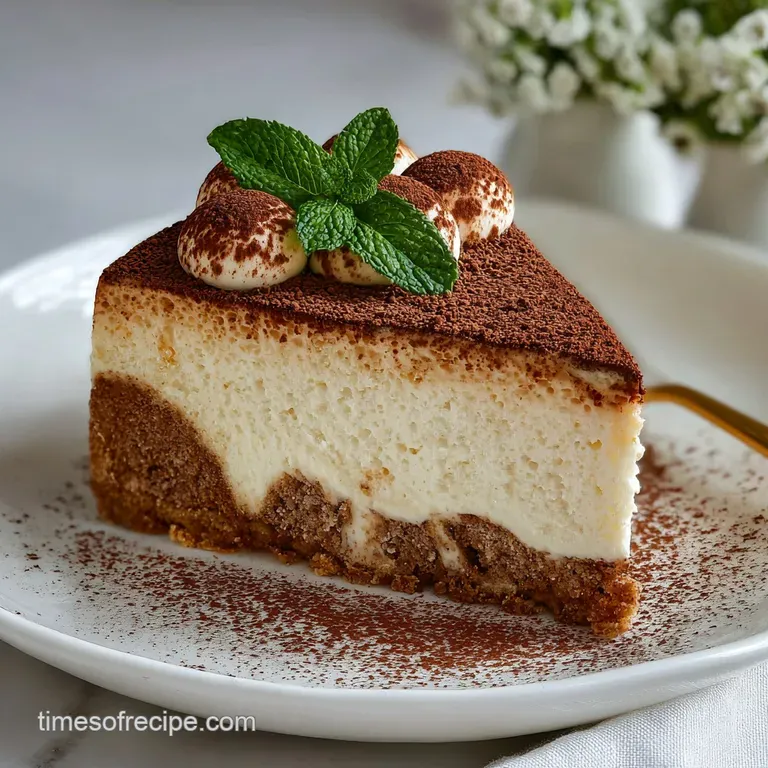
- Final garnish. Whip 240ml heavy cream with 2 tbsp powdered sugar until stiff peaks form, pipe onto the cake, and dust with 2 tbsp cocoa powder.
Troubleshooting Common Baking Issues
Even the best of us run into a "soupy" center or a cracked top once in a while. It’s all part of the learning curve!
Why Filling Stays Runny
If your cheesecake is still liquid after the suggested time, it’s usually a temperature issue. Cheesecakes continue to set as they cool. However, if it’s truly sloshing, your oven may be running cold, or you skipped the flour which acts as a stabilizer.
Fixing Lumpy Batter
Lumps happen when the cream cheese is too cold. If you see them forming, stop mixing immediately. You can sometimes save it by taking a small portion of the batter, microwaving it for 10 seconds, and whisking it back into the main bowl to raise the overall temperature.
| Problem | Root Cause | Solution |
|---|---|---|
| Surface Cracks | Over beating or rapid cooling | Use a water bath and cool in the oven with the door cracked |
| Soggy Ladyfingers | Over soaking the biscuits | Dip for 1 second only they shouldn't be dripping |
| Lumpy Filling | Cold ingredients | Ensure cheese and eggs are at room temperature for 2 hours |
Common Mistakes Checklist
- ✓ Never use low-fat or "tub" cream cheese; the water content is too high.
- ✓ Ensure the espresso is completely cold before dipping the ladyfingers.
- ✓ Don't skip the water bath - the steam creates that elegant, creamy texture.
- ✓ Let the cake sit at room temperature for 20 minutes before serving for the best flavor.
- ✓ Wipe your knife with a warm, damp cloth between every single slice.
Adapting Your Dessert Variations
Once you have the foundation of the best tiramisu cheesecake recipe down, you can start playing with the form and flavors to suit your mood.
Bite Sized Variations
You can easily turn this into Tiramisu Cheesecake bites recipe by using a muffin tin lined with paper cups. Reduce the baking time to about 22 minutes. Use a single piece of dipped ladyfinger in the center of each mini cake.
They are perfect for parties where you want people to be able to grab a treat and keep mingling.
Alcohol Free Version
If you prefer to leave out the liqueur, simply replace the 2 tbsp of coffee liqueur with 2 tbsp of strong decaf coffee or an extra splash of vanilla. You won't lose the magic; the espresso powder in the crust still provides plenty of punch. If you love the elegance of Italian treats but want something lighter, this is a must try alongside my Pistachio Panna Cotta recipe.
To scale this recipe up for a large crowd, double the ingredients but use two separate 9 inch pans rather than one giant one. Baking two at once is safer for maintaining that delicate internal texture. If scaling down, use a 6 inch pan and reduce the baking time by about 25%.
Storage and Waste Reduction Tips
This dessert actually tastes better on the second day as the coffee flavors have time to marry into the cheese.
- Fridge: Store in an airtight container for up to 5 days. The cocoa powder may dampen, so I recommend dusting it fresh right before serving.
- Freezer: You can freeze the baked and cooled cake (without the whipped cream topping) for up to 2 months. Wrap tightly in plastic wrap and then foil. Thaw in the fridge overnight.
- Zero Waste: If you have leftover espresso, freeze it in ice cube trays for iced lattes later. Any broken ladyfingers can be crumbled and used as a topping for yogurt or ice cream.
Finishing Touches and Pairings
Presentation is everything when you’ve put this much love into a bake. I love serving a slice with a small glass of Vin Santo or a very dark roast coffee to balance the sugar.
If you want to go the extra mile, a few chocolate shavings on top of the cocoa powder add a wonderful textural contrast. The bitterness of the dark chocolate against the velvety whipped cream is a match made in heaven.
It’s a stunning way to end a meal, making everyone at the table feel like they’ve just stepped into a high end Italian bistro.

Recipe FAQs
What is the best type of biscuit for the crust?
Chocolate digestive biscuits are ideal. They provide a rich, earthy flavor that complements the espresso and mascarpone filling beautifully. If you can't find them, graham crackers with a tablespoon of cocoa powder mixed in are a good substitute.
How do I prevent my cheesecake from cracking?
Use a water bath and cool slowly. A water bath provides even, gentle heat, preventing the edges from cooking faster than the center, which is a common cause of cracks. Cooling the cheesecake in the oven with the door ajar also prevents drastic temperature changes.
Can I make this recipe alcohol free?
Yes, it's easy to omit the coffee liqueur. Replace the 2 tablespoons of coffee liqueur with 2 tablespoons of strong decaf coffee or an extra splash of vanilla extract. The espresso powder in the crust still provides ample flavor.
My ladyfingers seem too soggy after dipping. What did I do wrong?
Dip them very briefly. The ladyfingers should only be dipped for about 1 second per side in the espresso. They should absorb enough liquid to soften but not become completely saturated, which prevents a "sponge leak" during baking.
Can I make this cheesecake in advance?
Yes, it's actually better made ahead. The cheesecake needs at least 4 hours to chill and set properly, and the flavors meld together beautifully overnight. For a similar layered dessert experience that's quicker, try our Dessert Shooters No-Bake Layered Cups Ready in 30 Min.
How long does the cheesecake need to bake?
Bake for about 1 hour and 15 minutes. The cheesecake is ready when the edges are set but the center still wobbles slightly. This slight wobble is key to achieving a perfectly creamy texture once it cools.
What's the secret to a silky smooth filling?
Ensure all dairy ingredients are at room temperature. Room temperature cream cheese and mascarpone emulsify much more smoothly, preventing lumps and creating that signature velvety texture. This principle of careful ingredient preparation is also crucial for creating stable emulsions in dressings, like in our Easy Cannoli Dip: No-Bake Sweet Dessert Recipe.
Tiramisu Cheesecake Recipe

Ingredients:
Instructions:
Nutrition Facts:
| Calories | 531 kcal |
|---|---|
| Protein | 8.1 g |
| Fat | 38.2 g |
| Carbs | 41.8 g |
| Fiber | 1.2 g |
| Sugar | 31.5 g |
| Sodium | 284 mg |
