Peanut Butter Blossom Cookies: the Ultimate Crinkle-Top Classic
- Welcome to the Classic: Mastering the Peanut Butter Blossom
- The Science of the Signature Chew: Achieving Perfect Cookie Texture
- Essential Provisions: Detailed Ingredients List and Expert Notes
- Baking the Blossoms: A Comprehensive Guide to Making the Dough
- Troubleshooting Your Bake: Tips for Picture-Perfect Cookies
- Preservation and Planning: Keeping Your Peanut Butter Cookies Fresh
- Pairing Perfection: How to Serve and Enjoy Your Peanut Butter Treats
- Recipe FAQs
- 📝 Recipe Card
Welcome to the Classic: Mastering the Peanut Butter Blossom
Can we just agree that there is no greater smell in the world than a kitchen filled with the aroma of warm, nutty peanut butter mixing with melting milk chocolate? These iconic Peanut Butter Blossom Cookies have been my desert island cookie choice for years.
They are comforting, nostalgic, and absolutely foolproof if you follow a few key steps.
Seriously, this recipe is a lifesaver. It’s incredibly fast, uses pantry staples you already have, and delivers maximum flavor with minimal effort. Plus, they look so impressive with that shiny chocolate kiss on top, perfect for cookie exchanges or just a Monday night treat.
I’ve baked thousands of these little wonders and finally perfected the texture soft in the center, slightly crisp on the edges, and never greasy. Let’s crack on and make the absolute best Peanut Butter Blossom Cookies you will ever taste.
The Science of the Signature Chew: Achieving Perfect Cookie Texture
The Anatomy of a Perfect Crinkle Top Cookie
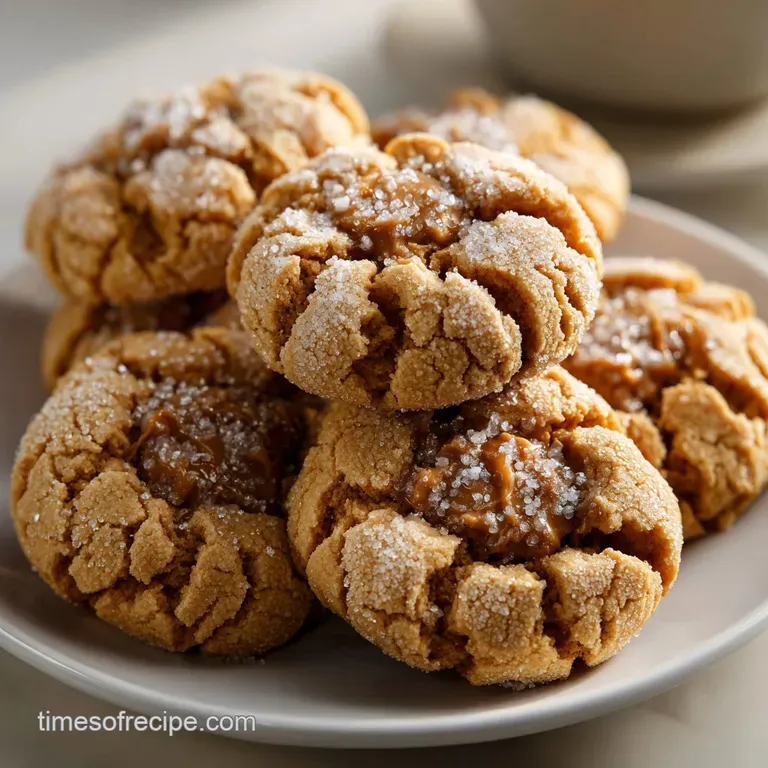
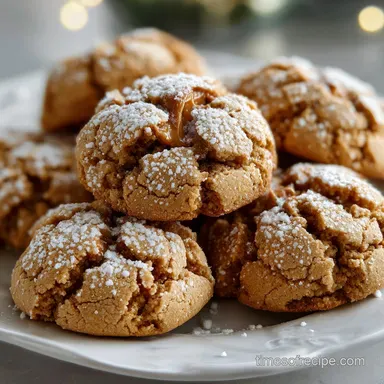
The magic of the Peanut Butter Blossom Cookies lies in the controlled spread and the contrast between the dense, salty base and the sweet, creamy chocolate topping. We are specifically aiming for a high, slightly domed cookie that cracks beautifully when you press the chocolate into it.
That cracking isn't an accident; it's a direct result of the sugar crusting on the outside faster than the interior sets.
A Historical Sweet Treat: Why We Love This Classic
These aren't just any old cookie; they are a piece of baking history. The original recipe for the Peanut Butter Blossom Cookies was born from a contest in the 1950s and has since become one of the most beloved recipes in America, especially around the holidays. They simply scream tradition! If you love that dense, chewy quality, you might also adore my Peanut Butter Cookies: The Ultimate Chewy Classic Recipe — they share a similar textural DNA but skip the chocolate top.
Defining the Signature Texture: Soft, Chewy, and Sweet Salty
Truly great Peanut Butter Blossom Cookies are defined by the balance of texture and flavor. We need chewiness, which comes from the brown sugar and the fat content of the peanut butter, and we need that softness, achieved by slightly under baking them. The salty peanuts and sweet chocolate?
That’s just addictive kitchen alchemy.
The Role of Creaming: Incorporating Air for Lift
The first crucial step in this process is creaming the butter and sugar. For these Peanut Butter Blossom Cookies , we cream longer than you might think about three minutes until the mixture is genuinely pale and fluffy.
This traps air, which expands during baking, giving the cookies a light lift so they don't spread into flat puddles.
Balancing the Fats: Peanut Butter vs. Butter Ratio
This recipe uses an equal ratio of butter to peanut butter. This specific balance is intentional. The high fat content of commercial peanut butter (more on that below) keeps the cookie moist and soft, while the butter provides the structure and flavour base.
Mess with this ratio, and your cookies will either be too dry or too greasy.
Why Sugar Matters: Controlling Spread and Crinkle
We use both granulated and brown sugar. The brown sugar provides moisture and chewiness because of the molasses content, while the granulated sugar ensures that desirable crisp edge.
Rolling the dough balls in extra granulated sugar before baking is the non-negotiable step that guarantees the crinkle top appearance of your Peanut Butter Blossom Cookies .
Essential Provisions: Detailed Ingredients List and Expert Notes
If you want the best Peanut Butter Blossom Cookies , you cannot skimp on ingredient quality or proper preparation. This is where I share my deep, dark secrets about what really works.
Choosing the Right Peanut Butter (Avoid Natural/Oily Varieties)
This might sound like heresy, but for baking consistency, you must use commercial, stabilized peanut butter (think Jif, Skippy). The foundation of a perfect Peanut Butter Blossom Cookies structure relies on the emulsifiers in these jars.
Natural peanut butter, the kind with separated oil, will yield a greasy, overly crumbly cookie that spreads too thin.
| Ingredient | My Top Tip | Viable Substitute |
|---|---|---|
| Smooth Peanut Butter | Use stabilized commercial brands only. | Sunflower Seed Butter (SunButter), though flavor changes. |
| Unsalted Butter | Must be truly room temperature (soft enough to indent easily). | Vegetable Shortening (use 50/50 blend for less spread). |
| All-Purpose Flour | Measure using the spoon and level method. | 1:1 gluten-free Baking Blend (ensure it contains Xanthan Gum). |
| Milk Chocolate Kisses | Chill them! Seriously. | Mini Reese’s Cups or Rolo candies. |
Sugar Selection: The Difference Between Granulated and Brown
As noted, the blend is key. If you only have dark brown sugar, that’s fine; it will yield a slightly darker, fudgier cookie. But if you try to make these with only granulated sugar, the resulting cookie will be dry, brittle, and lack that comforting chewiness we are after.
Can I Substitute the Chocolate Kiss? (Candy Options)
Absolutely, but the original recipe calls for that specific Hershey Kiss shape for its iconic 'blossom' appearance. If you don't have Kisses, small mini peanut butter cups are phenomenal, turning these into double peanut butter monsters.
You could also use small, unwrapped Rolos for a caramel surprise inside your Peanut Butter Blossom Cookies .
Ingredient Prep: Bringing Butter and Eggs to Room Temperature
This step is not optional, darling. Room temperature butter creams beautifully, trapping maximum air. A cold egg will seize up the butter mixture instantly, making your dough dense and resulting in tough, dry Blossom Cookies .
Chef's Note: If you forgot to pull out the eggs, place them in a bowl of warm (not hot!) water for 5 minutes. They’ll be ready to go!
Baking the Blossoms: A Comprehensive Guide to Making the Dough

Making Peanut Butter Blossom Cookies is easy, but achieving perfection requires paying close attention to the texture cues. Don't rush the creaming, and definitely don't skip the chilling.
Stage 1: The Creaming Process (Mixing Fats and Sugars)
In your stand mixer, combine the softened butter, granulated sugar, and brown sugar. Beat on medium speed for a full 3 minutes. The mix should lighten significantly in color and volume. Stop and scrape down the bowl constantly.
Then, beat in the peanut butter until the mixture is uniform and smells gloriously nutty. Finally, add the room temperature egg and vanilla, mixing just until they disappear into the batter.
Stage 2: Incorporating the Dry Ingredients and Binding the Dough
In a separate bowl, whisk together the flour, salt, and baking soda. Now, add the dry mix to the wet mix slowly , using the mixer's lowest setting. Mix only until the flour streaks vanish about 30 to 45 seconds. Stop immediately.
Overmixing develops gluten, which makes tough cookies. We want tender, soft Peanut Butter Blossoms , not hard biscuits!
Stage 3: Shaping and Sugaring the Cookie Balls Uniformly
The perfect batch of Peanut Butter Blossom Cookies starts with uniform size. Use a small cookie scoop (about 1.5 teaspoons or 3 cm diameter) to portion the chilled dough. Roll each piece tightly between your palms until perfectly round.
Then, roll generously in that extra bowl of granulated sugar. The sugar coating is essential for that signature texture and prevents sticking.
Stage 4: The Crucial Bake Time and Chocolate Placement
Bake the sugared dough balls for 8 to 10 minutes at 350°F (175°C). You are looking for a matte surface, slightly golden edges, and a center that looks just a little bit soft and puffed. They shouldn't look wet, but they shouldn't look completely set either.
The 9 minute mark is usually the sweet spot.
When you pull the pan out, immediately grab one of your chilled Kisses and press it gently but firmly into the center of each hot cookie. The heat will melt the chocolate just enough to adhere, and the pressure will cause the cookie to crinkle outwards hello, Blossom!
Let them set up for 5 minutes on the pan before moving them to a wire rack to cool completely.
Troubleshooting Your Bake: Tips for Picture Perfect Cookies
If you’ve ever wondered why your cookies spread too thin or why the dough crumbles when you roll it, this section is for you. Mastering Peanut Butter Blossom Cookies means knowing how to fix the little hiccups.
Preventing Excessive Spreading (The Chilling Necessity)
If your Peanut Butter Blossom Cookies look more like flat disks than plump domes, you skipped the chilling step. Chilling the dough solidifies the fat, preventing it from melting too quickly in the oven.
For an extra safeguard, bake only one pan at a time and ensure your baking sheets are cool before placing the dough on them.
Dealing with Cracks and Crumbling Dough
If your dough is too crumbly to roll, it might be due to a lack of moisture or inaccurate measuring. Try adding 1 teaspoon of milk (or plant milk) to the dough and mixing briefly until it comes together. If the dough is too soft (sticky), it needs more time in the fridge fat needs to be firm for proper rolling.
When to Add the Chocolate Kiss for Optimal Appearance
Wait for the moment they exit the oven. If you add the chocolate before baking, it will melt into a sticky puddle. If you wait 5 minutes after baking, the cookie surface will have set, and pressing the Kiss in will shatter the cookie, making a mess.
Immediately out of the oven is the only way to get that soft press and controlled crinkle.
Preservation and Planning: Keeping Your Peanut Butter Cookies Fresh
One of the great things about making Peanut Butter Blossom Cookies is how well they store. But does it freeze well? You bet.
Short Term Storage: Maintaining Softness at Room Temperature
Store your completely cooled cookies in an airtight container at room temperature for up to 5 days. Pro Tip: Toss a slice of white bread into the container with the cookies.
The cookies will absorb moisture from the bread, keeping your Blossom Cookies incredibly soft for days.
Freezing Cookie Dough vs. Baked Blossoms
I highly recommend freezing the unbaked dough. Roll the dough balls, sugar coat them, and then freeze them solid on a sheet pan. Transfer the frozen balls to a freezer bag and store for up to 3 months.
When ready to bake, place the frozen dough balls on a prepared sheet and add 2– 3 minutes to the bake time. Freezing baked Peanut Butter Blossom Cookies works too, but the Kisses can sometimes develop a slight grayish bloom after thawing, though they still taste great.
Safe Thawing and Reheating Practices
If you freeze the baked cookies, thaw them overnight in the refrigerator, then let them come to room temperature on the counter for an hour before serving. You can reheat them for 30 seconds in the microwave to make the chocolate soft and gooey again it's highly recommended!
Pairing Perfection: How to Serve and Enjoy Your Peanut Butter Treats
These classic Peanut Butter Blossom Cookies are wonderful served plain, but there are a few ways to level up the experience.
For the holidays, I always pair these with a simple sugar cookie; it creates a lovely contrast on a cookie platter, perhaps alongside my perfect Sugar Cookies: The Best Cut-Out Recipe for Decorating . The creamy texture here is a great complement to the crispness of a sugar cookie.
Serve your perfect Peanut Butter Blossom Cookies with a thick hot chocolate for an after dinner delight. Or, for a truly decadent pairing, try crumbling these up over vanilla ice cream for a salty sweet sundae topping. They are also amazing served alongside a robust cup of coffee.
Making these timeless sweets brings such joy. I promise that once you follow these steps, these softest Peanut Butter Blossom Cookies will become a staple in your kitchen. Enjoy every soft, chewy, and perfectly sweet salty bite!
You’ll agree these are the best Peanut Butter Blossom Cookies you could ever bake.

Recipe FAQs
Why are my Peanut Butter Blossom cookies dry or crumbly?
This is often due to overmixing the dry ingredients, which develops the gluten too much, or overbaking. Ensure you stop mixing immediately once the flour is incorporated, and never bake these cookies beyond the point where the edges are set and the centers still look slightly soft.
When exactly should I press the chocolate kiss into the cookie?
You must add the chocolate kiss immediately after the cookies exit the oven. Gently press the kiss directly into the center of the warm cookie; waiting even a minute can cause the cookie surface to set, preventing the chocolate from adhering properly or leaving the signature "blossom" crackle.
Do I have to use standard commercial (processed) creamy peanut butter, or can I use natural peanut butter?
Standard creamy peanut butter (like Jif or Skippy) is highly recommended for its stability and fat content, which ensures the best texture. Natural, oil-separating peanut butters contain fewer stabilizers and often result in a greasier, less structured, or overly crumbly cookie.
My cookies flattened out too much what went wrong?
Excessive flattening is typically caused by using butter that is too soft or melted, or measuring too much sugar. Ensure your butter is only softened to room temperature, and if your dough feels overly sticky or soft, chill it briefly (15 20 minutes) before rolling.
Can I make these Peanut Butter Blossoms gluten-free?
Yes, this recipe adapts very well to gluten-free baking. Simply substitute the all-purpose flour with a high-quality 1:1 gluten-free baking blend that includes xanthan gum. No other major modifications to the wet ingredients are usually required.
What is the proper way to store these cookies?
Once the chocolate kisses have completely set and cooled, store the cookies in an airtight container at room temperature for up to one week. To prevent the chocolate from sticking or damaging the cookies when stacking, layer them gently with pieces of parchment paper.
Can I prepare and freeze the cookie dough ahead of time?
Yes, you can freeze the prepared dough balls (unrolled in sugar) for up to three months. To bake, thaw them slightly, roll them in the sugar mixture, and bake from mostly frozen, adding 1-2 minutes to the typical bake time until the edges are golden.
Ultimate Peanut Butter Blossom Cookies
Ingredients:
Instructions:
Nutrition Facts:
| Calories | 180 kcal |
|---|---|
| Protein | 4.0 g |
| Fat | 11.0 g |
| Carbs | 19.0 g |
