Cookie Icing: Ultimate Stable Royal Icing Base

- The Ultimate Stable Royal Icing Base for Piping and Flooding
- The Science Behind Hard-Setting Cookie Icing
- Essential Ingredients and Trusted Substitutions
- Step-by-Step Guide to Mixing Professional Royal Icing
- Troubleshooting Common Royal Icing Mistakes
- Maximizing the Shelf Life of Unused Icing (Storage & Freezing)
- Creative Uses Beyond Basic Sugar Cookies
- Recipe FAQs
- 📝 Recipe Card
The Ultimate Stable Royal Icing Base for Piping and Flooding
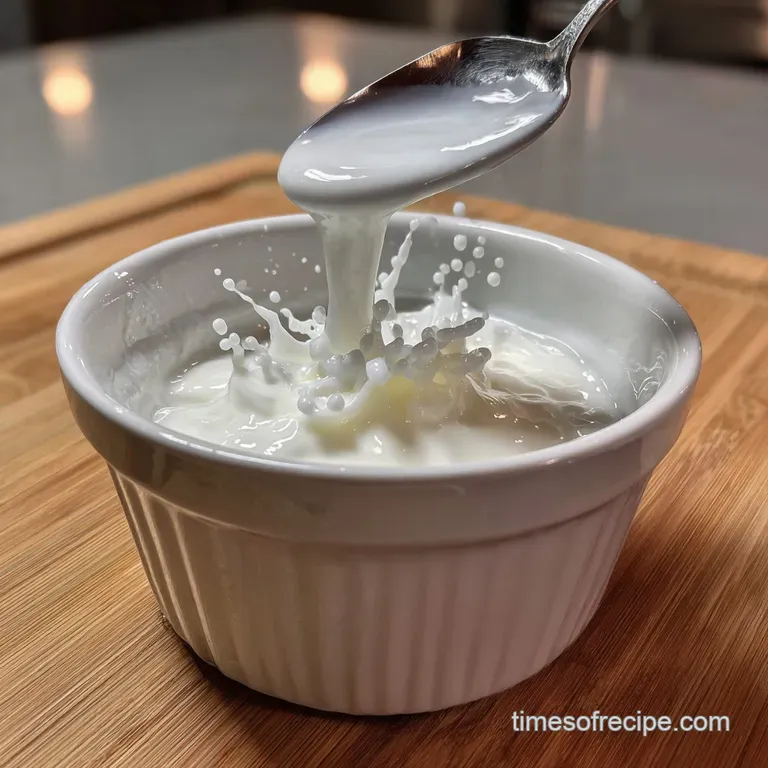
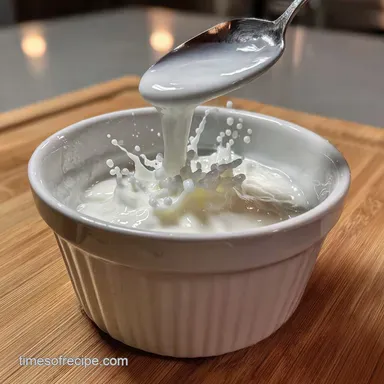
I’m serious, nothing makes me happier than the sound of perfectly decorated cookies clinking together in a tin. That crisp, satisfying sound means the cookie icing set hard. It means no smudges, no stickiness, and definitely no catastrophic color bleeding.
I spent years fighting frosting that cracked, cratered, or refused to dry, leaving me with sticky, ruined stacks of beautiful baking. But this recipe? This is the one. It’s the professional standard, built on meringue powder, which guarantees you get that glossy, hard finish every single time.
Stop stressing over sticky sugar cookies; we are making the ultimate, stable, flawless cookie icing today.
This technique delivers a strong, beautiful cookie icing that is perfect for intricate piping and smooth flooding. It’s easier than you think, but you absolutely cannot skip the science.
The Science Behind Hard Setting Cookie Icing
Why This Works: The Power of Meringue
This recipe delivers a bulletproof cookie icing that hardens completely because we aren’t just mixing sugar and liquid; we are creating a meringue matrix.
Meringue powder is your secret weapon. It contains dried egg whites and stabilizers. When you introduce liquid and whip it at high speed, the protein structure in the meringue powder traps air, giving the icing volume and incredible stability. This structure is what locks the sugar crystals into place as the water evaporates, creating a smooth, glossy shell. It's the difference between frosting that smears and frosting that shatters . If you want an even deeper dive into the specific ratios for a flawless, hard finish, check out my full guide on Sugar Cookie Icing Recipe: Flawless, Hard Setting Royal Finish .
Understanding Royal Icing Consistency: Piping vs. Flooding
Consistency is everything when making cookie icing . We aim for two main types:
- Piping/Stiff Consistency: This is the icing right after whipping thick, dense, and firm (like creamy peanut butter or latex paint). It holds sharp edges for borders, lines, and details.
- Flooding Consistency: This is the piping consistency thinned slightly with water. It needs to flow smoothly to fill the border without running over the edge. The sweet spot is the 10 Second Rule: When you draw a line through the icing, it should seamlessly smooth itself out within 8 to 12 seconds. This is the ultimate Icing For Flooding Cookies.
Essential Ingredients and Trusted Substitutions
Sifting the powdered sugar is non-negotiable, okay? If you skip this, you will have tiny, grainy lumps that clog your piping tip and ruin the velvety texture of the finished cookie icing .
| Ingredient | The Role | Substitute/Swap | Notes |
|---|---|---|---|
| Confectioners' Sugar (Sifted) | Bulk, sweetness, and hardness. | Granulated Sugar (Pulsed) | Only if desperate! Pulse granulated sugar in a food processor until superfine, but the texture will never be as smooth. |
| Meringue Powder | Structure, stability, food safety. | Fresh Egg White Powder (or Dried Pasteurized Egg Whites) | Essential for making this kind of stable cookie icing that hardens. Do not use raw egg whites for food safety. |
| Warm Water | Hydration and consistency control. | Lemon Juice or Milk | Lemon juice adds flavor and helps stability; milk makes the final dry coat softer, not as brittle. |
| Clear Vanilla Extract | Flavor (without discoloration). | Clear Almond Extract | Adds a strong bakery flavor that pairs beautifully with most sugar cookies. |
| Light Corn Syrup (Optional) | Shine and elasticity. | Liquid Glucose or Clear Agave Nectar | Adds a beautiful reflective gloss and prevents the dried icing from being too brittle (it helps reduce cratering, too). |
step-by-step Guide to Mixing Professional Royal Icing
Before you start, make sure your mixing bowl and whisk are spotless. Any grease or oil will kill the meringue structure immediately.
1. The Power Mixing Method: Whipping for Volume
- Sift and Combine Dry: Sift all 4 cups of confectioners’ sugar and the meringue powder directly into the bowl of your stand mixer. This prevents lumps.
- The Initial Stir: Pour in the warm water, clear vanilla, and corn syrup (if using). Start the mixer on the lowest speed just the Stir setting for about 30 seconds. You need to moisten all the powder before you ramp up the speed, otherwise you’ll create a sugar cloud that coats your entire kitchen.
- Whip to Stiff Peaks: Increase the speed to medium high (I use setting 6 or 7 on my KitchenAid). Let the mixer run! This process takes 5 to 7 minutes. The powerful motor should be humming. You will watch the icing transform from a dull yellow white paste into a bright, snowy white cloud that has nearly doubled in volume.
- Check for Piping Consistency: When you stop the mixer, the icing clinging to the whisk should form stiff peaks that stand tall and barely curl at the very tip. This is your Piping Consistency and the ideal foundation for any Best Frosting For Decorating Cookies.
2. Diluting to Flooding Consistency (The 10 Second Rule)
We use the stiff icing base and add water very slowly to achieve the perfect flow for filling large areas.
- Divide and Conquer: Scoop the stiff cookie icing into several separate bowls, one for each color you plan to use.
- Add Color: Introduce gel food coloring now, using a clean toothpick. Gel coloring gives you rich color without thinning the icing. Stir gently to avoid incorporating new air bubbles.
- Thinning: Add water, a half teaspoon at a time, mixing gently with a rubber spatula. Once you think you’re close, use the "10 Second Rule." Drop a spoonful of icing back into the bowl. If the surface is totally smooth within 8 to 12 seconds, you nailed it. If it takes longer, add 1/4 tsp more water. If it disappears faster than 8 seconds, you’ve gone too far (see troubleshooting below!).
Troubleshooting Common Royal Icing Mistakes
Even the best bakers run into trouble when trying to achieve a perfect, stable cookie icing . Here are the pitfalls and how to fix them immediately.
| Problem/Mistake | Cause | The Quick Fix |
|---|---|---|
| Grainy Texture | Un-sifted sugar or insufficient mixing time. | Add 1 tsp of water and beat on low speed for 1 minute longer to dissolve residual sugar granules. |
| Icing is Separated/Weeping | Too much fat or the mixture was over whipped after thinning. | Add 1 Tbsp of fresh powdered sugar (sifted) and whip on high speed for 30 seconds to re-stabilize the meringue. |
| Cratering/Potholes | The flood icing was too thin or the layer was applied too thick. | Next time, aim for the full 12 second consistency. For existing craters, let the whole cookie dry, then pipe a tiny dot of stiff icing into the hole and let it harden. |
| Color Bleeding | Stacking cookies too soon, or using cheap liquid food coloring. | Wait 8- 12 hours before stacking. Always use gel paste colors; if necessary, reduce the amount of water in the recipe slightly to counteract the added moisture from the coloring. |
Maximizing the Shelf Life of Unused Icing (Storage & Freezing)
The best part about this cookie icing is how robust it is. You can prep it days in advance and store it easily!
Short Term Storage: Keeping Icing Hydrated
Royal icing crusts over instantly when exposed to air. If you need to stop mixing or decorating for even five minutes, place a piece of plastic wrap directly onto the surface of the icing, pressing it down so no air touches the liquid.
Store leftover, unused cookie icing in an airtight container in the refrigerator for up to two weeks. Before using, allow it to warm up to room temperature (about an hour) and give it a quick, gentle stir to redistribute any water separation.
Can You Freeze Royal Icing?
Yes, but only the stiff, un-thinned base consistency. If you freeze the thin flood icing, the water content can cause separation upon thawing. Freeze the stiff base in an airtight bag or container for up to three months.
Thaw overnight in the fridge, then bring it to room temp and re-whip gently to bring back the volume.
Properly Storing Fully Decorated Cookies
Wait for it... wait for it... wait at least 8 hours, and ideally 24 hours, for the cookie icing to completely harden before you attempt to stack or package the cookies. Once the icing is hard (it should sound like a little tap of plastic when you gently touch it), store them layered between wax paper in an airtight container at room temperature. Speaking of perfect storage, this cookie icing works great as a 'glue' for construction, especially if you're building a gingerbread house or making something like my famous Hershey Kiss Cookies Recipe: Easy Peanut Butter Blossoms .
Creative Uses Beyond Basic Sugar Cookies
This particular cookie icing is so stable that it’s perfect for more than just cut-out sugar cookies.
Its hardness and reliable structure make it fantastic for structural work, like assembling gingerbread houses or adhering delicate chocolate details. Once you master this stable cookie icing , you'll need the perfect base. If you love chocolate, you have to try my Crinkle Cookies: The Ultimate Fudgy Chocolate Recipe . The contrast of the fudgy cookie and the crisp, sweet cookie icing is pure heaven.

Recipe FAQs
Why is meringue powder used instead of fresh egg whites in this royal icing recipe?
Meringue powder provides superior food safety compared to raw egg whites, eliminating the risk of salmonella. Additionally, it offers reliable, consistent stability and structure to the icing, which is crucial for creating fine piping details that hold their shape perfectly.
My royal icing is cracking or cratering as it dries. How can I prevent this?
Cracking is usually caused by either excess moisture or drying too slowly, especially in thick flood layers. Ensure you dry the cookies in front of a fan or in a dehydrator on the lowest setting (under 100°F).
For high humidity environments, slightly increase the amount of meringue powder to improve internal structure.
What is the difference between piping consistency and flooding consistency?
Piping consistency (or outlining consistency) is stiff and holds a crisp peak, typically used for borders and intricate details that require structure. Flooding consistency is much looser, achieving a 10-15 second count (meaning the icing settles back flat in that time), which is necessary to smoothly fill in the outlined areas.
How should I store leftover royal icing, and how long does it last?
Store the royal icing in an airtight container at room temperature for up to two weeks, or in the refrigerator for up to four weeks. Always ensure the surface is covered with plastic wrap pressed directly onto the icing to prevent a hard crust from forming and stir vigorously before reuse.
My colored icing is bleeding onto the dried base coat. What caused this?
Color bleed typically occurs when the base coat is not completely dry, trapping moisture underneath the top layer, or when highly saturated colors are placed next to light ones. To prevent this, ensure the flood coat is 100% dry (6-8 hours minimum) before adding detailed layers.
Using gel colors sparingly also helps reduce moisture content.
Can I substitute clear corn syrup in this recipe for a shinier finish?
Yes, adding 1 to 2 tablespoons of clear corn syrup or glycerin to the initial mix can increase the sheen of the dried icing and prevent it from becoming overly brittle. This addition often results in a slightly smoother finish and provides better protection against chipping.
Ultimate Stable Cookie Icing Base
Ingredients:
Instructions:
Nutrition Facts:
| Calories | 499 kcal |
|---|---|
| Protein | 0.0 g |
| Fat | 0.0 g |
| Carbs | 126.9 g |
