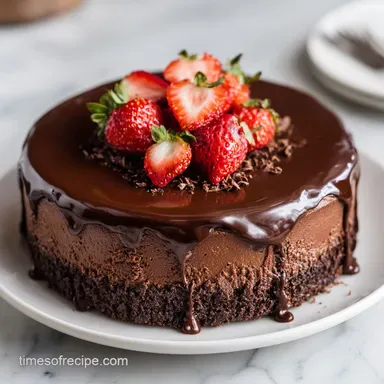
Chocolate Mousse Cake: Rich and Decadent
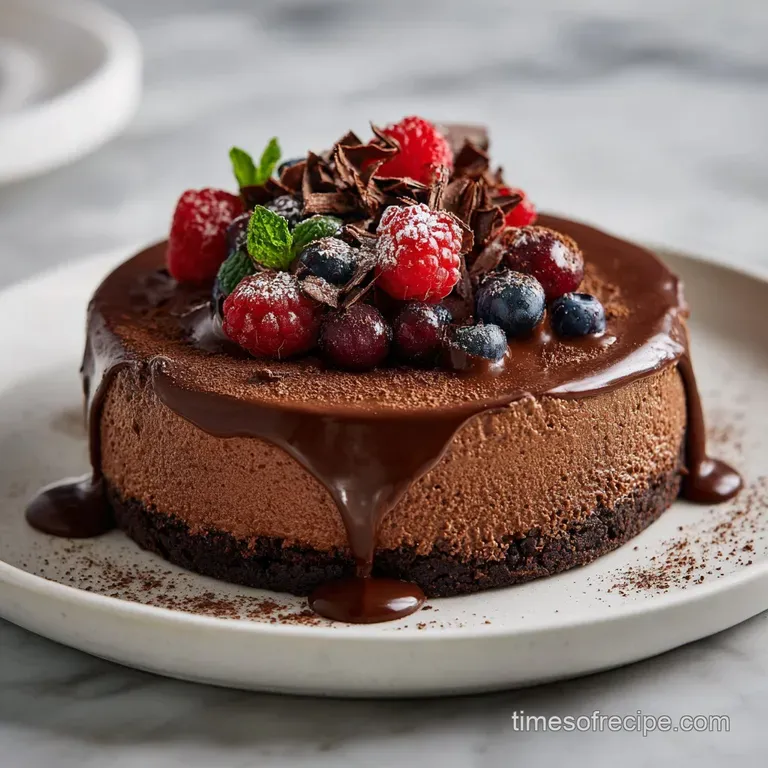
- Time: Active 40 minutes, Passive 25 minutes, Total 65 minutes
- Flavor/Texture Hook: A velvety, melt away crumb paired with a glossy, snap crisp ganache.
- Perfect for: Anniversary celebrations, sophisticated dinner parties, or high end weekend baking.
- Unveiling the Decadent Chocolate Mousse Cake Recipe for Chocolate Lovers with Rich Ganache
- Essential Details for Crafting Your Triple Layer Masterpiece
- Selecting the Finest Components for a Silky Cocoa Finish
- Curating Your Patisserie Toolkit for Seamless Baking Success
- A Step by Step Guide to Airy Mousse and Glossy Glaze
- Navigating Potential Pitfalls for a Flawless Chocolate Finish
- Personalizing Your Cocoa Canvas with Sophisticated Flavor Adaptations
- Preserving the Velvet Texture for Days of Pure Indulgence
- Three Levels of Elegant Plating for a Stunning Presentation
- Common Kitchen Misconceptions
- Recipe FAQs
- 📝 Recipe Card
Unveiling the Decadent Chocolate Mousse Cake Recipe for Chocolate Lovers with Rich Ganache
The kitchen currently smells like a high end Parisian patisserie, and I am absolutely here for it. There is something truly magical about the moment you pour warm, glossy cream over chopped dark chocolate and watch it transform into a shimmering pool of liquid gold.
It is not just about the sugar; it is about that deep, soulful aroma of 70% cacao mingling with a hint of espresso that tells you something spectacular is happening. Discover our ultimate decadent chocolate mousse cake recipe for chocolate lovers, topped with a rich ganache.
Honestly, I remember the first time I tried to make a multi layered chocolate dessert without a plan. It was a chaotic mess of runny mousse and a base that felt more like a brick than a cake.
But after playing with ratios and realizing that the secret lies in the aeration of the eggs and the temperature of the chocolate, I finally found the rhythm. This isn't just a dessert; it's an experience of textures from the slight resistance of the ganache to the ethereal wobble of the mousse layer.
We are going for elegance here, the kind of cake that makes people go quiet when you bring it to the table. We’ve all had those dry, uninspired chocolate cakes at supermarkets, but this version is the antidote.
It’s rich, yes, but the hit of sea salt and the bitterness of the Dutch process cocoa keep it from being cloying. Let's get into the details of how we build these layers of cocoa infused joy.
Essential Details for Crafting Your Triple Layer Masterpiece
Before we even crack an egg, we need to understand the structural integrity of what we are building. A mousse cake is essentially a game of physics and temperature control. We are creating a dense, stable foundation that can support a light as-air filling without collapsing under its own weight.
It’s a delicate balance that requires a bit of patience, but the payoff is a slice that looks like it came straight out of a professional pastry case.
The beauty of this recipe is that it feels incredibly complex to the palate, yet the actual active work is quite manageable if you follow the checkpoints. We are looking for that specific "ribbon stage" with our eggs to ensure the base is light despite being flourless. If you’ve ever enjoyed a Chocolate Raspberry Truffle Cake, you know that the interplay between a dense base and a lighter top is what creates that "decadent" feeling we are chasing.
- Aeration Control
- The eggs act as our leavening agent since there is no flour. By whisking them until they are pale and thick, we trap tiny air bubbles that expand in the oven, giving the base its signature fudgy yet light texture.
- Fat Stability
- Using unsalted butter in the base ensures a clean flavor profile, while the heavy cream in the mousse provides the fat globules necessary to hold the air we whip into it.
- The Espresso Secret
- We aren't making a coffee cake, but the tablespoon of strong espresso acts as a flavor intensifier. It bridges the gap between the bitter notes of the dark chocolate and the sweetness of the sugar.
- Emulsification Magic
- The ganache relies on the corn syrup to prevent sugar crystals from forming, which is exactly what gives it that professional, high shine mirror finish that doesn't crack when you slice into it.
| Cake Layer | Internal Temp | Rest Time | Visual Cue |
|---|---|---|---|
| Flourless Base | 175°F (80°C) | 60 mins | Edges set, center slightly wobbly |
| Mousse Filling | Chilled | 4 hours | Surface is matte and firm to touch |
| Ganache Glaze | Room Temp | 20 mins | Glossy and coats a spoon evenly |
This table helps you stay on track. If the center of your base is still sloshing around after 25 minutes, it needs another minute or two. If your mousse is still liquid after two hours, don't rush the ganache give it the full four hours to stabilize.
Patience is the most important ingredient in any sophisticated baking project.
Selecting the Finest Components for a Silky Cocoa Finish
When a recipe has so few components, every single one has to pull its weight. We aren't hiding behind piles of flour or frosting here. The quality of your chocolate will dictate the final outcome more than anything else. I always suggest going for a bar of chocolate you would actually enjoy eating on its own.
If it tastes waxy or overly sweet in the wrapper, it will taste that way in the cake.
| Ingredient | Component Role | Pro Secret |
|---|---|---|
| 170g Bittersweet Chocolate | Structural Base | Use 60% cacao for the perfect balance of snap and melt. |
| 3 Large Eggs | Leavening & Richness | Ensure they are room temperature to maximize air volume when whisking. |
| 360ml Heavy Cream | Aerated Volume | Keep it ice cold until the very second you are ready to whip it. |
| 1 tbsp Espresso | Flavor Catalyst | Use a concentrated shot to deepen the cocoa's natural earthy notes. |
The heavy cream is the backbone of our mousse. I’ve seen people try to use low-fat alternatives, and frankly, don't even bother. You need the fat content (at least 36%) to hold the air bubbles in place.
If you use a lower fat percentage, your mousse will simply deflate into a chocolate puddle, and nobody wants that.
- 115g Unsalted butter: Cubed for faster melting. Why this? Provides the fat for a tender, melt in-your mouth base.
- 170g Bittersweet chocolate (60% cacao): Finely chopped. Why this? Offers deep flavor without being overly bitter.
- 3 Large eggs: Must be at room temperature. Why this? Room temp eggs emulsify better and whip to a higher volume.
- 100g Granulated sugar: For sweetness and structure. Why this? Stabilizes the egg foam during the whisking process.
- 1 tsp Vanilla extract: Pure extract is best.
- 1/2 tsp Sea salt: To balance the richness.
- 2 tbsp Dutch process cocoa powder: Sifted to avoid lumps. Why this? Provides a darker color and smoother flavor than natural cocoa.
- 360ml Heavy whipping cream: Very cold.
- 225g Semi sweet chocolate: Melted and cooled slightly for the mousse.
- 1 tbsp Strong espresso: Liquid, not grounds.
- 30g Powdered sugar: For the mousse stability.
- 115g Dark chocolate (70% cacao): For the ganache.
- 120ml Heavy cream: For the ganache glaze.
- 1 tbsp Light corn syrup: For the mirror finish.
Curating Your Patisserie Toolkit for Seamless Baking Success
You don't need a kitchen full of gadgets, but a few specific tools will make this process much more enjoyable. A 9 inch springform pan is non negotiable here. Because we are layering textures that shouldn't be flipped, being able to simply pop the sides off the pan is the only way to keep those clean, sharp edges.
If you try this in a regular cake tin, you'll be digging out mousse with a spoon, which is tasty but definitely not elegant.
A stand mixer, such as a KitchenAid, is a lifesaver for the egg whisking stage. You need to whisk those eggs and sugar for a full 3 minutes, and doing that by hand is a workout most of us aren't looking for on a Saturday afternoon. You'll also want a fine mesh sieve for the cocoa powder.
Dutch process cocoa loves to clump, and finding a dry pocket of powder in your velvety cake is a real mood killer.
Finally,, grab a silicone spatula. We are going to be doing a lot of "folding." This is a gentle motion not stirring designed to incorporate ingredients without popping all those lovely air bubbles we worked so hard to create. If you're looking for more inspiration on light, airy desserts that don't require an oven, you might enjoy this Heaven on Earth Cake recipe, which uses a different stabilization technique entirely.
A step by step Guide to Airy Mousse and Glossy Glaze
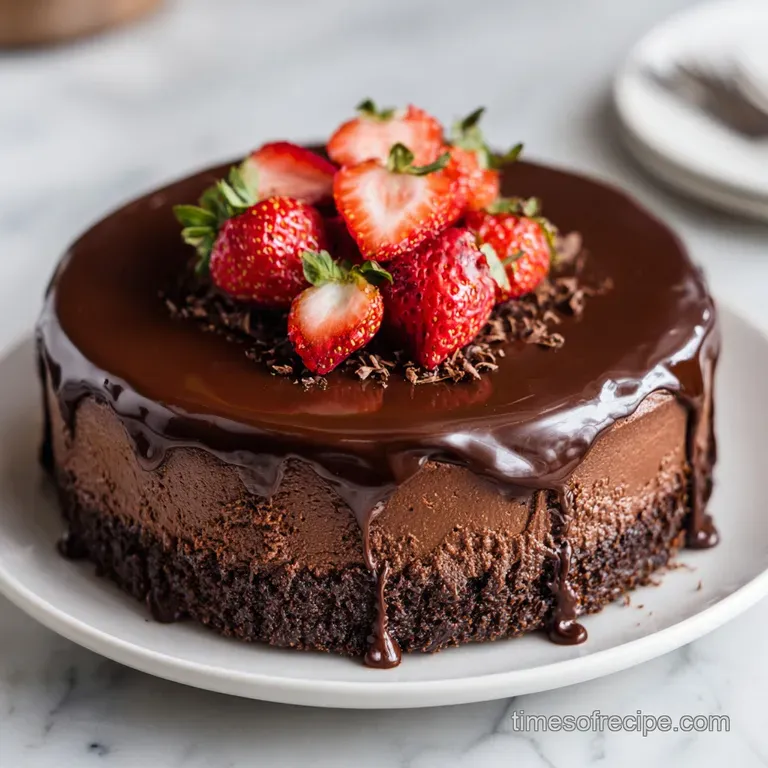
- Preheat your oven to 175°C (350°F) and meticulously line a 9 inch springform pan with parchment paper. Melt the 115g butter and 170g bittersweet chocolate together using a double boiler until smooth and glossy. Note: Avoid direct heat to prevent the chocolate from scorching.
- In a stand mixer, whisk 3 eggs and 100g granulated sugar for approximately 3 minutes until the mixture is pale, thick, and has doubled in volume.
- Gently fold the melted chocolate mixture into the aerated eggs using a silicone spatula. Sift in 2 tbsp cocoa powder and 1/2 tsp sea salt, folding until just combined to maintain the airy volume.
- Pour the batter into the prepared pan and bake for 25 minutes until the edges are set but the center remains slightly wobbly. Remove from the oven and allow to cool completely in the pan on a wire rack.
- Prepare the mousse: Combine 225g melted semi sweet chocolate and 1 tbsp espresso. In a separate cold bowl, whip 360ml heavy cream and 30g powdered sugar until stiff peaks form and the cream holds its shape.
- Fold the whipped cream into the cooled chocolate espresso mixture in three batches until no white streaks remain and the texture is velvety. Spread this evenly over the cooled cake base.
- Prepare the ganache: Heat 120ml heavy cream until simmering, then pour over 115g dark chocolate and 1 tbsp corn syrup. Let sit for 2 minutes, then stir gently until perfectly emulsified and shiny.
- Pour the ganache over the chilled mousse layer, tilting the pan to ensure an even coating. Refrigerate for at least 4 hours until the mousse has stabilized and the ganache is set.
Chef's Tip: To get those professional, clean slices, dip your knife in hot water and wipe it dry between every single cut. The heat will melt through the ganache and mousse like butter, leaving you with a stunning presentation.
Navigating Potential Pitfalls for a Flawless Chocolate Finish
Even the most seasoned bakers run into hiccups now and then. The most common issue with this decadent chocolate mousse cake recipe for chocolate lovers is the mousse "breaking" or becoming grainy. This usually happens if your melted chocolate is too hot when you add the cold whipped cream.
The temperature shock causes the cocoa butter to solidify instantly, creating tiny hard lumps.
Why Your Mousse is Grainy
If you notice the texture becoming gritty as you fold, it’s likely a temperature mismatch. The chocolate should be "finger warm" roughly 30-35°C. If it's too hot, it melts the cream; too cold, and it seizes.
To fix this, you can try gently whisking in a tablespoon of un whipped cream to smooth it out, though prevention is much easier.
Why Your Ganache Is Dull
A matte ganache usually means the emulsion didn't quite take, or the cream wasn't hot enough to fully melt the chocolate. This is why we let it sit for two minutes before stirring. If you stir too early, you lose heat; if you stir too vigorously, you incorporate air bubbles, which ruins that mirror like surface.
| Problem | Root Cause | Solution |
|---|---|---|
| Mousse is runny | Cream was under whipped | Chill the cake longer; the chocolate will eventually firm it up. |
| Cake base stuck | No parchment used | Use a thin knife dipped in hot water to release the edges. |
| Ganache is lumpy | Chocolate wasn't chopped fine | Microwave in 5 second bursts and stir gently until smooth. |
Another common mistake I once made was skipping the sifting of the cocoa powder. I thought, "It's just two tablespoons, it'll be fine." It wasn't fine. I ended up with tiny "cocoa bombs" in the base that tasted bitter and dry. Take the extra thirty seconds to sift your taste buds will thank you.
- ✓ Pat the bottom of your springform pan firmly on the counter before baking to release large air bubbles.
- ✓ Use a metal spoon or silicone spatula for folding; wooden spoons are too heavy and will deflate the eggs.
- ✓ Ensure your espresso is at room temperature before adding it to the chocolate.
- ✓ Never use "light" or "single" cream for the mousse; it lack the fat needed for stability.
- ✓ Allow the cake base to cool 100% before adding the mousse, or you'll end up with a melted mess.
Personalizing Your Cocoa Canvas with Sophisticated Flavor Adaptations
Once you've mastered the classic version of this decadent chocolate mousse cake recipe for chocolate lovers, you can start getting a bit creative. I personally love adding a tablespoon of orange zest to the cake base for a subtle, bright citrus note that cuts through the richness.
It changes the whole vibe from "deep and moody" to "elegant and refreshing."
If you want to adjust the size of the recipe, it’s fairly straightforward, though baking times will vary. For a smaller gathering, you can halve the recipe, but keep an eye on the oven.
- Scaling Down (1/2 size): Use a 6 inch springform pan. Reduce bake time to 18-20 minutes. Use 2 small eggs or 1.5 large eggs (whisk one and use half).
- Scaling Up (2x size): Use two 9 inch pans rather than one giant one. The depth of the layers is crucial for the texture. If you go too deep, the mousse might not set properly in the center.
- Spice Variation: Add 1/2 tsp of cinnamon and a pinch of cayenne to the cocoa powder for a "Mexican Hot Chocolate" twist.
| Premium Ingredient | Budget Alternative | Flavor Impact |
|---|---|---|
| Valrhona Cocoa | Hershey's Special Dark | Slightly less complex, but still very rich and dark. |
| Vanilla Bean Paste | Pure Vanilla Extract | Lose the tiny black specks but keep the essential floral aroma. |
| Organic Grass Fed Butter | Standard Unsalted Butter | A bit less creamy on the palate, but barely noticeable in a cake this rich. |
If you are looking for a shorter shortcut, you could technically use a high-quality store-bought chocolate frosting for the top layer, but I promise the homemade ganache is worth the extra five minutes. The corn syrup trick really is the secret to that "expensive" look that makes people ask where you bought the cake.
Preserving the Velvet Texture for Days of Pure Indulgence
Because this cake contains significant amounts of dairy and eggs, it needs to stay in the fridge. However, serving it straight from the refrigerator can mask some of the deeper chocolate notes. I like to take it out about 15-20 minutes before serving.
This allows the ganache to soften just enough to be velvety, and the base to lose its "cold from the fridge" firmness.
Storage Guidelines:Fridge: Store in an airtight container or under a cake dome for up to 4 days. The mousse will stay stable, but the base may slightly dampen over time. Freezer: This cake actually freezes beautifully!
Wrap individual slices in plastic wrap and then foil. They will last for up to 2 months. Thaw in the fridge overnight before serving.
Zero Waste Tips: If you find yourself with leftover ganache, don't you dare throw it out. It makes an incredible base for truffles. Just let it firm up in the fridge, scoop into balls, and roll in cocoa powder.
If the cake base edges are a bit dry after a few days, crumble them over vanilla bean ice cream. It's like a high end brownie crumble that elevates even the simplest scoop of store-bought gelato.
Three Levels of Elegant Plating for a Stunning Presentation
Presentation is half the fun with a cake like this. Depending on the occasion, you can choose how much "drama" you want to bring to the table. Since we are focused on visual appeal, let's look at how to transform a simple slice into a restaurant quality dessert.
Level 1: The Simple Sophisticate Place a clean slice on a white plate. Dust the top very lightly with a touch of extra cocoa powder and add a single, perfect raspberry on the side. This is clean, modern, and highlights the beautiful layers we’ve created.
Level 2: The Polished Host Add a "swoosh" of raspberry coulis or a salted caramel drizzle across the plate before placing the cake. Top the cake with a few curls of shaved white chocolate. The color contrast against the dark ganache is absolutely stunning and makes the dish feel intentional.
Level 3: The Restaurant Experience This is where we go all out. Serve with a dollop of crème fraîche instead of whipped cream the tanginess balances the sugar perfectly. Add a few edible gold leaf flakes to the ganache and a sprig of mint.
If you have any leftover espresso, serve a tiny "demitasse" on the side. This level of detail turns a dessert into a memory.
| Plating Component | Simple | Polished | Restaurant |
|---|---|---|---|
| Garnish | Single Berry | Chocolate Shards | Gold Leaf & Mint |
| Sauce | None | Caramel Drizzle | Fruit Coulis Swoosh |
| Accompaniment | None | Whipped Cream | Crème Fraîche |
Common Kitchen Misconceptions
There is a common myth that you must use a complicated water bath (bain marie) to bake a flourless cake base. While it works for cheesecakes, this specific base is robust enough to bake without one. The high fat content from the butter and chocolate protects the eggs from curdling, provided you don't overbake it.
Another misconception is that "seizing" chocolate is the end of the world. If a drop of water gets into your melting chocolate and it turns into a grainy clump, you can actually save it!
Paradoxically, adding more boiling liquid (like a teaspoon of hot water or cream) and stirring vigorously can often smooth it back out. However, for this recipe, keep your workspace dry to avoid the hassle altogether.
Finally,, some people think room temperature eggs are an optional suggestion. In this decadent chocolate mousse cake recipe for chocolate lovers, they are a requirement. Cold eggs will cause your melted butter and chocolate to firm up instantly when you try to fold them in, leading to a lumpy batter and a loss of that precious air volume we need for the rise.
Trust me, leave them on the counter for 30 minutes before you start. It makes all the difference in the world.
Recipe FAQs
Is it necessary to use a double boiler for the chocolate?
Yes, it is the safest method. Using a double boiler prevents the bittersweet chocolate from seizing or scorching due to direct, uneven heat from a burner.
How to ensure the egg mixture reaches maximum volume?
Whisk the eggs and granulated sugar in a stand mixer for a full 3 minutes. You are looking for a pale, thick consistency that has clearly doubled in volume, which provides the necessary aeration for the cake structure.
Can I speed up the chilling process for the cake?
No, avoid rushing the 4-hour refrigeration time. This window is critical for the mousse to stabilize properly and for the ganache to set, ensuring clean slices when you release the springform pan.
Is it possible to whip the heavy cream too much for the mousse?
Yes, stop whipping as soon as you reach stiff peaks. If you continue past this point, the cream will become grainy and lose its ability to fold smoothly into the melted chocolate base.
How to achieve a glossy finish on the ganache layer?
Stir the cream and chocolate gently until perfectly emulsified. If you enjoyed mastering this stable emulsion technique, see how it creates the perfect consistency in our Kahlua Chocolate Cheesecake.
Is it true I can substitute the dark chocolate with milk chocolate?
No, this is a common misconception. The recipe specifically calls for 70% cacao dark chocolate to balance the sweetness of the mousse layer and provide a sophisticated flavor profile.
How to remove the cake from the pan without damaging the sides?
Run a thin, sharp knife carefully around the inside edge of the springform pan. Ensure the cake has been fully refrigerated for 4 hours first so the layers are firm enough to withstand the release.
Chocolate Mousse Cake