Gluten Free Bagel Recipe: Chewy & Golden
- Time: Active 20 minutes, Passive 25 minutes, Total 45 minutes
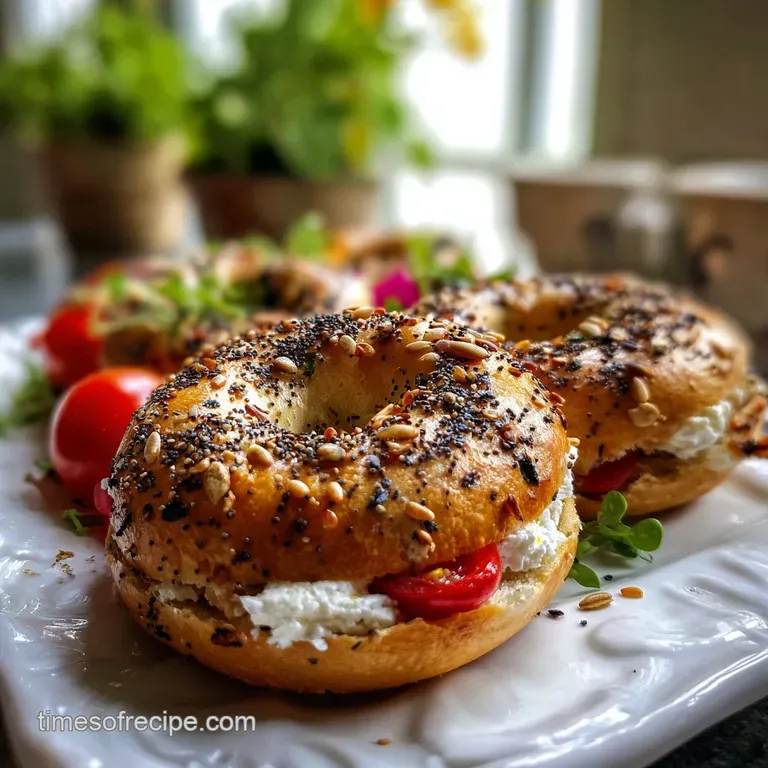
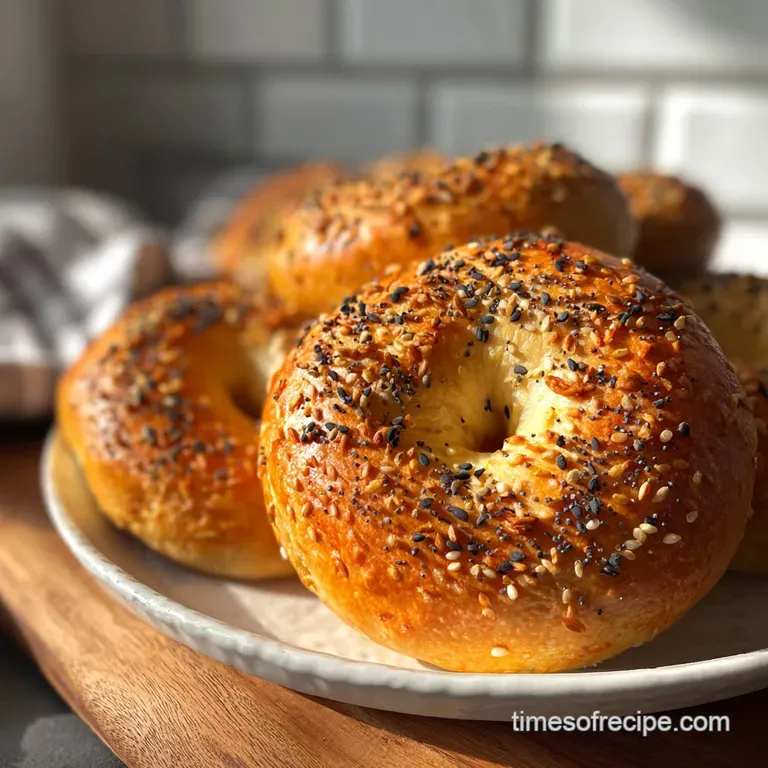
- Flavor/Texture Hook: A shatter crisp exterior with a dense, velvety crumb
- Perfect for: Slow morning rituals and meal prepping office breakfasts
- Achieving a Great Gluten Free Bagel Recipe
- The Science of Better Baking
- Essential Recipe Specifications
- Building Blocks for Great Dough
- Kitchen Tools You Will Need
- Step by Step Baking Guide
- Fixes for Common Baking Errors
- Adjusting the Batch Size
- Debunking Misconceptions About Yeast
- Storage and Reheating Tips
- Perfect Pairings for Breakfast
- Gluten-Free Bagel Recipe FAQs
- 📝 Recipe Card
Achieving a Great gluten-free Bagel Recipe
The aroma of a toasting bagel is one of those morning rituals I refuse to give up. For years, I struggled with store-bought gluten-free options that felt more like dry sponges than actual bread. They crumbled the second I tried to spread butter, and honestly, they lacked that iconic "pull" that makes a bagel a bagel.
After a lot of trial and error in my own kitchen, I realized the secret wasn't some expensive, hard to find flour blend, but rather the way we handle moisture and protein.
This recipe uses a clever combination of Greek yogurt and a reliable flour blend to mimic the elasticity we usually lose when we skip the gluten. We are going for that classic New York style chew without the twelve hour wait for dough to rise.
It's approachable, fast, and uses items you likely already have in your pantry. If you are used to spending eight dollars on a four pack of mediocre frozen bagels, this is going to be a total shift for your breakfast routine.
We are going to focus on the technique here. The boiling step is non negotiable, and the yogurt must be thick. If you have ever felt intimidated by yeast or gluten-free baking, let those worries go.
We are keeping things simple and cost effective while prioritizing a result that looks like it came from a professional bakery. Let's get into the details of how to make this work every single time.
The Science of Better Baking
Starch Gelatinization: Boiling the dough in alkaline water sets the exterior starches, creating a barrier that prevents the bagel from over expanding and ensures a chewy crust.
Chemical Leavening: The acidity in the Greek yogurt reacts with the baking powder to produce carbon dioxide, providing immediate lift without a lengthy proofing stage.
| Method | Time | Texture | Best For |
|---|---|---|---|
| Traditional Oven | 25 minutes | Soft and bread like | Quick morning snacks |
| Boil then Bake | 32 minutes | Iconic chewy skin | Authentic deli style |
| Air Fryer | 15 minutes | Ultra crisp exterior | Single servings |
Adding a little honey to the boiling water is a trick I learned from a baker friend. It doesn't just sweeten the dough; it speeds up the Maillard reaction, which is the chemical dance between amino acids and reducing sugars that gives the bagels their deep mahogany color. Just like when I make my Ted Lasso Biscuit recipe, the temperature of your ingredients matters more than you might think for the final texture.
| Component | Science Role | Pro Secret |
|---|---|---|
| Greek Yogurt | Provides structural protein | Use full fat for a richer, more supple crumb |
| Baking Powder | Creates internal air pockets | Always check the expiration date for max lift |
| Honey (in water) | Promotes surface browning | Sub with molasses for a deeper, malt like flavor |
Essential Recipe Specifications
Getting the measurements right is the difference between a bagel and a hockey puck. I highly recommend using a kitchen scale for the flour and yogurt. 280 grams of flour might look different in your measuring cup depending on how tightly you pack it, but a scale never lies.
This precision ensures your dough isn't too sticky or too dry to roll.
Chef's Tip: Freeze your Everything Bagel seasoning for 10 minutes before topping. This prevents the garlic and onion bits from scorching in the high heat of the oven, keeping the flavors sharp and toasted rather than bitter.
When you are ready to start, ensure your water is at a rolling boil before adding the baking soda. If the water is just simmering, the bagels won't get that immediate "shock" needed to set the crust.
We are looking for a total cook time of 25 minutes at 400°F to ensure the centers are fully set without the tops becoming too dark.
Building Blocks for Great Dough
- 2 cups (280g) King Arthur Measure for Measure gluten-free Flour: Why this? The rice flour and xanthan gum ratio is perfectly balanced for structure.
- Substitute: Any GF blend with xanthan gum included.
- 1.5 cups (345g) Plain thick Greek Yogurt: Why this? Provides the acidity needed for the leavening reaction.
- Substitute: Skyr or thick dairy-free Greek style almond yogurt.
- 1 tbsp (14g) Baking powder: Why this? Essential for the immediate rise and airy interior.
- Substitute: 1 tsp baking soda + 2 tsp cream of tartar.
- 1 tsp (6g) Fine sea salt: Why this? Enhances the flavor of the grains and balances the yogurt.
- Substitute: Kosher salt (use 1.5 tsp).
- 1 tsp (3g) Instant yeast: Why this? Used here primarily for that classic "bread" flavor, not just rise.
- Substitute: Active dry yeast (must bloom in 1 tbsp warm water first).
- 2 quarts water: Used for the boiling bath.
- 2 tbsp (42g) Honey: Added to water to create a glossy, golden finish.
- 1 tsp (5g) Baking soda: Added to boiling water to gelatinize the surface starches.
- 1 large egg: Whisked for an egg wash to help toppings stick.
- 3 tbsp (24g) Everything bagel seasoning: For that savory, salty crunch.
Kitchen Tools You Will Need
You don't need a professional kitchen to pull this off, but a few specific tools make the process much smoother. I always use a large rimmed baking sheet lined with high-quality parchment paper. Do not use wax paper, or you will have a sticky disaster on your hands once it hits the 400°F oven.
A wide, shallow pot (like a Dutch oven) is better for the boiling phase because it allows you to cook three bagels at once without them crowding each other. You will also want a slotted spoon or a "spider" strainer.
This allows the water to drain off quickly so you aren't transferring pools of liquid onto your baking sheet, which would cause the bottoms to become soggy.
step-by-step Baking Guide
Mix the Shaggy Dough
Whisk the 280g of gluten-free flour, baking powder, salt, and yeast in a large bowl. Add the 345g of Greek yogurt and stir with a stiff spatula until a shaggy mass forms and no dry flour remains at the bottom of the bowl.
Shape the Bagel Rings
Turn the dough onto a lightly floured surface and knead for 1 minute until it feels velvety. Divide into 6 equal pieces and roll each into a rope about 6 inches long, then pinch the ends together firmly. Note: Wetting your hands slightly prevents the dough from sticking to your skin.
Prepare the Boiling Bath
Bring the 2 quarts of water to a boil in a large pot, then stir in the honey and baking soda. The water will bubble up aggressively, so add the soda slowly to avoid a mess on your stovetop.
The Signature Flash Boil
Drop 2 or 3 bagels into the boiling water. Boil for 30 seconds on each side until they look slightly puffed and the surface looks wrinkled. Use your slotted spoon to transfer them back to the parchment lined tray.
Apply the Finishing Touches
Brush the tops and sides of the warm bagels with the beaten egg wash. Sprinkle the everything seasoning generously over the top, pressing down slightly so the seeds settle into the damp dough.
The Golden Bake
Slide the tray into the center of your 400°F oven. Bake for 25 minutes until the crust is deep golden and the bottoms sound hollow when tapped. If you want a punchy flavor pairing later, these are incredible alongside a gluten-free Shrimp recipe for a savory brunch spread.
Final Cooling Stage
Transfer the bagels to a wire rack immediately. Let them rest for at least 15 minutes before slicing. Note: Cutting into them too early allows steam to escape, which can lead to a gummy interior.
Fixes for Common Baking Errors
Why the Dough Sticks
If your dough is sticking to everything, the culprit is usually the moisture content of the yogurt. Some brands are more liquid than others. You want a dough that feels like damp clay, not cake batter. If it's too messy, add more flour one tablespoon at a time.
Bagels Deflate After Boiling
This usually happens if the water isn't hot enough or if the bagels boiled for too long. If they sit in the water for over a minute, the internal air bubbles expand too much and then collapse once they hit the cooler air. Stick to the 30 second rule for a stable structure.
| Problem | Root Cause | Solution |
|---|---|---|
| Dense/Heavy Interior | Expired baking powder | Use fresh leavening agents every 6 months |
| Pale/White Crust | Skipped the honey bath | Add honey or molasses to boiling water for color |
| Bottoms are Sliced | Too much water on tray | Drain bagels thoroughly on a slotted spoon |
Common Mistakes Checklist
- ✓ Always weigh your flour; volume measurements are too inconsistent for GF baking.
- ✓ Don't skip the boiling step - it's what creates the iconic bagel texture.
- ✓ Ensure your oven is fully preheated for at least 20 minutes before baking.
- ✓ Use a thick, strained Greek yogurt rather than a runny "European style" one.
- ✓ Let the bagels cool completely on a wire rack to prevent a gummy crumb.
Adjusting the Batch Size
If you are cooking for one, you can easily halve this recipe. Since it calls for one egg wash, just beat the egg in a small bowl and use half for the wash, or save the rest for a quick scramble. When halving, use a smaller pot for boiling to keep the water depth sufficient for the bagels to float.
For a big family brunch, you can double the recipe. However, do not double the baking soda in the water bath; stick to 1.5 teaspoons so the flavor doesn't become metallic. You should also bake in two separate batches or use two oven racks, swapping their positions halfway through the timer to ensure even browning.
Debunking Misconceptions About Yeast
Many people think that "no rise" recipes can't use yeast, but that isn't true. While the baking powder does the heavy lifting for the rise, adding a teaspoon of instant yeast provides that fermented, "bakery fresh" flavor that yogurt alone can't replicate.
It doesn't need time to proof; it just needs to be there for the ride.
Another myth is that you must use a stand mixer for gluten-free dough. Because there is no gluten to develop, over mixing isn't a concern, but neither is under mixing. A simple bowl and spatula are actually better because you can feel the hydration level of the dough, which is the most important factor for success.
Storage and Reheating Tips
These bagels are best on the day they are made, but they store surprisingly well. Keep them in an airtight container at room temperature for up to 2 days. For longer storage, slice them first and freeze them for up to 3 months.
Topping them with the everything seasoning before freezing is fine; the seeds stay put quite well.
When you are ready for a quick breakfast, toast them directly from frozen. This revives the "shatter" of the crust while keeping the inside soft. If you have leftover dough scraps, roll them into tiny balls, boil them, and bake them as "bagel bites" to toss into a morning salad or snack on with a bit of honey.
Perfect Pairings for Breakfast
A classic bagel deserves a classic spread, but since we are focusing on morning rituals, think about the texture. A thick, whipped cream cheese with fresh chives is my go to. If you want something more substantial, a slice of smoked salmon and a few capers add a salty brightness that cuts through the richness of the Greek yogurt dough.
For a sweet start, try a thick layer of almond butter topped with sliced bananas and a drizzle of honey. The dense crumb of this bagel holds up much better to heavy toppings than standard gluten-free bread.
It's about starting the day with something that feels substantial and intentional, rather than a rushed, crumbly substitute.

gluten-free Bagel Recipe FAQs
What makes these gluten-free bagels chewy?
Greek yogurt and a specific boiling method are key. The protein in Greek yogurt provides structure, and boiling the bagels briefly before baking gelatinizes the starches on the exterior, creating that signature chewy crust.
Do I need to use a specific type of gluten-free flour blend?
Yes, look for blends containing xanthan gum. Blends like King Arthur Measure for Measure work well because they are balanced for structure. If your blend doesn't have xanthan gum, you'll need to add it separately.
How do I get my gluten-free bagels to hold their shape?
Proper dough hydration and gentle handling are crucial. The dough should feel like damp clay, not sticky. Rolling the ropes firmly and pinching the ends together securely helps prevent them from opening during boiling and baking.
Can I make these bagels ahead of time?
Yes, you can shape the dough ahead. Shape the bagels up to 12 hours in advance and keep them refrigerated. This makes them ready to boil and bake whenever you're craving them.
Why do I need to boil the bagels before baking?
Boiling is essential for texture and crust development. It gelatinizes the exterior starches, preventing the bagels from expanding too much in the oven and creating that classic chewy, slightly crisp crust.
What happens if I skip the honey in the boiling water?
The crust might not brown as deeply. Honey helps speed up the Maillard reaction, giving the bagels a beautiful golden brown color and a slightly glossy finish. If you mastered controlling cookie spread here, the same principles of sugar browning apply.
How should I store leftover gluten-free bagels?
Airtight storage at room temperature is best for 2 days. For longer preservation, slice and freeze them for up to 3 months; toasting them from frozen works wonderfully to revive their texture.
gluten-free Bagel Recipe

Ingredients:
Instructions:
Nutrition Facts:
| Calories | 248 kcal |
|---|---|
| Protein | 8.4 g |
| Fat | 5.1 g |
| Carbs | 42.8 g |
| Fiber | 1.6 g |
| Sugar | 3.2 g |
| Sodium | 612 mg |
