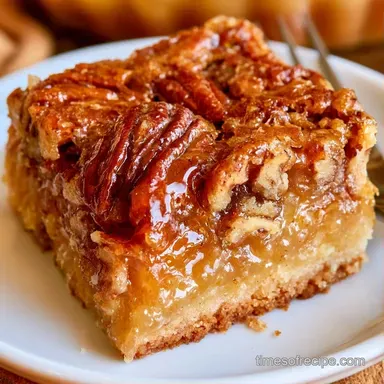
Mini Pecan Pie Bars with Shortbread Crust
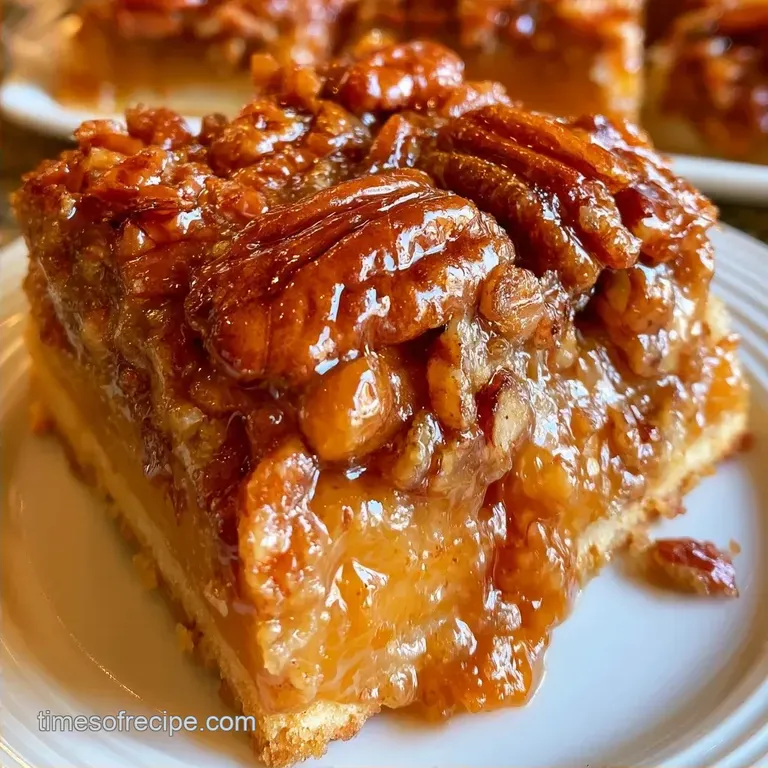
- Time: 15 min active + 2 hours 40 mins chilling/baking
- Flavor/Texture Hook: Shattering shortbread crust with a mahogany, chewy pecan topping
- Perfect for: Holiday platters, dessert parties, or an elegant tea time snack
That nutty, caramelized aroma hits you the second the pan leaves the oven. It is the kind of smell that fills every corner of the house and makes people wander into the kitchen asking what is happening.
Ever wonder why we stick to huge, heavy pies when bite sized is so much more elegant? I spent years hauling a massive pie to dinners, only to find the slices falling apart on the plate. These Mini Pecan Pie Bars solve that problem completely.
You get a high ratio of crust to filling in every single bite. It is a a light, refined take on a traditional favorite, designed to look stunning on a platter while staying easy to eat.
Mini Pecan Pie Bars with Shortbread Crust
What Makes These Bars Work
- The Par Bake: Baking the crust for a few minutes first creates a moisture barrier. This keeps the base crisp and prevents the syrup from soaking through.
- Maple Syrup Base: Using syrup instead of just corn syrup adds a deep, woody flavor. It also helps the filling set with a slight chew rather than a sticky glue.
Recipe Specs
This recipe is all about balance. We are aiming for a crust that snaps and a topping that is rich but not cloying.
The 2 hour cooling window is the hardest part of the process, but it is non negotiable. If you cut them while warm, the filling will ooze, and you will lose those clean, professional edges.
The Ingredient Breakdown
Before we get into the mixing, let's look at how these components interact.
| Ingredient | Role | If You Don't Have It |
|---|---|---|
| Unsalted Butter | Provides the sandy, short texture of the base | Salted butter (reduce added salt) |
| Pure Maple Syrup | Natural sweetener and binding agent | Honey (adds a floral note) |
| Raw Pecan Halves | The primary texture and nutty flavor | Walnuts or Hazelnuts |
| Cornstarch | Stabilizes the filling for a clean cut | Arrowroot powder |
Gear You Will Need
While professional equipment isn't necessary, having the right tools makes the process much easier. A 9" x 13" rectangular baking pan is required to get the thickness just right.
Using parchment paper is highly recommended. Beyond making cleanup simple, it lets you easily remove the set bars from the pan for more precise slicing.
A medium whisk and a silicone spatula are the best tools for the job. The spatula is especially helpful for pressing the syrup into the corners so no spots are missed.
The Cooking Process
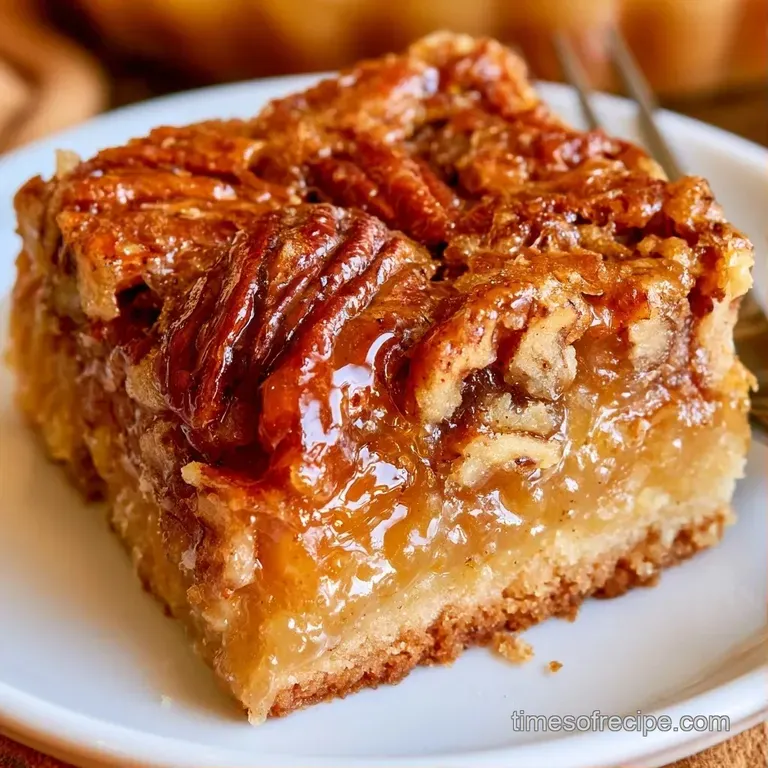
Now, let's move on to the preparation. Pay close attention to the timing markers to achieve the perfect texture.
- 1. Oven Temperature
- 350°F (175°C).
- 2. First Bake
- 12-15 minutes until edges are barely golden.
- 3. Cooling
- Minimum 2 hours before slicing.
Preparing the Base
- Mix the chilled cubed butter and brown sugar in a bowl. Beat until combined, then stir in the flour and salt until the dough becomes crumbly.
- Line a 9" x 13" pan with parchment paper. Press the dough firmly and evenly across the bottom. Note: Use the bottom of a measuring cup to ensure a flat surface.
- Bake at 350°F (175°C) for 12–15 minutes until the edges are just barely golden.
Crafting the Filling
- Using a medium bowl, whisk together the melted butter, maple syrup, brown sugar, eggs, and vanilla until the mixture is smooth and velvety.
- Sift in the salt and cornstarch. Fold in the pecan halves until they are thoroughly coated in the syrup.
- Pour the filling over the warm, par-baked crust, using a spatula to spread it to the edges.
- Bake for 20–25 minutes until the filling is bubbling around the edges and the pecans have turned a deep, toasted brown.
- Let the bars cool entirely in the pan for at least 2 hours before cutting into slices.
Solving Common Issues
Even the most experienced bakers run into a few hiccups. Most of the time, it comes down to temperature or timing.
Soggy Crust Fix
If your base feels soft, you likely skipped the par baking step or didn't press the dough firmly enough. The moisture from the maple syrup is aggressive, so that initial bake is the only thing protecting the crust.
Burnt Nut Save
Pecans can go from toasted to burnt in a matter of seconds. If you notice the nuts darkening too quickly, simply tent a piece of aluminum foil over the top of the pan for the last 10 minutes.
Clean Slicing
Getting a jagged edge is a common frustration. The trick is to use a very sharp knife and wipe the blade clean with a damp cloth between every single cut.
| Problem | Root Cause | Solution |
|---|---|---|
| Filling too soft | Under baked or cut too early | Bake 5 mins longer or cool for 4 hours |
| Crust is too crumbly | Over mixed the butter | Stop mixing as soon as dough clumps |
| Pecans sinking | Filling was too thin | Ensure cornstarch is fully incorporated |
Swaps and Tweaks
Feel free to tweak the flavors of these Mini Pecan Pie Bars to suit the season. For a more unexpected touch, try adding a pinch of cinnamon to the crust.
Stirring a tablespoon of bourbon into the maple syrup adds a sophisticated depth and a bold edge. If you're looking for other holiday sweets, these pair beautifully with pumpkin pie cups on a dessert board.
Fresh vs. Shortcut Comparison
| Ingredient | Pure Maple Syrup | Pancake Syrup (Corn Syrup) |
|---|---|---|
| Flavor | Rich, woody, complex | One dimensional sweetness |
| Set | Firm, slightly chewy | Very sticky and gooey |
| Color | Deep mahogany | Pale gold |
Decision Shortcut:
- For a firmer set: Bake filling for an extra 3 minutes.
- For a nuttier taste: Toast pecans for 5 minutes before adding.
- For a softer crust: Reduce butter by 10g.
Adjusting the Batch Size
If you only need a small amount, you can halve the recipe using an 8" x 8" pan. Just keep in mind that the bake time for the crust might drop by about 20%, so start checking it at 10 minutes.
When doubling the recipe, do not double the salt or vanilla. Use 1.5x the amount instead, as these flavors can become overpowering in larger volumes. Work in two separate pans rather than one deep pan to ensure the middle cooks through.
For larger batches, I recommend lowering the oven temp to 325°F (160°C) and extending the final bake time by 10 minutes. This prevents the edges from over browning while the center is still wobbly.
Storage and Waste Tips
Keep these in a sealed container, ensuring they aren't stacked. They'll keep in the refrigerator for 5 days, and you'll find the filling's texture actually gets better.
For an extended shelf life, the bars can be frozen for as long as 3 months. Individually wrap each piece in parchment paper before sealing them in a freezer safe bag. When you're ready to enjoy, allow them to thaw at room temperature for 30 minutes.
Don't waste any remaining pecans. Instead, coat them in some melted butter and honey and toast them in the oven for 5 minutes to make a fast snack. It's a perfect way to use leftover bits while you're making other desserts, such as cinnamon bread.
Serving Suggestions
These are quite rich, so a bit of contrast goes a long way. A small dollop of unsweetened whipped cream or a side of fresh raspberries cuts through the sweetness perfectly.
For a more formal presentation, dust the tops with a tiny bit of powdered sugar right before serving. It looks like a light snowfall on those dark, toasted pecans.
If you're serving these at a party, keep them chilled until 15 minutes before guests arrive. This ensures the cuts stay sharp and the bars don't slide on the platter.
According to USDA FoodData Central, pecans are a great source of healthy fats, making these a slightly more mindful choice than a traditional sugar heavy cake.
Recipe FAQs
How do you prevent the bars from becoming soggy?
Par-bake the crust at 350°F for 12 15 minutes before adding the filling. This creates a barrier that prevents the syrup from soaking into the dough.
Which crust works best for this recipe?
A crumbly shortbread base made with chilled butter and brown sugar provides the best structural support. If you enjoyed the buttery texture here, you'll love the similar richness in my peanut butter blossom recipe.
What common mistakes cause the filling to stay runny?
Omitting the cornstarch is the most frequent error. This thickener is necessary to stabilize the maple syrup and eggs so the bars set properly.
Is it true that you can skip par-baking the crust to save time?
No, and here's why. Skipping this step results in a raw, doughy bottom because the filling bakes faster than the unbaked crust.
How should I store these for the best texture?
Place the bars in a single layer within a sealed container. Keeping them in the refrigerator actually improves the consistency of the filling.
Mini Pecan Pie Bars