Oreo Dirt Cake: No-Bake and Decadent
- Time: 20 min active + 4 hours chilling = Total 4 hours 20 mins
- Flavor/Texture Hook: Shattered chocolate cookies paired with a wobbly, silky mousse
- Perfect for: Potluck desserts, children's parties, or low stress celebrations
- Easy No Bake Oreo Dirt Cake Recipe with Gummy Worms
- The Magic of This Dessert
- Component Analysis
- The Must Have Ingredients
- Essential Kitchen Tools
- Step by Step Assembly
- Fixing Common Texture Issues
- Fun Flavor Variations
- Adjusting The Batch Size
- Dessert Truths
- Storage and Waste Tips
- Stunning Presentation Ideas
- Recipe FAQs
- 📝 Recipe Card
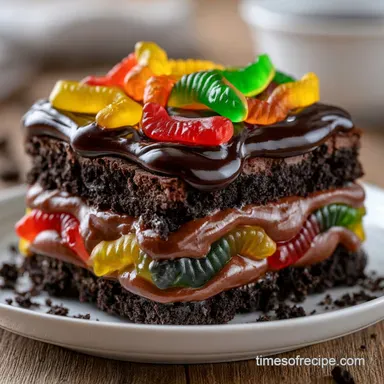
Easy No Bake Oreo Dirt Cake Recipe with Gummy Worms
Imagine the sound of forty eight Oreo cookies shattering in a food processor, turning from solid discs into a heap of dark, gritty sand. That tactile shift is where the magic begins. There is something so playful about a dessert that looks like a garden bed but tastes like a high end chocolate truffle.
The hero here is undoubtedly the Oreo. I've tried using generic chocolate wafers or homemade cocoa crumbs, but they always fall short. The Oreo provides a specific balance of deep cocoa and a hint of vanilla cream that cuts through the richness of the pudding.
Without that signature crunch, the whole thing just feels like a bowl of mousse.
This Easy No Bake Oreo Dirt Cake Recipe with Gummy Worms is the ultimate crowd pleasing dessert. It is a stunning blend of textures that feels whimsical yet looks elegant when served in a glass bowl. You can expect a dessert that is light, airy, and just the right amount of sweet.
The Magic of This Dessert
I used to think no bake desserts were just "cheating," but then I realized they are actually about smart stabilization. According to the technique guides at Serious Eats, the key to a stable no bake cake is managing the fat and air ratios.
Air Incorporation: Folding in whipped topping creates tiny air pockets, which keeps the filling from feeling like a heavy brick of pudding.
Fat Stabilization: The cream cheese acts as a structural anchor, preventing the mixture from weeping or becoming too runny as it sits.
Moisture Barrier: A thin layer of cookie crumbs at the bottom prevents the pudding from soaking directly into the pan, keeping the "soil" texture distinct.
Texture Contrast: Keeping a few "pebbles" of cookie rather than a fine powder ensures every bite has a satisfying snap.
| Method | Time | Texture | Best For |
|---|---|---|---|
| Instant Mix | 20 min | Silky & Consistent | Quick parties |
| From Scratch | 60 min | Dense & Fudgy | Gourmet dinner |
| Slow Set | 120 min | Firm & Moldable | Pre sliced squares |
Component Analysis
| Ingredient | Science Role | Pro Secret |
|---|---|---|
| Cream Cheese | Structure | Beat until completely smooth to avoid white lumps |
| Instant Pudding | Thickening | Use ice cold milk for a faster, firmer set |
| Whipped Topping | Volume | Thaw fully in the fridge, never the microwave |
| Oreo Cookies | Texture | Pulse in bursts to avoid turning them into dust |
The Must Have Ingredients
For this recipe, precision with the fats is key. Don't be tempted to use low-fat cream cheese, as it contains more water and can make your filling wobbly.
- 48 Oreo cookies (approx. 1 lb / 450g) Why this? Provides the iconic "dirt" look and chocolate base
- 1 package (3.4 oz / 96g) instant chocolate pudding mix Why this? Offers instant thickening and a deep cocoa flavor
- 3 cups (710ml) cold whole milk Why this? High fat content makes the pudding more velvety
- 1 package (8 oz / 225g) cream cheese, softened Why this? Adds tang and stabilizes the air bubbles
- 1 container (8 oz / 225g) frozen whipped topping, thawed Why this? Adds lightness and a cloud like consistency
- 1 package (8 oz / 225g) gummy worms Why this? The essential whimsical garnish
Ingredient Substitutions
| Original Ingredient | Substitute | Why It Works |
|---|---|---|
| Whole Milk | Evaporated Milk | Richer, more condensed flavor. Note: Heavier mouthfeel |
| Oreo Cookies | Chocolate Wafers | Similar color and crunch. Note: Lacks the cream filling sweetness |
| Gummy Worms | Fresh Raspberries | Adds a tart, red accent. Note: Changes the "dirt" theme to "forest" |
| Whipped Topping | Heavy Whipped Cream | More natural taste. Note: Less stable; may deflate faster |
Right then, let's get into the gear you'll need. You don't need a professional kitchen, just a few basics to keep things smooth.
Essential Kitchen Tools
- Food Processor: This is the fastest way to get that "coarse sand" texture. If you don't have one, a heavy duty zip top bag and a rolling pin work just as well.
- Hand Mixer or Stand Mixer: Necessary for getting the cream cheese completely smooth. Lumps of cream cheese are a total mood killer in a velvety dessert.
- 9x13 Inch Baking Pan: The classic size for potlucks, though a glass trifle bowl makes it look more stunning.
- Rubber Spatula: Essential for the "folding" process. We want to keep the air in, not beat it out.
Step by step Assembly

Let's crack on with the assembly. The key here is the layering - we want distinct bands of chocolate and cream.
- Pulse the Oreo cookies. Use a food processor until they reach a consistency of coarse sand with a few small pebbles left for texture. Note: Don't over process or it will turn into a paste
- Beat the softened cream cheese. Use your mixer on medium speed until the mixture is completely smooth and creamy.
- Whisk the pudding. In a separate bowl, combine the chocolate pudding mix and cold milk. Whisk for 2 minutes until the mixture has thickened significantly.
- Fold the pudding. Gently stir the pudding into the cream cheese. Then, fold in the thawed whipped topping until the mixture is velvety and uniform.
- Create the barrier. Spread a thin layer of Oreo crumbs across the bottom of your 9x13 inch pan. Note: This stops the base from getting too mushy
- First filling layer. Spoon half of the chocolate filling over the crumbs, smoothing it with a spatula.
- Middle soil layer. Add another thick layer of Oreo crumbs, spreading them evenly.
- Final filling layer. Top with the remaining chocolate filling, smoothing the surface.
- The garden bed. Cover the top with a final, generous layer of Oreo crumbs until the surface looks like dark soil.
- The finishing touch. Press gummy worms into the soil at various angles and chill for 4 hours.
Chef's Tip: If you want an extra thick "dirt" layer, freeze your Oreo crumbs for 10 minutes before layering. This keeps them from absorbing the moisture of the cream too quickly.
Fixing Common Texture Issues
Most people get this right, but a few things can go sideways if you're rushing. The most common issue is the "soup" effect, where the filling doesn't set.
Why Your Filling Is Too Runny
This usually happens if the milk wasn't cold enough or if the whipped topping wasn't fully thawed before folding. If the topping is still icy, it won't incorporate; if it's too warm, it collapses.
How To Stop Soggy Oreos
While some softening is expected, "mushy" cookies happen when you skip the bottom crumb barrier or don't chill the cake long enough. The 4 hour window is non negotiable for the layers to bond.
Dealing With Lumpy Cheese
If you see white specks of cream cheese, it means it wasn't softened to room temperature. You can fix this by gently warming the bowl over a pot of simmering water for 30 seconds and re beating.
| Problem | Root Cause | Solution |
|---|---|---|
| Filling is liquid | Under whisked pudding | Whisk pudding for a full 2 mins before adding cheese |
| Cookies are "dust" | Over processing | Pulse in 1 second bursts next time |
| Gummy worms sinking | Filling too soft | Chill for an extra hour before adding worms |
Common Mistakes Checklist:
- ✓ Did you use cold milk for the pudding?
- ✓ Is the cream cheese completely smooth before adding pudding?
- ✓ Did you fold the whipped topping rather than beating it?
- ✓ Is the cake chilled for at least 4 hours?
- ✓ Did you leave some cookie "pebbles" for texture?
Fun Flavor Variations
If you want to move away from the classic version, there are a few ways to tweak this. For a winter twist, you could incorporate a dollop of my Eggnog Recipe into the filling for a festive, spiced flavor profile.
The Peanut Butter Plot: Swap the chocolate pudding for peanut butter flavored pudding and use peanut butter Oreos. It creates a salty sweet combo that is honestly addictive.
The Minty Meadow: Use Mint Oreos and add a drop of peppermint extract to the cream cheese. This version feels a bit more sophisticated and refreshing.
The "Worm Bucket" Approach: Instead of a big pan, assemble this in individual clear plastic cups. It's much easier for parties and looks like a collection of little terrariums.
Decision Shortcut
- If you want a tart contrast, add fresh raspberries on top.
- If you want a richer taste, replace whole milk with heavy cream.
- If you want a "healthier" feel, use dark chocolate Oreos and Greek yogurt in place of half the cream cheese.
Adjusting The Batch Size
When you're making this for a small family or a massive office party, the ratios don't always scale linearly.
Scaling Down (Half Batch): Use a 8x8 inch square pan. Reduce the chilling time by about 20% (3 hours should suffice). If the recipe calls for an odd number of eggs (not applicable here), beat one and use half.
Scaling Up (Double Batch): Do not try to mix a double batch of whipped topping in one bowl; it will deflate. Work in two separate batches to maintain the airiness. Increase the salt or extracts by only 1.5x, as they can become overpowering.
| Version | Pan Size | Chilling Time | Filling Volume |
|---|---|---|---|
| Single | 9x13" | 4 hours | 1x |
| Half | 8x8" | 3 hours | 0.5x |
| Double | Two 9x13" | 4 hours | 2x |
Dessert Truths
There are a few things people get wrong about no bake treats. Let's clear those up.
Myth: "No bake means it's just sugar and air." Truth: Actually, by using cream cheese and instant starches, you're creating a stabilized mousse. It has a more complex structure than a simple pudding.
Myth: "You can't freeze a dirt cake." Truth: You absolutely can. In fact, freezing it turns it into a semi frozen cheesecake hybrid. Just let it thaw in the fridge for 2 hours before serving.
Storage and Waste Tips
This cake keeps surprisingly well because of the sugar and fat content, which act as natural preservatives.
Storage: Keep it in an airtight container in the fridge for up to 5 days. Do not leave it on the counter, as the cream cheese and whipped topping can spoil.
Freezing: You can freeze this for up to 1 month. Wrap it tightly in plastic wrap to prevent freezer burn. When you're ready to eat, thaw it slowly in the refrigerator.
Zero Waste: If you have leftover Oreo crumbs, don't toss them! They are perfect for topping a milkshake or stirring into a morning smoothie for a chocolatey kick. If you have extra cream cheese, I highly recommend using it in a Sourdough Discard Cinnamon Bread frosting.
Stunning Presentation Ideas
Since this is a "dirt" cake, the visual appeal comes from the contrast of colors. I like to treat the top of the cake like a canvas.
- 1. Neon Green
- Use the bright green gummy worms to create "movement" across the soil.
- 2. Deep Red
- Add a few fresh raspberries or sliced strawberries to look like wild berries in a garden.
- 3. Fresh Green
- Place a small sprig of fresh mint in the center to mimic a sprouting plant.
For a more elegant look, serve the cake in a wide mouthed glass bowl. This allows the guests to see the layers of "dirt" and cream, turning a simple potluck dessert into a stunning centerpiece. Use a wide spoon to scoop out generous portions, ensuring every guest gets a bit of the crunchy base and the velvety filling.
Recipe FAQs
Can I keep this cake at room temperature?
No, keep it refrigerated. The cream cheese and whipped topping can spoil if left on the counter.
Is it possible to freeze Oreo dirt cake?
Yes, for up to one month. Wrap the pan tightly in plastic wrap to prevent freezer burn and thaw slowly in the refrigerator.
Is it true that I should pulse the cookies into a fine powder for the best texture?
No, this is a common misconception. Pulse the cookies until they reach the consistency of coarse sand with a few small pebbles left to mimic real soil.
How to stop the bottom Oreo layer from becoming too mushy?
Spread a thin layer of crumbs across the bottom of the 9x13 inch pan to create a moisture barrier before adding the filling.
How to get the chocolate filling perfectly smooth?
Beat the softened cream cheese until completely smooth before folding in the thickened pudding and thawed whipped topping.
Can I serve the cake immediately after assembling?
No, it must chill. Refrigerate for at least 4 hours to allow the layers to bond and set properly.
What other treats pair well with this dessert?
Small, rich cookies provide a great contrast. If you enjoy the quick assembly of this treat, see how the same easy prep applies to our peanut butter blossoms.
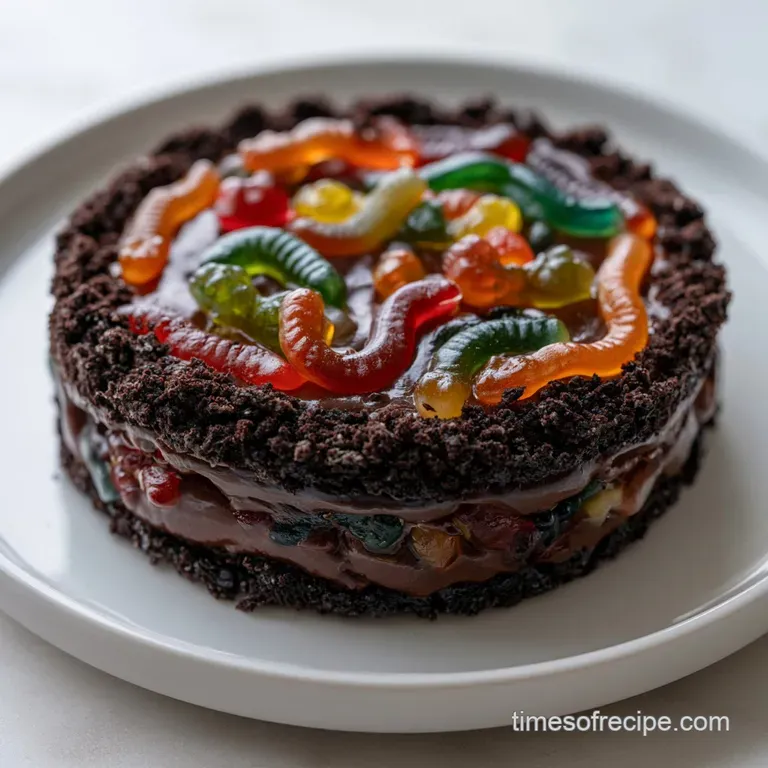
No Bake Oreo Dirt Cake