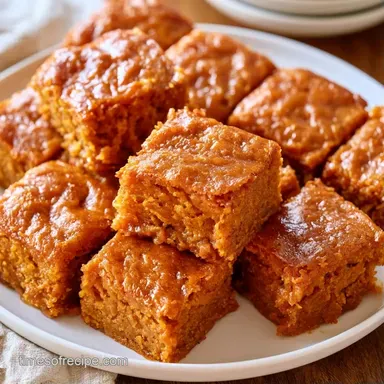
Pauls Pumpkin Bars with Cream Cheese Frosting
- Time: 25 min active + 2 hours cooling
- Flavor/Texture Hook: Heavily spiced crumb topped with an airy frosting
- Perfect for: Thanksgiving potlucks or cozy family weekends
Your home will feel like a cozy sanctuary while these are baking. I remember one rainy November afternoon when the house felt a bit too still. As soon as the cinnamon and nutmeg hit the heat, the energy in the room shifted, and it felt as though the house was finally embracing the season.
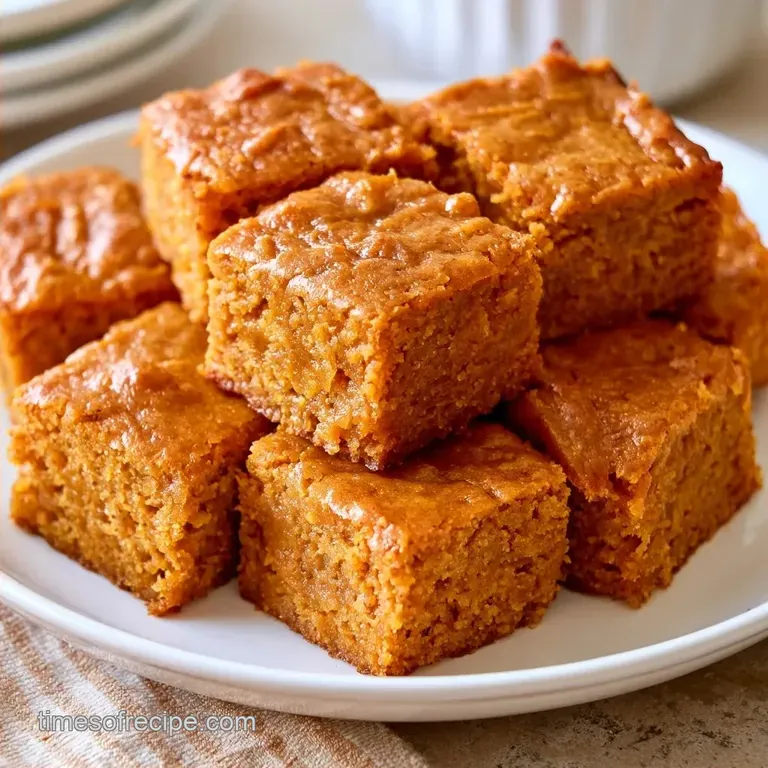
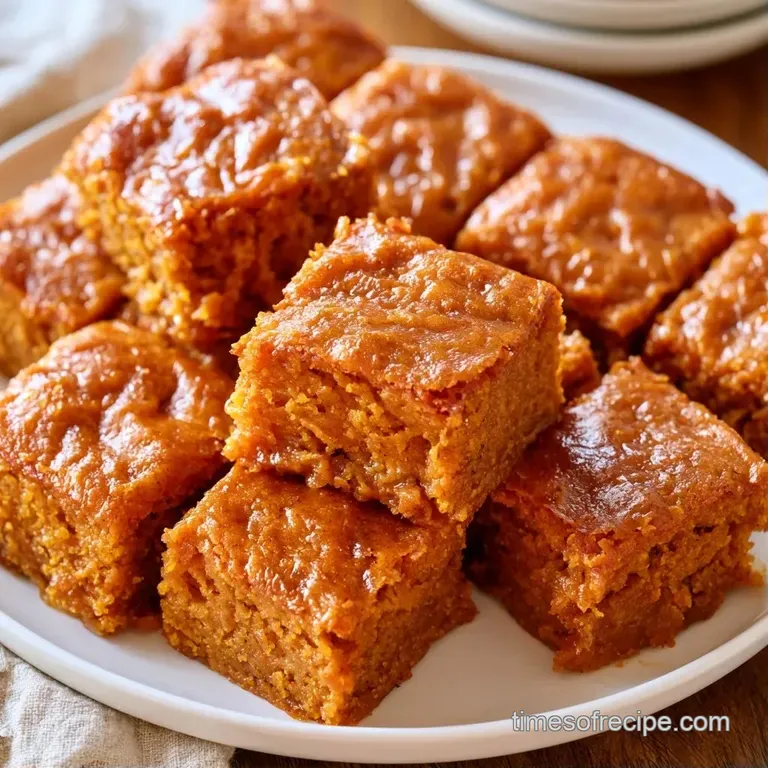
The visual appeal of this dessert is wonderful. The vibrant, sunset orange cake creates a striking contrast with the bright white frosting. It's a sophisticated look that is surprisingly easy to achieve. When sliced, the clean, precise edges give the bars a polished, professional bakery quality.
Imagine that first bite: the cake is soft and moist, while the frosting offers a tangy, cool balance to the warm spices. These Pumpkin Bars are such a hit that guests will be eager to know how you made them. They bring an element of autumnal charm to the table without requiring an entire day of preparation.
Quick Facts for Pumpkin Bars
If you're planning your baking schedule, keep in mind that while the oven time is short, the waiting is the hard part. You cannot frost a warm cake, or your frosting will turn into a puddle. I've learned that lesson the hard way.
For the best results, I recommend using a standard 9x13 inch pan. If you use a deeper pan, the center might stay too mushy, while a shallower one might lead to over baked edges. Stick to the dimensions to keep the texture consistent across every single square.
| Style | Prep Speed | Texture | Effort Level |
|---|---|---|---|
| Fast Method | 15 mins | Slightly denser | Very Low |
| Classic Method | 25 mins | Light and airy | Low |
What Makes the Batter Work
The magic of these Pumpkin Bars is all about the balance of moisture and lift. Most people over mix their batter, which turns a tender cake into something that feels like bread. By keeping the mixing minimal, we keep the crumb delicate.
Moisture Balance: The pumpkin puree provides a lot of water, which is why we use melted butter instead of creamed butter. This ensures the fats are evenly distributed without needing to beat air into the mixture for too long.
Spice Synergy: Using a mix of cinnamon, nutmeg, and ginger creates a layered flavor. The cinnamon provides the base, the nutmeg adds a woody depth, and the ginger gives a tiny bit of heat that cuts through the sugar.
Tools for Your Kitchen
Having the right tools makes this process effortless. I rely on a rubber spatula for the final fold, as it's the most gentle way to blend the flour with the wet ingredients.
A 9x13 inch baking pan is the ideal choice here. I strongly suggest lining it with parchment paper; rather than just greasing the pan, the paper lets you lift the entire slab out, making it much easier to cut the Pumpkin Bars into neat squares.
You will also need a medium bowl for dry ingredients and a larger one for the wet. A hand mixer will help the frosting come together more quickly, though a whisk and a little elbow grease work perfectly fine.
How to Make the Bars
Preparing the Base
- Heat your oven to 350°F (175°C) and line a 9x13 inch baking pan with parchment paper. Note: Leave an inch of overhang to make lifting the bars out easier.
- Combine the flour, baking soda, salt, cinnamon, nutmeg, and ginger in a medium bowl and whisk. Note: Whisking ensures there are no flour clumps for a smoother consistency.
- In a larger bowl, whisk the pumpkin puree, eggs, and sugar until the mixture is smooth.
- Mix in the melted butter. Note: Let the butter cool slightly so it doesn't accidentally cook the eggs.
- Using a rubber spatula, gently fold the dry ingredients into the wet batter. Stop mixing the moment the white streaks vanish to ensure the Pumpkin Bars remain tender.
Baking and Finishing
- Pour the batter into the prepared pan and spread it evenly.
- Bake for 22–25 minutes until the center bounces back when pressed.
- Let the Pumpkin Bars cool entirely in the pan. Note: This takes about 2 hours; if you rush this, the frosting will melt.
- Cream the softened butter and cream cheese together until the mixture is pale and fluffy.
- Slowly beat in the powdered sugar on low speed, adding it one cup at a time.
- Stir in the salt and vanilla extract.
- Spread a thick, smooth layer of frosting over the cooled Pumpkin Bars.
The Magic Behind the Texture
I used to wonder why some cakes felt heavy and others felt like clouds. It turns out that the folding technique is where the magic happens. When you stir too hard, you develop gluten, which is great for pizza dough but terrible for a dessert.
Low Gluten Development: Folding the flour in gently prevents the cake from becoming tough. This keeps the crumb open and soft.
Fat Distribution: Melted butter incorporates more easily into the pumpkin puree than cold butter does. This creates a consistent, velvety texture throughout the pan.
Since you're already in the mood for fall flavors, you might enjoy making some pumpkin whoopie pies for a portable treat. They use similar spices but have a completely different, sandwich like vibe.
The Building Blocks
| Ingredient | Role | If You Don't Have It |
|---|---|---|
| Pumpkin Puree | Moisture & Color | Mashed roasted pumpkin (drain excess water) |
| Baking Soda | Lift/Leavening | 3 tsp baking powder (adjusts pH slightly) |
| Cream Cheese | Tangy Structure | Mascarpone (richer, less tangy) |
| All Purpose Flour | Structure | 1:1 gluten-free blend (may be slightly grainier) |
The Pantry List
- 1 cup (245g) canned pumpkin puree Why this? Consistency is key for the rise
- 3 large eggs
- 1 cup (200g) granulated sugar
- 1/2 cup (113g) unsalted butter, melted and slightly cooled
- 2 cups (250g) all purpose flour
- 1 tsp (5g) baking soda
- 1 tsp (2g) salt
- 1 tbsp (6g) ground cinnamon
- 1 tsp (2g) ground nutmeg
- 1/2 tsp (1g) ground ginger
- 8 oz (226g) cream cheese, softened
- 1/2 cup (113g) unsalted butter, softened
- 4 cups (500g) powdered sugar, sifted
- 1 tsp (5ml) vanilla extract
- 1/4 tsp (1.5g) salt
Pro Tips & Pitfalls
Mistakes happen. A common issue is the "sinkhole," where the center of the cake collapses. This typically occurs if the oven is too cool or if you open the door too soon to check on them.
Fixing a Mushy Center
If the middle feels soft or wet, it is likely the pumpkin puree contained too much moisture. You can resolve this by returning them to the oven for an additional 3-5 minutes. A toothpick should come out with just a few moist crumbs, not wet batter.
Handling Runny Frosting
When frosting becomes too thin, it is usually because the butter was too warm or the cake was still hot. To fix this, chill the frosting in the fridge for 15 minutes, then beat it again.
Avoiding a Grainy Finish
A grainy texture happens when the cream cheese and butter are at different temperatures. Ensure both are completely softened to room temperature before you begin mixing.
| Problem | Fix |
|---|---|
| Cake sinks in middle | Bake 5 mins longer; don't open oven early |
| Frosting is too sweet | Add a pinch more salt or a drop of lemon juice |
| Bars are too dry | Reduce bake time by 2 minutes next time |
Adjusting the Batch Size
To scale this down for a small group, simply cut the ingredients in half. Use an 8x8 inch pan and trim the baking time by 20%. To handle the egg, whisk one in a bowl and measure out half of the liquid.
If you're feeding a crowd, doubling the recipe is simple, but avoid using a single giant pan. Instead, divide the batter between two 9x13 pans. A single deep cake often results in burnt edges before the center is fully set.
If you prefer to use one larger, deeper tray for a double batch, drop the oven temperature by 25°F and increase the baking time. This allows the heat to penetrate the middle without scorching the surface of the Pumpkin Bars.
Quick adjustments for your goals:
- Richer flavor? → stir in 1/2 cup toasted pecans.
- Tangier frosting? → add 1 tsp lemon juice.
- Spicier kick? → increase ginger to 1 tsp.
Keeping It Fresh
Once you've cut your Pumpkin Bars, they need to stay cool. The cream cheese frosting is the fragile part. Keep them in a sealed box in the cooler to maintain that silky texture. They'll stay fresh for about 4-5 days.
For long term storage, you can freeze these. I recommend freezing them without frosting first. Once thawed, you can whip up a fresh batch of frosting. If you freeze them already frosted, they still taste great, but the frosting can sometimes develop small cracks.
If you find yourself with a bit of leftover pumpkin puree in the can, don't toss it. It's a great addition to a pumpkin dump cake for a faster, more rustic dessert.
Variations & Substitutions
You can easily customize these Pumpkin Bars to suit your taste. For a nuttier flavor, fold in some chopped pecans or walnuts just before baking to add a great crunch to the tender crumb.
To achieve a richer profile, stir in a teaspoon of instant coffee crystals during the dry mixing stage. Rather than making the cake taste like coffee, this simply intensifies the pumpkin and spice notes.
If you prefer a dairy-free option, use a vegan butter substitute and dairy-free cream cheese. The texture remains remarkably similar, though the frosting may be slightly less stable.
Ingredient Swap Guide:
| Original Ingredient | Substitute | Why It Works |
|---|---|---|
| Granulated Sugar | Brown Sugar | Adds a molasses depth; makes cake denser |
| All Purpose Flour | Almond Flour | Grain free; result is much moister and heavier |
| Powdered Sugar | Maple Syrup | Use in frosting for a woody taste; will be runnier |
Presentation Tips
To make these Pumpkin Bars look truly stunning, focus on color balance. You already have the orange and white, so adding a third "accent" color makes the platter pop.
I love using an emerald green touch, like a tiny mint leaf or a sprinkle of crushed pistachios. Alternatively, a ruby red accent like a few pomegranate seeds looks elegant and festive. Add these just before serving so they stay bright.
For a more rustic look, place a few whole cinnamon sticks and some dried orange slices around the platter. It creates a sensory experience before the first bite is even taken. When you cut the bars, use a hot knife.
Dip the blade in hot water and wipe it clean between every single cut for those sharp, professional edges.
The final result is a luscious treat that looks as good as it tastes. These Pumpkin Bars are a reminder that you don't need to spend hours in the kitchen to create something that feels special. Just keep your ingredients at the right temperature, fold your batter gently, and let the flavors do the talking.
Whether you're sharing them with a crowd or keeping a few for a rainy Tuesday, these Pumpkin Bars bring that cozy, autumn magic right to your plate. Trust the cooling time, be generous with the frosting, and enjoy every single bite.
Recipe FAQs
How to prevent the bars from sticking to the pan?
Line a 9x13 inch baking pan with parchment paper before adding batter.
Tip: Leave a small overhang of paper on the sides to lift the entire block out easily.
Are pumpkin bars too difficult for a beginner to bake?
This one's false: the simple whisk and-fold method makes them accessible to anyone.
Tip: Use a rubber spatula to fold the dry ingredients to avoid overmixing.
Can I use a dairy-free alternative for the butter?
Use a vegan butter substitute to keep the texture consistent.
Tip: Ensure the substitute has a similar water-to-fat ratio to prevent the frosting from becoming too soft.
What causes the center of the bars to sink?
Overmixing the batter incorporates too much air and weakens the structure.
Tip: If you mastered the gentle folding technique here, see how the same care prevents toughness in sugar free banana bread.
When are the bars officially done baking?
Bake for 22 25 minutes until the center springs back when touched.
Tip: Avoid overbaking to ensure the crumb remains moist and tender.
Is it true that pumpkin puree makes the cake too wet?
No, this is a common misconception because the flour and baking soda balance the moisture.
Tip: Use canned pumpkin puree rather than homemade to ensure consistent water content.
Which spices create the autumn flavor profile?
A blend of cinnamon, nutmeg, and ginger provides the warm, seasonal taste.
Tip: Sift the spices with the flour to prevent small clumps of cinnamon in the batter.
Does the frosting require chilling before it is spread?
That's a myth since the cream cheese and butter just need to be softened to beat together.
Tip: Ensure the pumpkin bars have cooled completely so the frosting doesn't melt.
Pauls Pumpkin Bars