Spoons for Dessert: Velvet Mocha Bites
- The Velvet Mocha Spoons: A Deconstructed Dessert Masterpiece
- Decoding the Perfect Spoonful: Why This Texture and Flavor Combination Works
- Essential Components for Your Dessert Spoons: Ingredients and Key Substitutions
- Method: Crafting Your Velvet Mocha Dessert Spoons Step-by-Step
- Troubleshooting and Chef’s Secrets for Successful Dessert Spoons
- Planning Ahead: Storage, Shelf Life, and Freezing the Components
- Elevating the Experience: Pairing and Presentation Suggestions
- Recipe FAQs
- 📝 Recipe Card
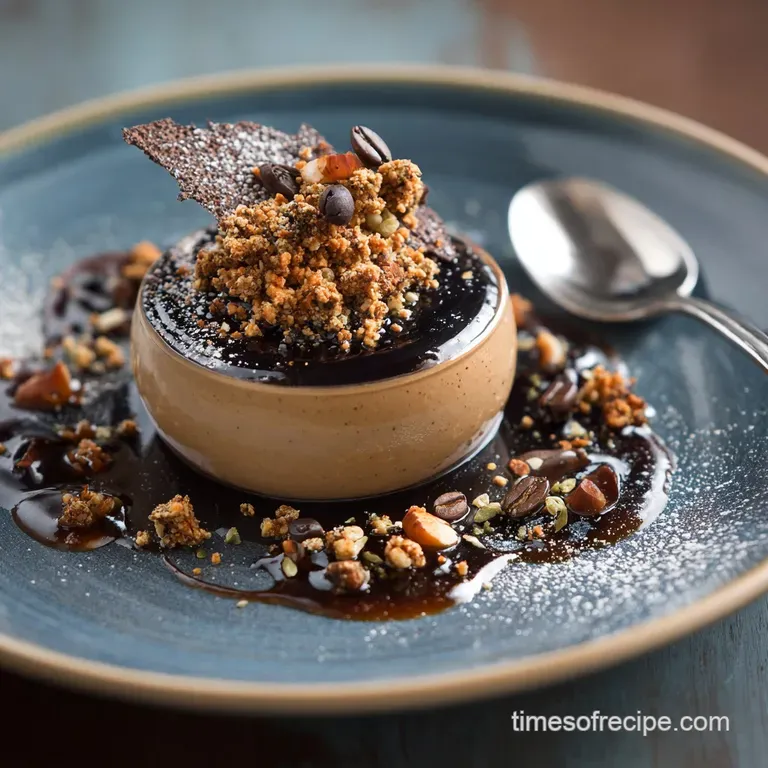
The Velvet Mocha Spoons: A Deconstructed Dessert Masterpiece
Can we talk about that aroma? The smell of dark, rich chocolate melting together with intense espresso, maybe with a hint of sea salt cutting through the sweetness, is pure heaven, right?
These Velvet Mocha spoons for dessert are exactly that sensory blast, packed into the most elegant little package you can imagine.
This isn't a stressful recipe, even though it looks impossibly fancy; it’s actually a total lifesaver for dinner parties or when you just need a small, potent fix. Serving individual spoons for dessert means no cutting cakes, no messy plating, and everyone gets the perfect, controlled portion.
It’s cheap to make, requires zero oven time, and gives you maximum bragging rights with minimal effort.
We are taking three classic components salty caramel, airy mocha mousse, and crunchy espresso brittle and layering them into these tiny servings. I promise you, once you learn the technique for these elegant spoons for dessert , you will never look back.
Ready to crack on with the ultimate recipe for portion control perfection?
Decoding the Perfect Spoonful: Why This Texture and Flavor Combination Works
When I first started playing with individual servings, I realized most recipes for spoons for dessert fail because they are too one-note just soft mousse, or maybe just a bit of custard. That’s boring!
This recipe is all about the contrast of temperatures, textures, and tastes that make every bite exciting. We’re pairing the cold, velvety smoothness of the mousse with the chewy, warm depth of the caramel and the unexpected sharpness of the brittle.
What Makes These Dessert Spoons So Elegant?
The elegance comes from the deconstruction. Instead of mixing everything into a single pot, we keep the components separate until the very last moment. This approach allows the intense coffee notes, the fudgy texture of the chocolate, and the sharp salinity of the caramel to shine individually while still harmonizing.
Using tiny mini spoons for desserts forces the eater to slow down and truly savor the complexity.
Speed vs. Sophistication: How Long Does This Recipe Take?
While there are several phases caramel, brittle, mousse the active cooking time is genuinely minimal. You spend most of the total time waiting for the components to chill.
Making these individual spoons for dessert is ideal for busy cooks because you can make the caramel and brittle days ahead, leaving only the mousse folding for the day you plan to serve.
The Components: Mousse, Caramel, and Brittle Defined
Think of this as an architectural project. The caramel acts as the dense, chewy foundation; the mocha mousse is the light, airy structure; and the brittle is the dramatic, crunchy roof. The resulting spoons for dessert are a perfect balance of rich intensity and delicate lightness.
The Salted Caramel Anchor: Balancing Bitterness and Sweetness
The caramel here must be taken right to the edge of bitterness. We want that deep, almost burnt sugar flavour. That intensity is critical because it prevents the final product the finished spoons for dessert —from tasting overwhelmingly sweet.
The flaky sea salt added at the end is non-negotiable; it cuts through the richness and brightens all the other notes.
Achieving the Ideal 'Velvet' Mousse Consistency
This is where the magic happens and where many cooks stumble. The 'velvet' texture comes from using high fat cream, careful temperature control of the chocolate base, and gentle folding. We need the air introduced by the whipping, but we don't want to lose it when mixing in the dense chocolate.
This technique ensures these velvet mocha dessert spoons are light as air, not heavy and pudding like.
The Science of the Espresso Brittle Snap
The brittle provides the essential textural counterpoint. Brittle is essentially caramelized sugar, but by adding instant espresso powder, we get a double hit of intense bitterness and crunch.
Ensuring the sugar is fully melted and poured thinly guarantees that satisfying, clean snap, which is crucial when serving these delightful spoons for dessert .
Essential Components for Your Dessert Spoons: Ingredients and Key Substitutions
I've made the mistake of trying to cut corners with ingredients, and let me tell you, when you are creating something small and focused like these spoons for dessert , quality shines through. Use good stuff!
Selecting the Right Dark Chocolate and Espresso Powder
You absolutely need at least 70% dark chocolate here. Anything less, and the mocha flavor will taste flat and overly sweet. Since we’re adding espresso, you want that dark chocolate intensity to back it up.
For the espresso, use a good quality instant powder it dissolves easily and gives a clean, strong flavor.
Dairy Decisions: Cream Fats vs. Whipped Consistency
For both the caramel and the mousse, you need heavy cream, often called double cream if you’re in the UK. The high fat content is what stabilizes the whipped cream into those perfect, stiff peaks and gives the mousse its richness.
low-fat cream simply won't hold the air needed for light spoons for dessert .
Expert Ingredient Swaps for Dietary Needs
I believe everyone should enjoy these elegant spoons for dessert , so here are my reliable swaps.
| Ingredient | Viable Substitute | Why It Works |
|---|---|---|
| Heavy Cream | Full Fat Coconut Cream (chilled) | Use only the thick, hardened top layer for whipping. It gives great volume and richness. |
| Dark Chocolate | high-quality Vegan Chocolate Chips | Ensures the texture and bitterness are maintained. |
| Egg Yolks | 1 tsp Bloomed Gelatin | Provides stability and body without the need for raw eggs. |
| Granulated Sugar (Caramel) | Stevia/Erythritol (adjusting liquid) | Difficult, but possible if you need sugar-free. Requires careful temperature monitoring as artificial sweeteners burn easily. |
Prep List: Prepping the Caramel and Brittle Bases
Get organized. The caramel and the brittle are heat intensive and must be done separately. Making the caramel first allows it to chill nicely in the base of the cups while you tackle the mousse.
Don't skip cleaning your pan between the brittle and the caramel steps, otherwise you'll contaminate your beautiful smooth caramel with burnt sugar bits! These foundational layers are essential for great spoons for dessert .
Method: Crafting Your Velvet Mocha Dessert Spoons step-by-step
This process is broken down so you can tackle each part perfectly. Precision is everything when creating these small spoons for dessert .
Phase 1: Perfecting the Salted Caramel Base
Start by combining your sugar and water in a small, heavy pan. Medium high heat is ideal. Resist the urge to stir! Stirring introduces air bubbles and promotes crystallization, and nobody wants grainy caramel.
Swirl the pan gently as the edges start to turn golden, watching it turn that beautiful amber colour. Once it’s fully coloured, remove it from the heat immediately. That heat retention is fierce, and it will continue cooking. Quickly whisk in the warm cream, followed by the butter and salt.
Pour this liquid gold into your chosen mini spoons for desserts or small cups right away.
Phase 2: Whipping the Intense Espresso Mousse
The first step here is melting the chocolate and espresso until it’s silky smooth. Give it a good whisk to fully emulsify the fats. Then, whisk in your egg yolks one at a time. The heat from the chocolate mixture gently cooks the yolks slightly, helping to thicken the base.
Now, set that aside and let it cool until it’s just barely warm to the touch. This waiting period is non-negotiable if you want light spoons for dessert . Next, whip your cream and powdered sugar to stiff peaks. Finally, fold the components together.
Start by sacrificing one-third of the cream mix it aggressively into the chocolate base to loosen it. Then, gently, GENTLY, fold in the rest.
Chef’s Note: The folding step is the moment of truth for your spoons for dessert . Use a big spatula and sweep under the chocolate mixture, lifting and folding over the cream. Three or four strokes too many, and you’ll deflate the mousse entirely.
Stop when it's just incorporated.
Phase 3: Mastering the Crunchy Espresso Brittle
Brittle is fun but fast. Place the sugar and espresso powder in a clean, heavy pan over medium heat. This is dry caramelizing, meaning no water is added. Watch for the sugar to melt and turn deep amber, swirling occasionally. As soon as it’s melted and uniform, pour it onto your prepared mat.
Working quickly, spread it very thin. This thinness is vital for the proper crunch in your spoons for dessert topping. Let it cool until it shatters easily.
Final Assembly and Chill Time Requirements
The final assembly of your elegant spoons for dessert is simply piping or spooning the mousse over the chilled caramel base. Ensure the mousse is smooth and mounded attractively. Cover and chill for a minimum of two hours.
If you try to serve them sooner, the mousse won't hold its shape, and the beautiful layers will merge, which totally ruins the presentation of these lovely mini spoons for desserts .
Troubleshooting and Chef’s Secrets for Successful Dessert Spoons
We all mess up sometimes! I once made a brittle so thick it nearly broke my teeth (and it didn’t look good on the spoons for dessert presentation, either). Here are the common culprits and how to fix them.
Avoiding a Grainy Mousse: Temperature Control is Key
If your mousse turns grainy or looks separated when you fold it, it’s almost always because your chocolate base was too hot when you added the whipped cream. The heat melted the butterfat in the cream, causing it to separate.
To fix it, you can sometimes place the bowl over an ice bath and whisk very gently until it tightens up again, but prevention is better: always let the chocolate cool to room temperature.
Preventing Caramel Crystallization
As mentioned earlier, stirring while the sugar is melting is the number one mistake. Also, make sure there are zero sugar crystals clinging to the sides of the pan. If you see crystals forming, grab a pastry brush dipped in water and carefully brush them down into the mixture to dissolve them before they seed the entire batch.
Nobody wants crunchy, sugary bits at the base of their elegant spoons for dessert .
The Secret to Snappy, Non-Sticky Brittle
Humidity is the enemy of brittle. If your kitchen is warm or damp, the brittle will become chewy and sticky instead of crisp. Make sure your brittle is poured ultra thin.
If you live in a humid area, consider putting the brittle into the freezer for 5 minutes right after it cools to lock in the snap, but ensure you store it in a completely air-tight container until you use it on your spoons for dessert .
Planning Ahead: Storage, Shelf Life, and Freezing the Components
These small spoons for dessert are great for meal prep, or maybe I should say dessert prep ! You can do most of the hard work days ahead.
Storing the Mousse and Caramel Bases Separately
Once assembled, the mousse and caramel base (without the brittle) will keep beautifully in the fridge for up to 3 days. Just ensure they are tightly covered so the mousse doesn't absorb fridge odors.
If you want to compare this to other prep ahead desserts, these keep better than something like [Cuban Desserts: Flaky Guava Pastries Recipe Easy] because the latter relies on maximum pastry flakiness, which degrades quickly.
Tips for Keeping Espresso Brittle Crispy (Humidity Management)
The brittle must be stored separately from the wet components. Keep it whole or in large chunks, sealed in an airtight container at room temperature. Do not crush the brittle until literally minutes before serving these fantastic spoons for dessert .
Once crushed, the small surface area easily absorbs moisture and loses its crispness.
Reheating (Not Really)
You don't reheat these! They are meant to be served chilled. If the mousse is too cold straight from the back of the fridge, let it sit out for 10 minutes to soften slightly. The ideal texture of these velvet mocha dessert spoons is cool and yielding, not rock hard.
Elevating the Experience: Pairing and Presentation Suggestions
The presentation is half the fun with these individual servings. Making these beautiful spoons for dessert allows you to show off your sophisticated plating skills.
Presentation Perfection: Loading the Spoons for Maximum Visual Impact
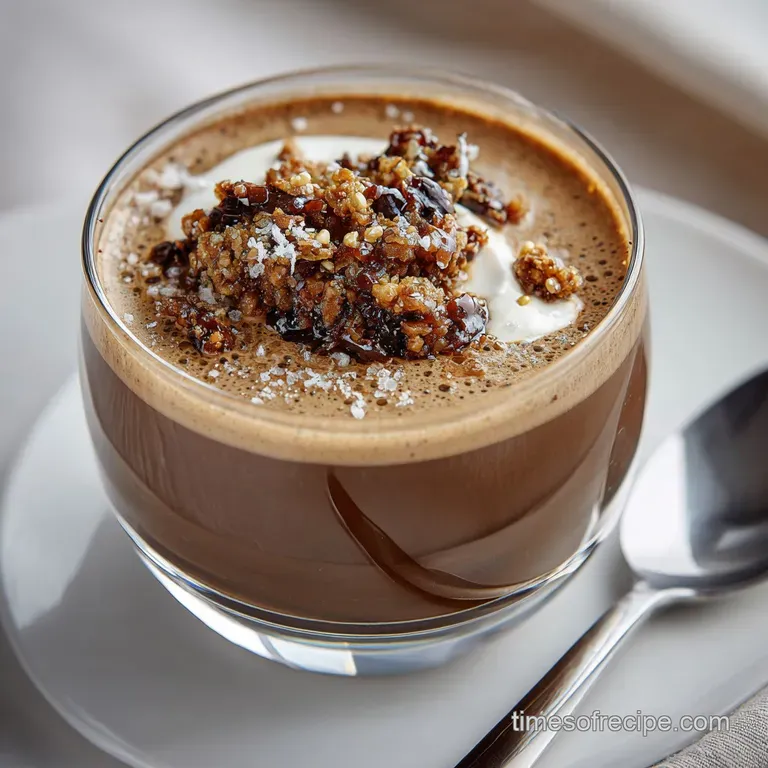
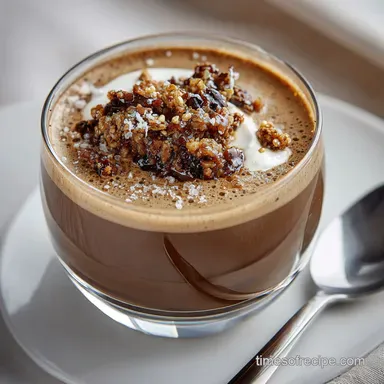
Choose the right presentation vessel. Long spoons for dessert are chic and modern. If you don't have those, small shot glasses or espresso cups work wonderfully. The goal is to show the layers: the dark, gooey caramel on the bottom, the pale mocha mousse above, and the dark, textured brittle on top.
To really make the presentation pop, dust the brittle and the surrounding plate with a small amount of cocoa powder or a few flakes of extra sea salt.
Serving the Best Spoons for Dessert
These rich, intense spoons for dessert pair best with a strong, clean palette cleanser. A tiny shot of limoncello or perhaps a pairing of fresh berries and a hint of mint is gorgeous.
If you’re serving a big, comforting meal, like a Sunday roast, following up with these small spoons for dessert is a great way to end the night without feeling overly stuffed.
If you wanted a more traditionally comforting dessert, you might consider my recipe for [Honeybun Cake: The Ultimate Sticky Swirl Comfort Cake Recipe], but these mocha spoons offer a much lighter finish.
A Final Word on Individual Servings
The beauty of making small spoons for dessert is the instant gratification and the perfect portion control. It ensures every guest gets the ideal balance of salty, sweet, crunchy, and velvety smooth. This is truly the only way to eat this decadent combination without needing a giant slice!
Go forth and make these, you won’t regret having these spectacular spoons for dessert in your repertoire.

Recipe FAQs
Can I make the Velvet Mocha Dessert Spoons ahead of time?
Yes, this recipe is designed for advance preparation, making it perfect for entertaining. The mocha mousse base and the salted caramel can be prepared up to 48 hours in advance and stored separately in airtight containers in the refrigerator. We recommend assembling the final spoons no more than 4 hours before serving.
Why is my mocha mousse grainy or separating after chilling?
This separation (or 'breaking') usually occurs if the chocolate mixture was too warm when folding in the whipped cream, causing the fat molecules to destabilize. Ensure both the melted chocolate base and the whipped cream are at a similar, slightly cool temperature before combining.
Fold gently using a rubber spatula to incorporate air without deflating the cream.
I don't like espresso. What can I substitute for the coffee flavour?
The espresso provides crucial depth, but you can swap it for other intense flavour profiles. Use 1 teaspoon of high-quality vanilla bean paste or scrape the seeds from half a vanilla pod for a classic flavour.
Alternatively, a tablespoon of dark rum or high-quality orange liqueur (like Grand Marnier) can add a complex warmth without the bitterness of coffee.
Why did my espresso brittle turn chewy instead of crunchy?
Brittle failure is often related to humidity or undercooking the sugar. The sugar mixture must reach the hard crack stage, which is 300-310°F (149-154°C), and requires a reliable thermometer.
Once cooled, store the finished brittle immediately in an airtight container, as moisture from the air will cause it to rapidly soften.
Can I make a vegan or dairy-free version of this dessert?
Absolutely, with slight adjustments. Use high-quality full fat coconut cream (refrigerated overnight, scooping only the thick top layer) whipped stiffly for the mousse substitute. For the caramel base, substitute the heavy cream and butter with plant based alternatives, such as coconut milk and vegan butter, noting the final texture may be slightly denser.
How should I store leftovers, and can I freeze the assembled spoons?
Assembled spoons (without the brittle topping) can be stored tightly covered in the refrigerator for up to 3 days. Freezing the assembled dessert is not recommended, as the delicate structure of the mousse will become watery and granular upon thawing. Only freeze the caramel base if necessary.
If I don't have dessert spoons, how else can I serve this elegant dessert?
The beauty of this dessert lies in its small, intense portions. If serving spoons aren't available, use small shot glasses, mini tasting cups, or petit four glasses (verrines). The layered look remains striking, and the small portion prevents the richness from overwhelming the diner.
Velvet Mocha Dessert Spoons
Ingredients:
Instructions:
Nutrition Facts:
| Calories | 564 kcal |
|---|---|
| Protein | 5.6 g |
| Fat | 40.4 g |
| Carbs | 44.8 g |
